Oracle Enterprise Manager (OEM)
Oracle Enterprise Manager is Oracle's GUI-based database management tool. It is possible to manage the oracle environment using SQL and PL/SQL but OEM gives you a console based framework to help you with almost all of your day-to-day management activities, including tasks such as backup, recovery, export, import and data loading, it also makes it easier to use the oracle advisors.
There are two version of OEM - a single instance version called Database Control and a system wide version that lets you manage all your systems called Grid Control. Most dba's do not like using GUI's but it makes sense to use the GUI for the easier day-to-day administration tasks like adding users, resizing tablespaces, etc, I think that knowing both SQL and PL/SQL and the GUI will make you a better dba in the long run.
The benefits of using the OEM
| Out-of-the-box Management | Installing and configuration of the OEM (both database and grid control) is a breeze, if using the DBCA to install Oracle it will automatically be installed for you, configuring the OEM is a trivial task. |
| Web-based Management | OEM can be configured to use both HTTP or HTTPS, so security can be tightened if required. Being web based all you need is web browser to access the OEM. |
| Real-Time Monitoring | Normally you have to write scripts or use a 3rd party tool to perform real-time monitoring, which can cause additional expensive or time, OEM will perform real-time monitoring right from the off. The new hang analysis feature in 10.2 helps during a database hang, when SQL scripts can't get information back to you quickly, by attaching directly to the SGA bypasses SQL and helps you out when normal SQL is used. |
| Complete Environment Monitoring | A poor performing database could be the result of a problem anywhere in the application stack (web server, app server, etc). OEM can monitor the performance of all the components in the stack not just the Oracle database. It can monitor
|
| Application Performance Monitoring | Oracle uses alert and notification systems to monitor the database, these alerts can identify problems quickly thus using a pro-active approach, thresholds can also be easily adjusted with the OEM. It can identify
|
| Scaleable Management Capability | OEM is highly scalable, the only requirement is that any new servers require the management agent started. |
| Consolidated Database Management | The home page of OEM will contain everything you need for a quick overview of your environment, this means that any problems can be identified very quick, a few more clicks and you have advanced performance charts available. |
| Integrated System Management | OEM uses the Smart Plug-In (SPI) to provide integration in system-wide monitoring tools such as HP Openview. |
OEM Database Control
You can automatically install OEM with installing Oracle via the DBCA, just select the use database control for database management option.
| Manually configure OEM | unix: export ORACLE_SID=D01 emca -config dbcontrol db |
| Start dbconsole | emctl start dbconsole |
| Stop dbconsole | emctl stop dbconsole |
| dbconsole status | emctl status dbconsole |
| Start management agent | emctl start agent |
| Stop management agent | emctl stop agent |
| Management agent status | emctl status agent |
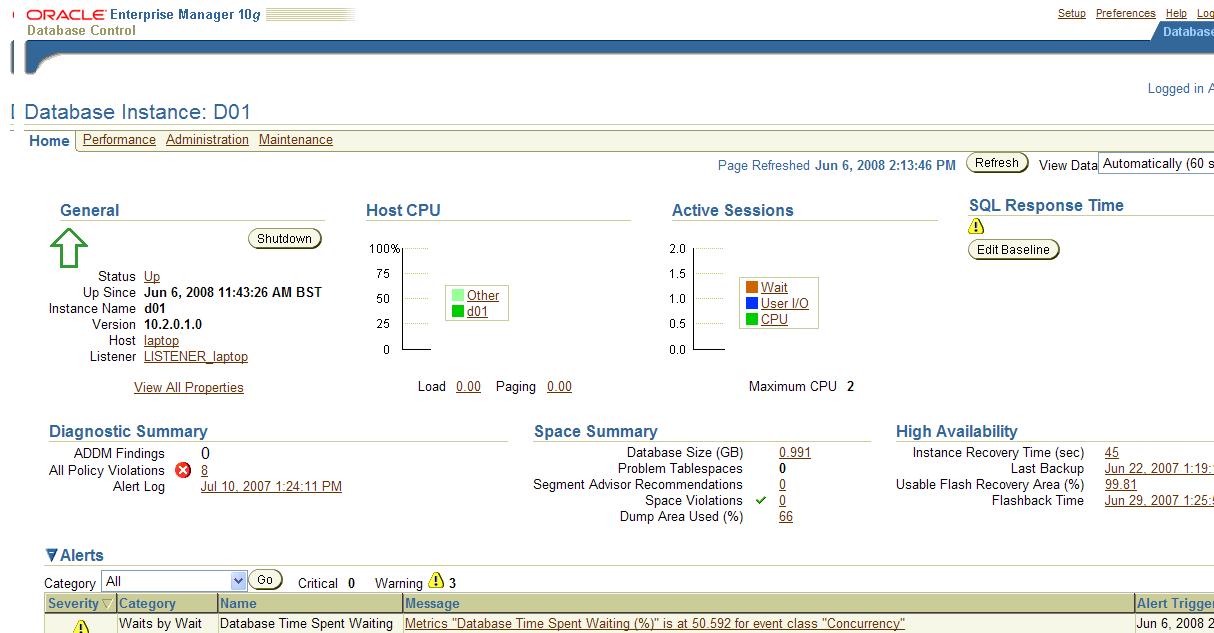
Main OEM Page
The main OEM page is displayed below, please refer to the oracle web site on how to navigate and what is available on the OEM.
OEM Grid Control
OEM Grid Control can manage a number of systems across the environment, this means easier management. The Grid Control has a number of components
Note that the grid control product is a licensed product which you can obtain from Oracle.
If possible it is best to install the Grid Control on a server on its own, depending on the number of servers you wish to monitor will determine the performance and disk space required for the server.
There are a number of commands that can be used to control the Oracle Management Services (OMS)
| Status | # emctl status oms |
| Start | # emctl start oms |
| Stop | # emctl stop oms |
To install Grid Control follow below
| Grid Control Installation |
|
To install the OEM Management agent only
| Management agent Installation | 1-7.
Use the proceeding first seven steps
|