This is a quick and dirty tutorial on Spring Cloud, I will cover just enough to get you started, I will also be using Spring Boot but won't cover it here as I have already have a tutorial.
Before we get into Spring Cloud I need to discuss what a Microservice is, it is a software development technique that structures an application as a collection of loosely coupled services, these services are fine-grained, this makes the application very modular, which allows for faster developement, testing and more resilient to failures. A microsoervice can be a user login, password reset, search for data, reporting, email verification, etc.
The big benefit is that microservices can be configured to work in a cloud environment (Azure, AWS, etc) and thus can be easy scaled to meet the demand of the application, a good example of this Netflix.
Traditionally the application has been created as a monolithic architecture, basically a single Spring Boot application for example, changing one component my have an affect on the entire application, plus you need to recompile the whole thing. Microservices basically breaks the monolithic application into smaller more managable pieces, that can be tested on there own and compiled on there own, many developers can work on the smaller pieces knowing that they won't affect others. The other bonus is that you can run the same service multiple times that can be spread across many servers and if one service goes down then users will be redirected to a working service, thus you have fault tolerance, also in many cloud providers you have the ability to add more services as the application depends grow. The other thing to think about is that you can code a microservice in any programming language you like (Java, JavaScript, C#, etc), as long that is exposes an API (normally REST API) that others can hook into to retrieve data, etc.
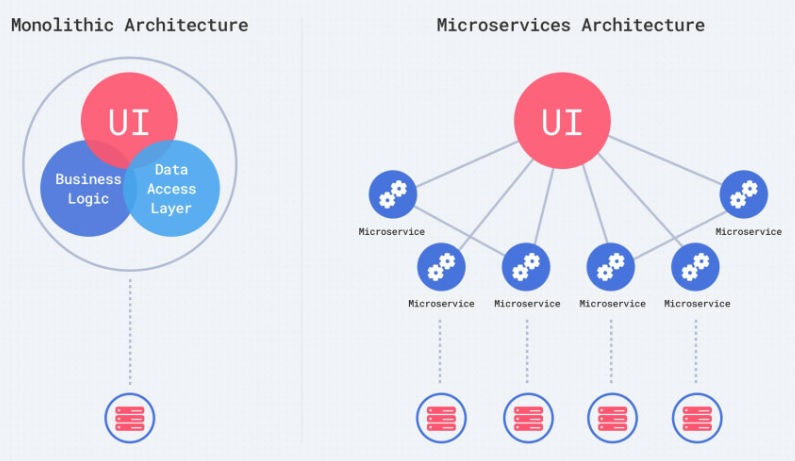
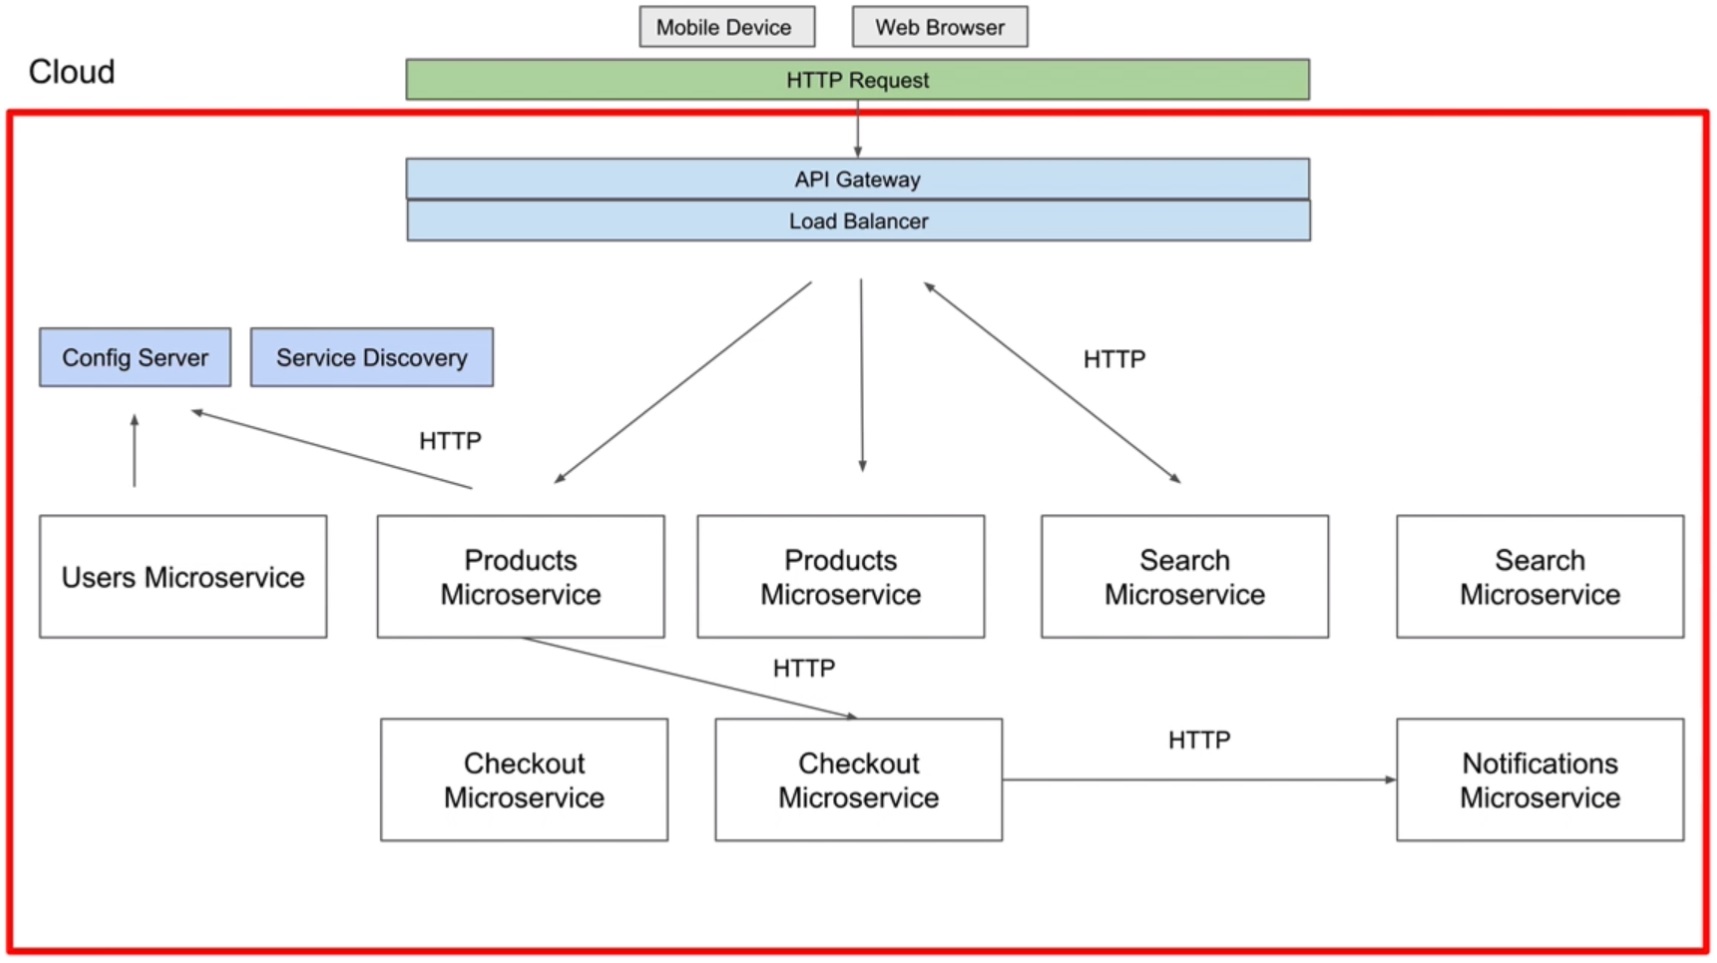
A typical microservices application would look like something below, the client using a browser would send a HHTP request (register, login, get data, etc), it would hit an API gateway and load balancer, the request would then be redirect to the appropriate microservice of which there could be many that serve the same purpose (fault tolerance), the service would then do its thing and return back to the client. Services basically need to register to let the application know that they are available, in Spring Cloud we use service discovery, this communicates with the load balancer so that the load balance knows where to direct requests. Services may stop then be restarted, issues may araise with a data center, etc but the application will work with the cloud provider to make sure that the services are available at all times, an exmple of this is using Kubernetes to provide fault tolerence and make the application scalable. Also in the diagram you might have noticed that microservices can communicate with other microservices.
For this tutorial you need to have a basica understanding of Spring Boot, you also need to hae some knowledge of using Postman as we will be using this to test the application, also just to recap the difference between URL, URI and Query String, so breaking down http://www.datadisk.co.uk/api/users/?username=pvalle
- URL - http://www.datadisk.co.uk
- URI - /api/users/
- Query String - ?username=pvalle
Also to recap on the HTTP methods that I will use is below, I am keeping things simple to focus on Spring Cloud.
- POST - Create (example /users)
- GET - Read (example /users/1)
- PUT - Update (example /users/1)
- DELETE - Delete (example /users/1)
I will be using JDK 11, Jetbrains IntelliJ IDE and Maven as the build tool.
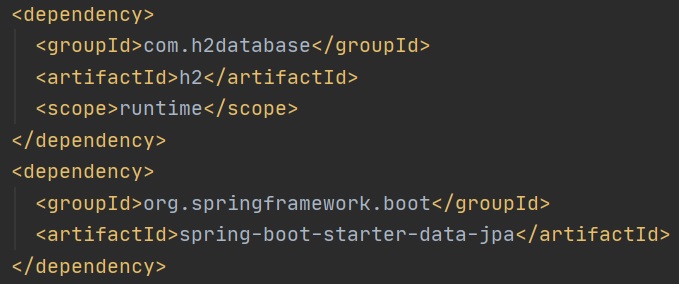
Although I am jumping ahead I wanted to give a quick tutorial of the User setup and H2 database configuration, This is more of a Spring Boot configuration that Spring Cloud, the H2 database is an in-memory database that is sued for either quick knock-up testing or a dev environment, to start using the H2 database you need to pull in the below dependencies (left-hand screenshot) and add the the H2 configuration to the properties file (right-hand screenshot)
 |
 |
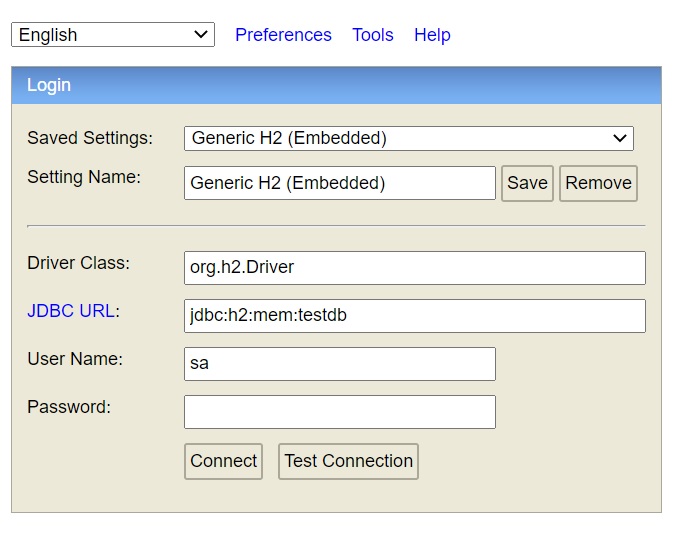
When you start the application you should be able to go to the URL http://localhost:8080/h2-console, you will see the belowlogin screen (left-hand screenshot), once you login (no password required) you will see the management screen (right-hand screenshot), here you can examine the tables run SQL code, etc. One point to remember is once you stop the application all the data in the database is gone.
 |
 |
What now follows is pretty standard Spring Boot setup to include setting up a user, Controller, Service, repository and Entity. All this I have already covered in my Spring Boot tutorial.
Wew start with the User entity and JPA, nothing special here, however I do have some validation.
 |
 |
Here is the Users controller, I will be using ModelMapper for the DTO, just a simple GET and POST. Notice the @PostMapping I have added two parameters this allows the method to accept or return either XML or JSON, to do this you need to configure some request headers.
- Content-Type - sending data type for example application/json or application/xml
- Accept - recieving data type for example application/json or application/xml

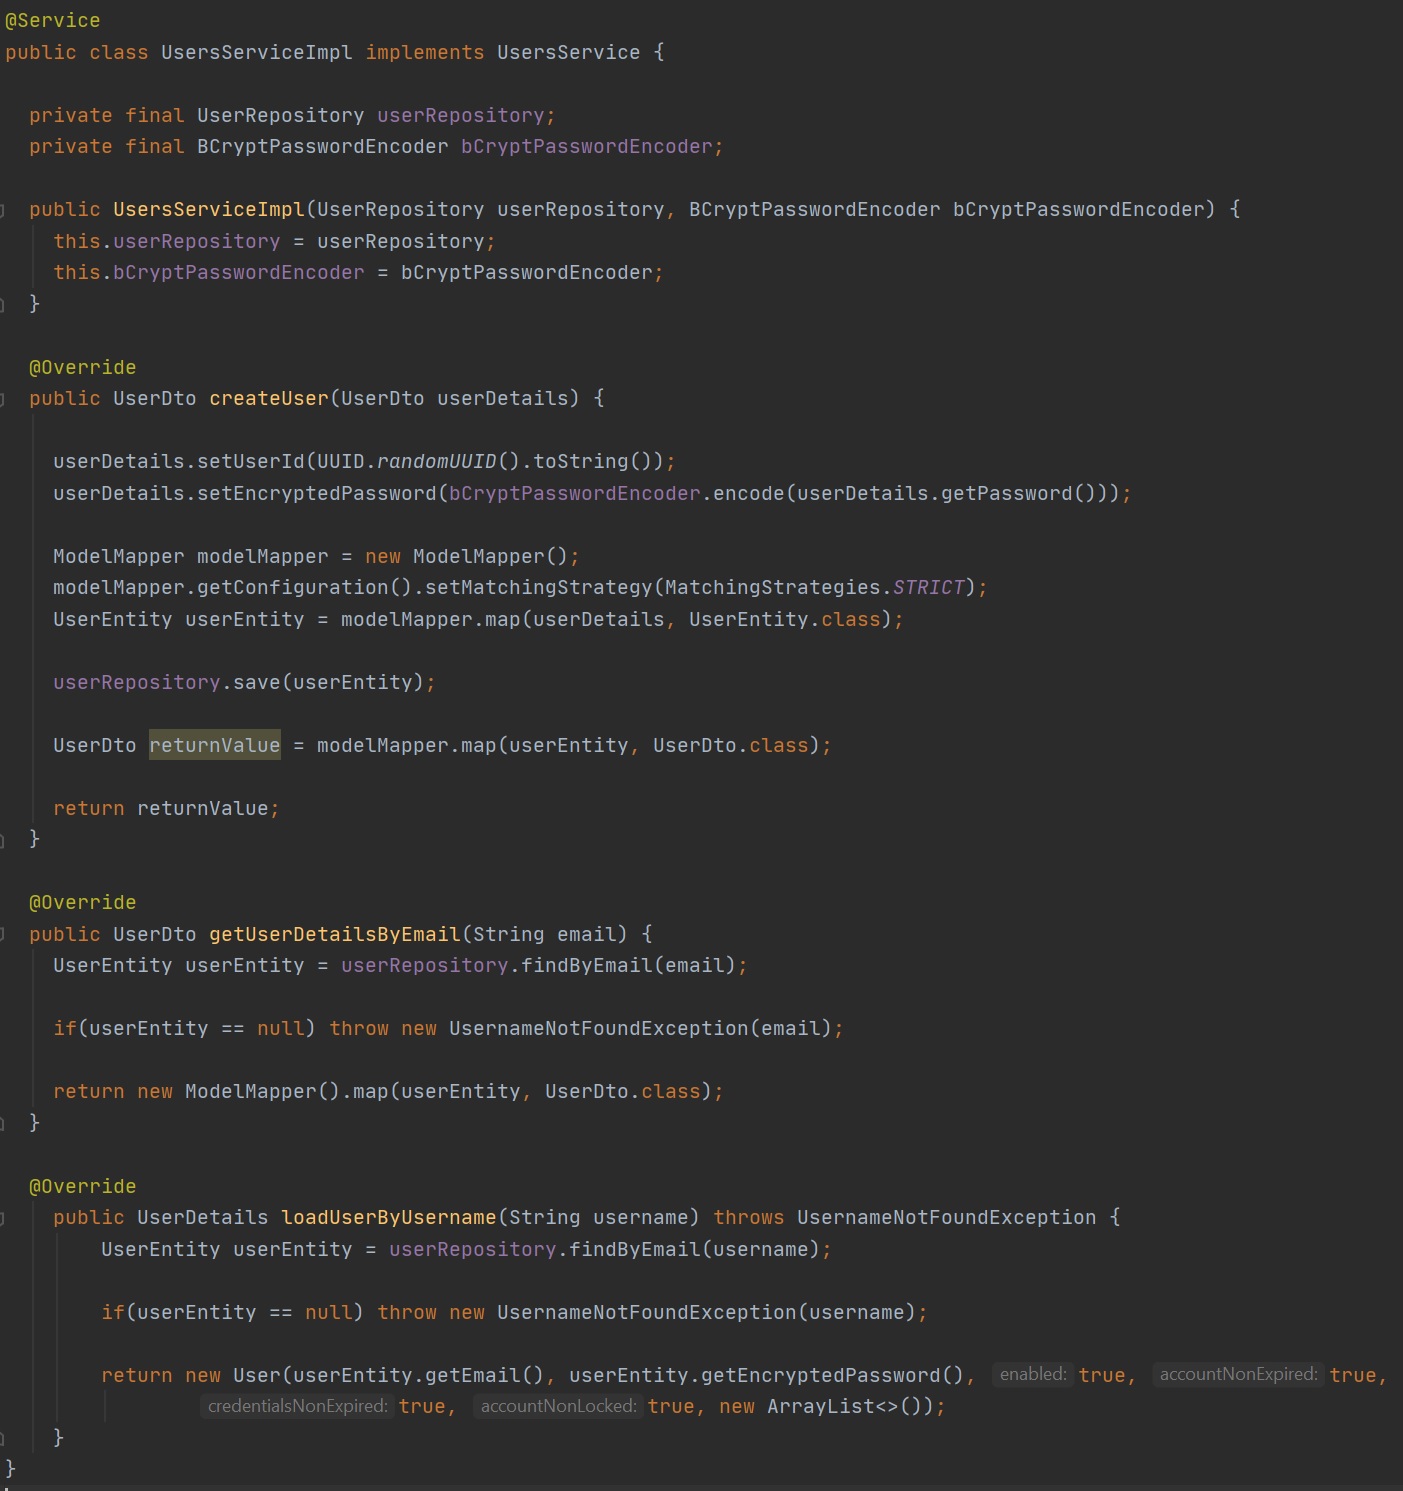
Here is the Users Service class, if you notice I will be using BcryptPasswordEncoder to encrypt the users password to store to the H2 database, we also use Java.util, UUID to generate a User ID for us. I create three service methods to create a user, get users details by email and load a user by username.
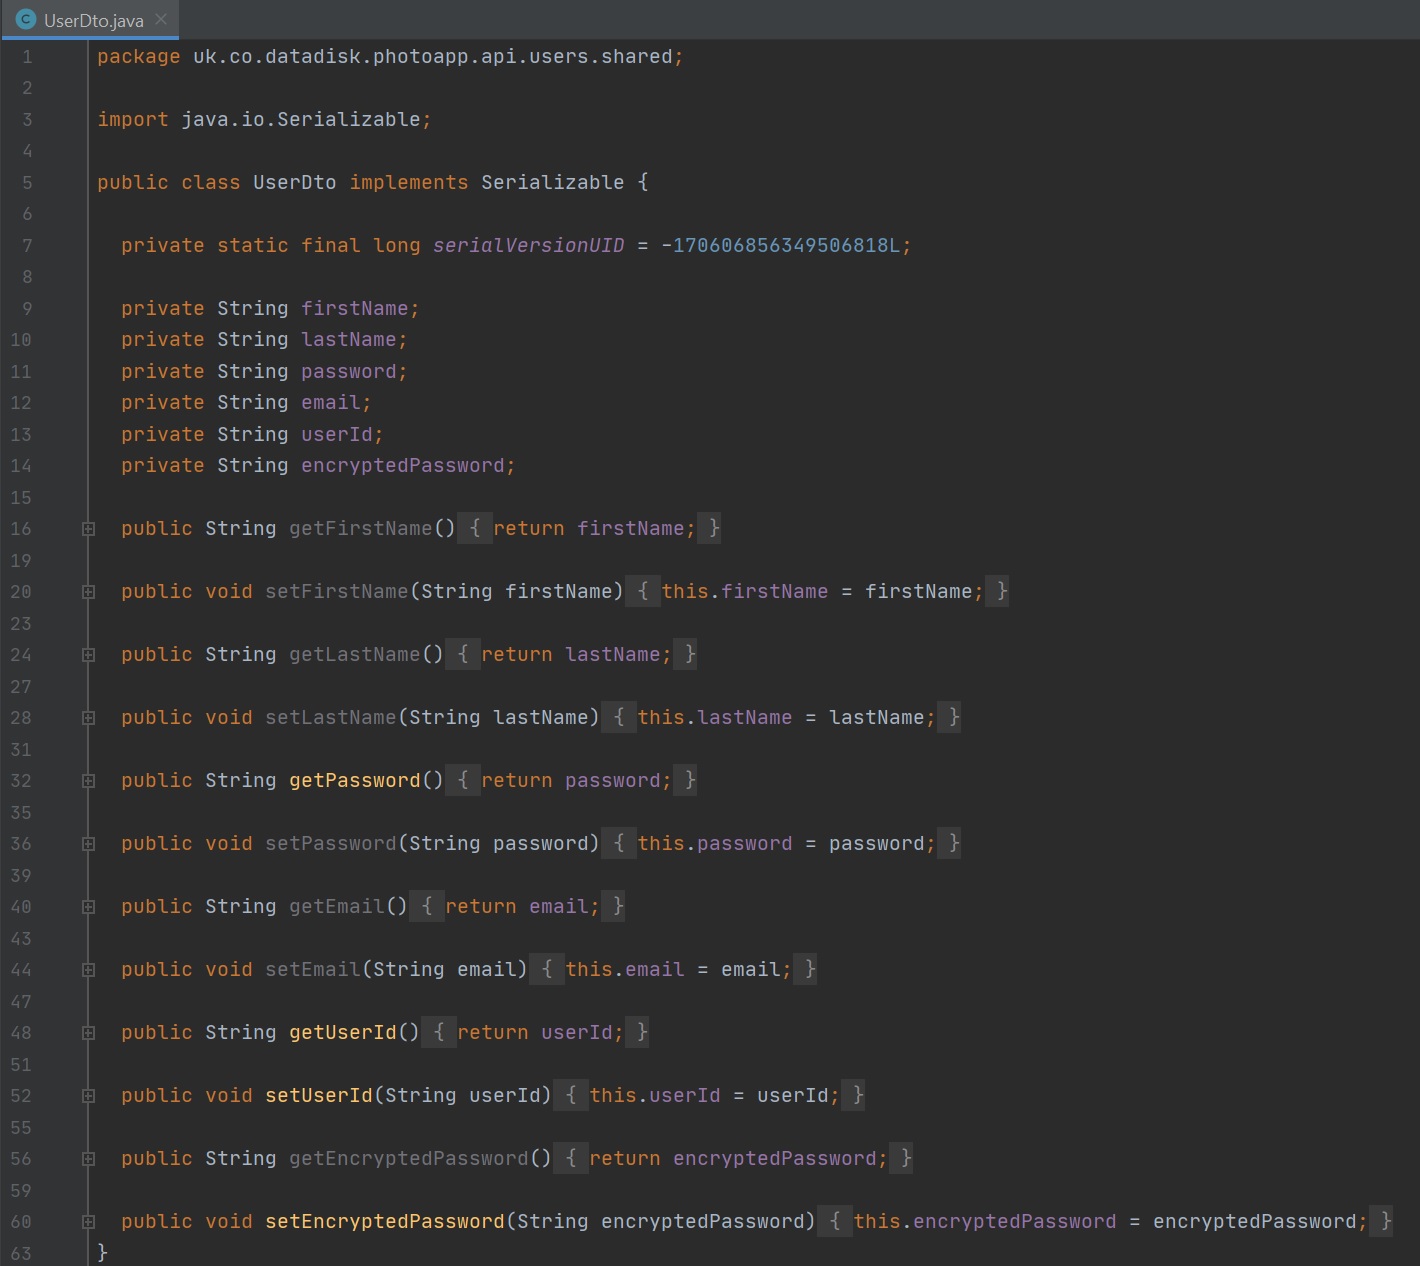
Next we have the User DTO, pretty simple, with using s DTO we do have the choice of leaving out fields that we don't want to expose.
Next is the Create Users Request Model, we have a bit of validation in here

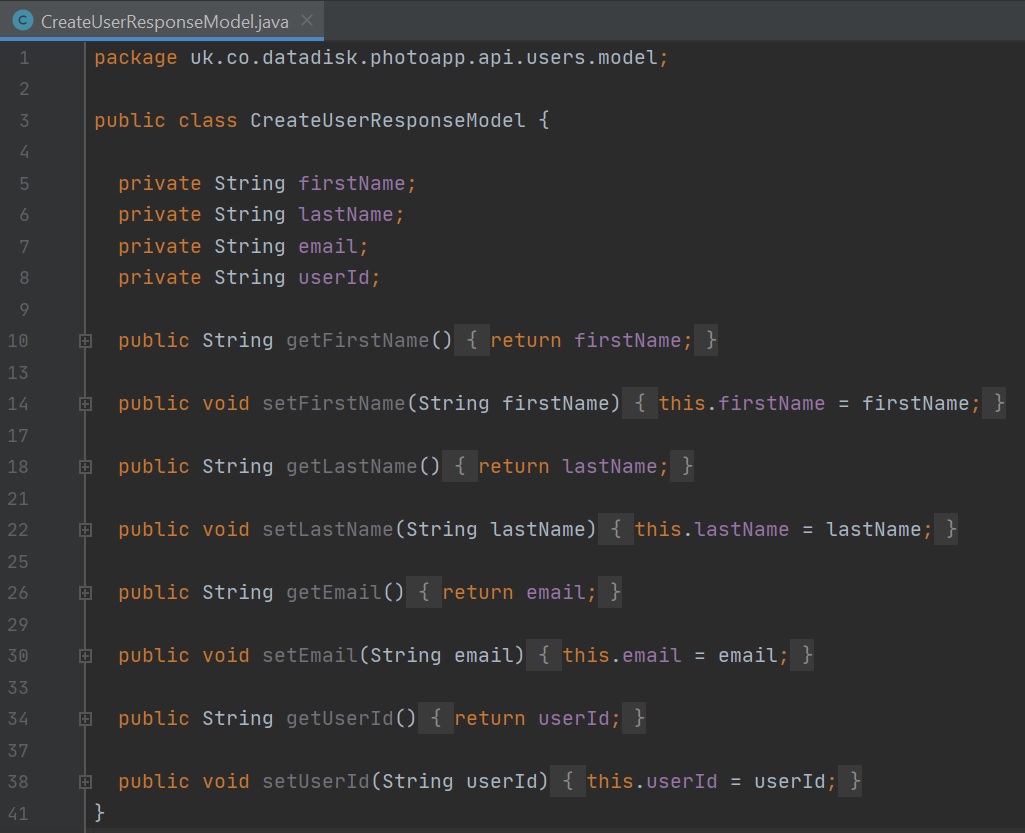
Next we have the Users Response Model
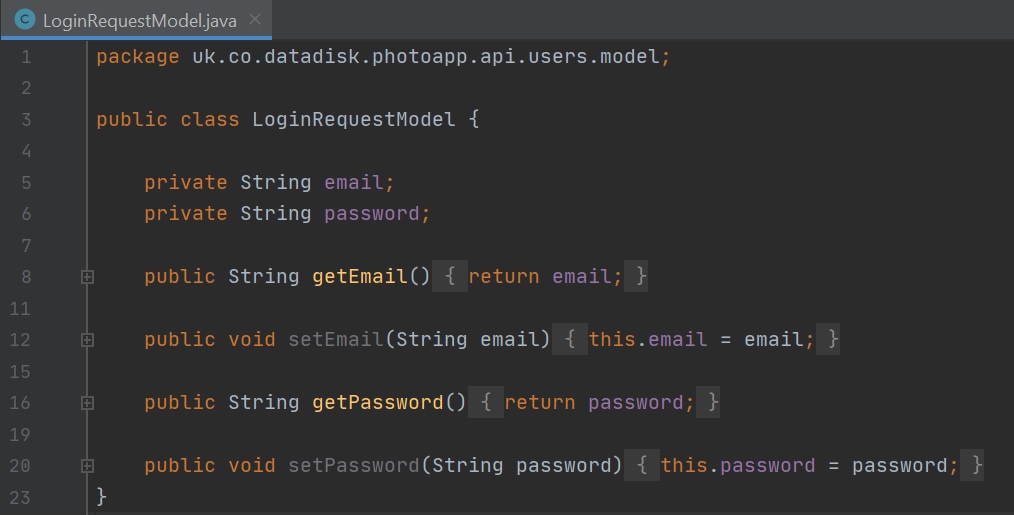
Lastly we have the Login Request Model that only accepts the email and password.
This makes up the User configuration.