Networking (Standard and Distributed)
This section will cover both standard networking and distributed networking (vCenter server required for distributed networking), first I will start with standard networking.
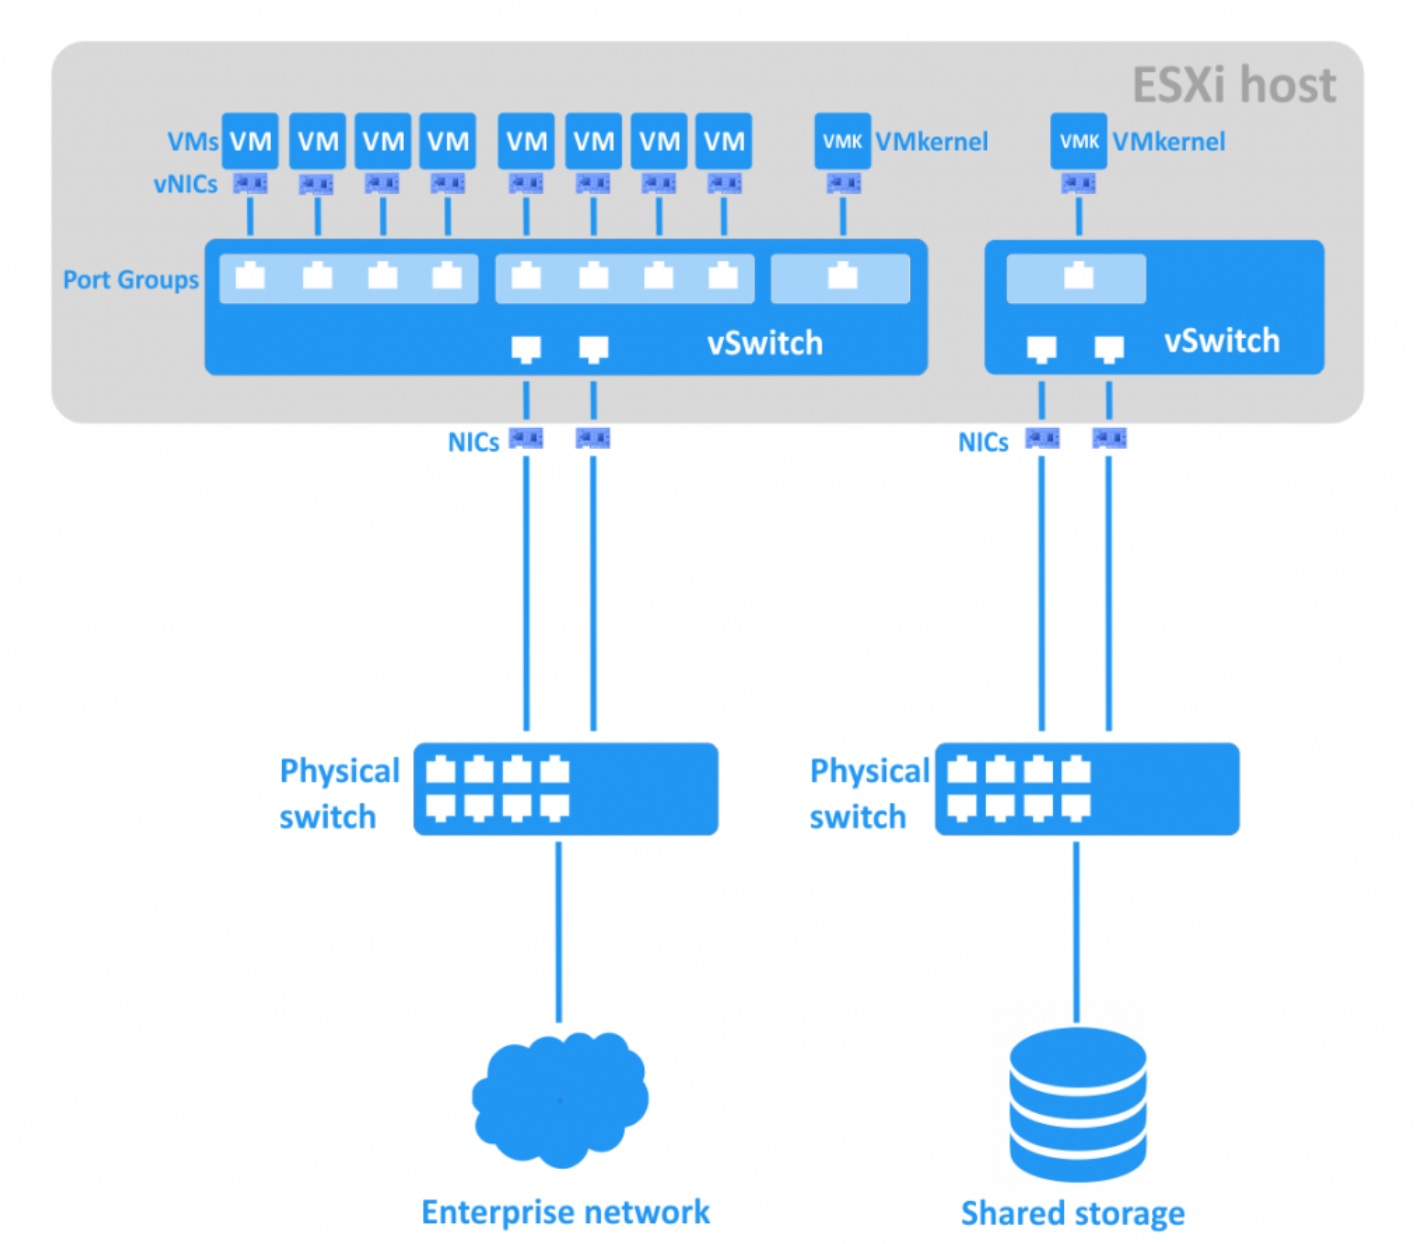
The VMkernel can create virtual switches called vSwitches, the virtual machines virtual NIC's are plugged into vSwitches these are then mapped to the physical NIC's on the ESXi server. This means many virtual machines can use the physical NIC's on the ESXI server. The other clever thing VMware can do is that if two virtual machines communicate with each other on the same vSwitch no physical network traffic is generated. The VMkernel moves the data into memory seamlessly from one virtual machine to another without ever involving the physical network interface. Knowing this knowledge you can design your VM's that communicate with each other to use the same vSwitches thus increasing performance.
vSwitches are VLAN aware and can control outbound traffic using a VMware technology called traffic shaping, you can also impose security settings. A vSwitch can contain 0,1 or many physical NIC's assigned to it, a vSwitch without any NIC's attached to it is called a internal vSwitch, as it only allows communication with the host. The internal vSwitch could be used as staging area before moving it into Production, one note to remember is that vSwitches do not communicate with one another.
The only drawback of internal vSwitches is that you cannot carry out vMotion events without first disconnecting users from the virtual machine. Since they are internal to the ESXi server, we cannot guarantee that users would have a continuous connection to the virtual machine during the vMotion event.
A vSwitch with one physical NIC gives you basic connectivity to the outside world. This might be suitable for vMotion or one that does not require fault tolerance (FT), ideally this would be for testing, development environments, etc. A vSwitch with two physical NIC's gives you fault tolerance (FT) and load balancing, this would be idea for vMotion and could be used in Production environments.
You can have up to 20 physical NIC's in an ESXi server of any link speed, there are now 56 ports by default on a vSwitch and this is configurable for up to 4,088 ports.
In the below diagram you can see how vSwitches, port groups and physical NIC which I will go into more detail during this section.
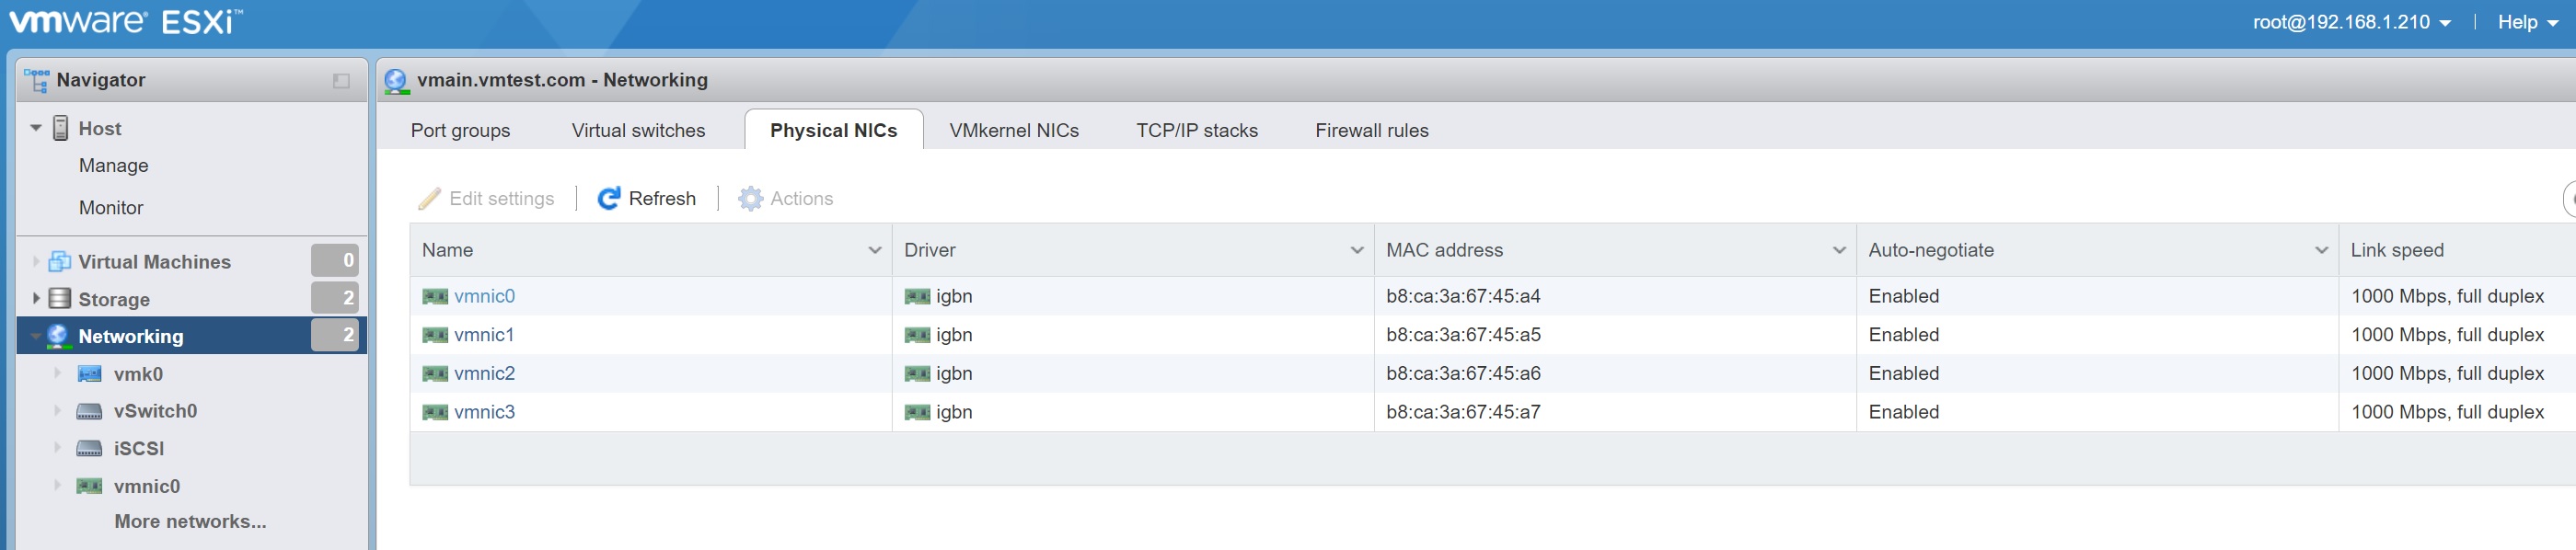
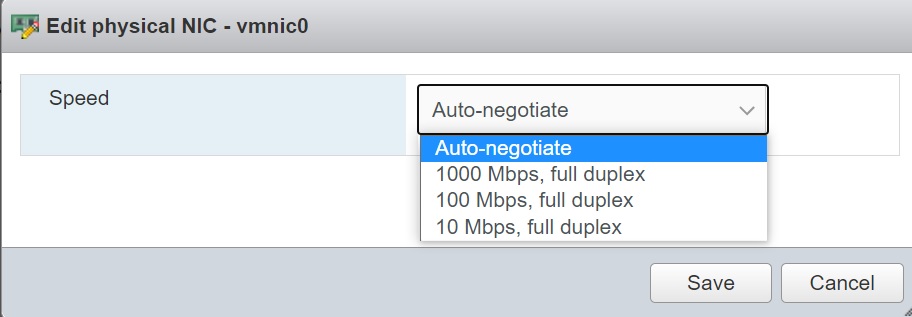
There is not much you can change, only the NIC speed
A virtual switch is a software program – a logical switching fabric that emulates a switch as a layer-2 network device. A virtual switch ensures the same functions as a regular switch, with the exception of some advanced functionalities. vSwitches are used for ensuring connections between virtual machines as well as connecting virtual and physical networks. A vSwitch uses a physical network adapter (also called NIC - Network Interface Controller) of the ESXi host for connection to the physical network. Port groups are assigned to a virtual switch, uplinks are the physical NIC's attached.

A virtual switch requires a name, the maximum transfer unit (generally 1500 or 9000 for jumbo frames), the NIC, link discovery settings and any security settings.
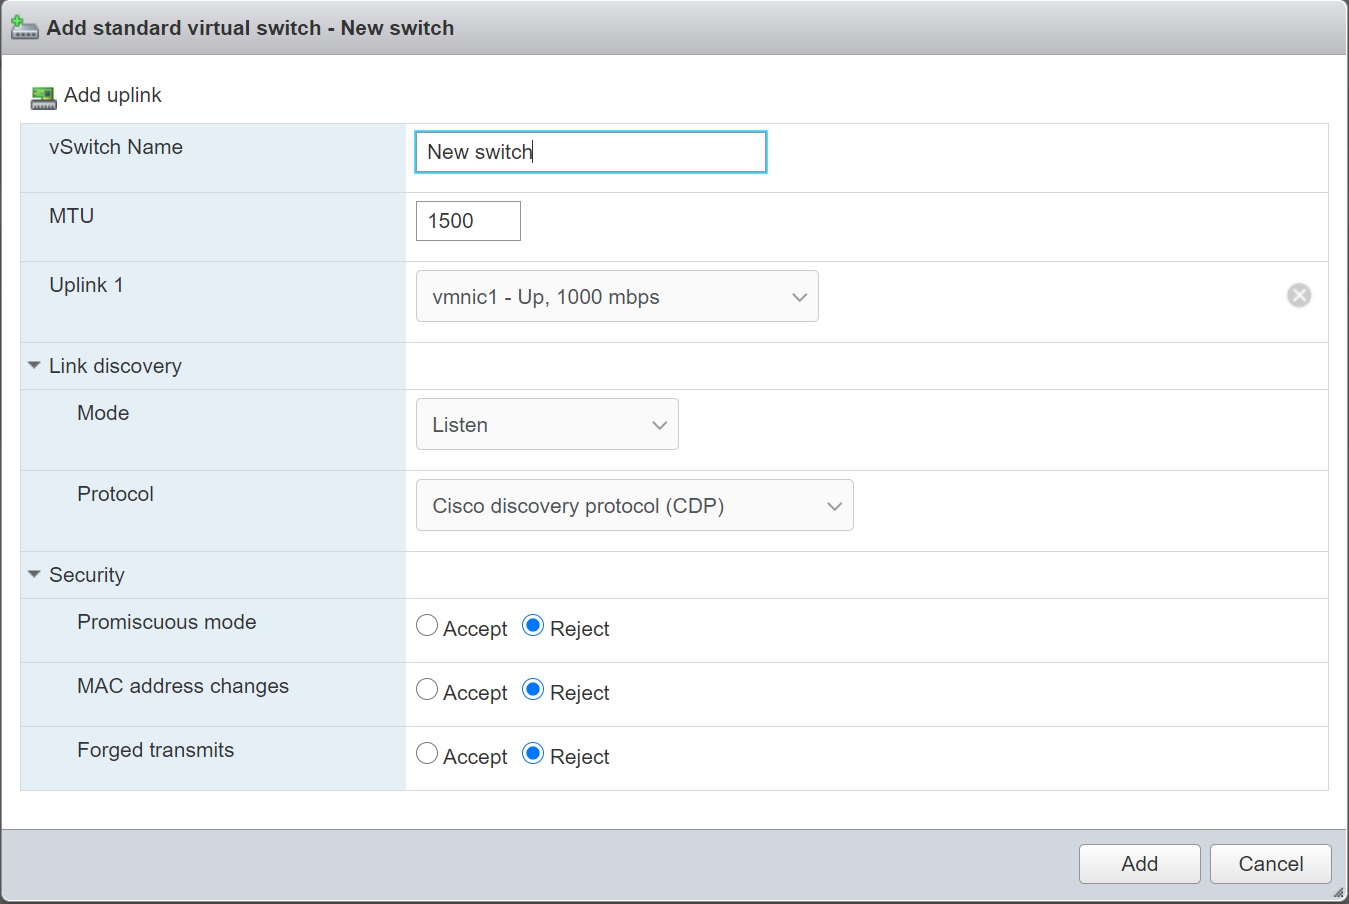
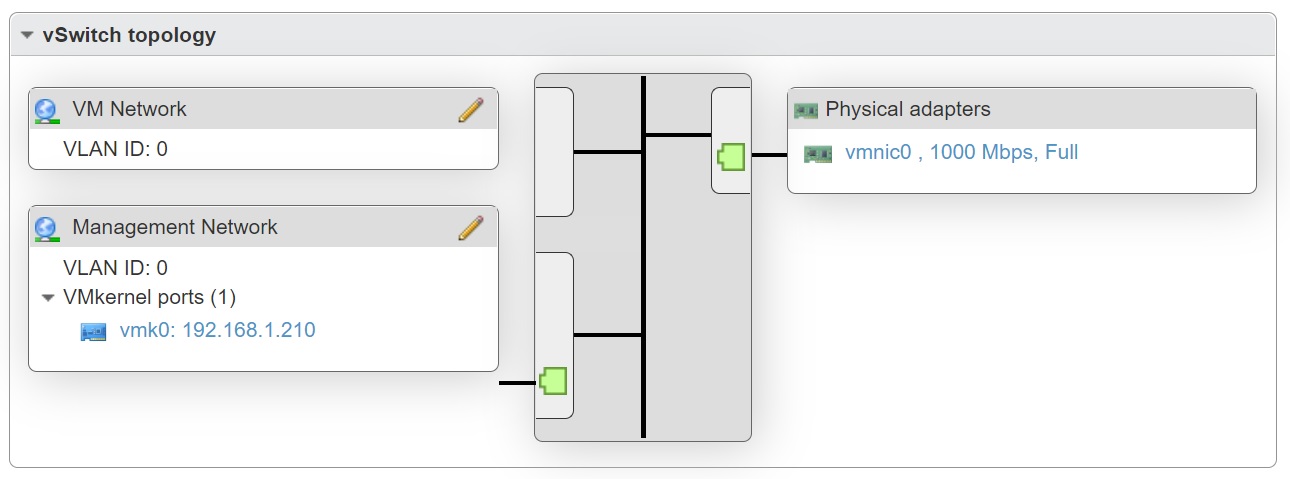
You can see in the example below this switch has two port groups assigned and a single physical NIC, in this case any management traffic with flow via physical vmnic0 using IP 192.168.1.210, you could even add additional NIC's for redundancy also know as a teamed switched.
| Internal standard vSwitch | To create a internal vSwitch follow the notes below, remember to name your vSwitch appropriately
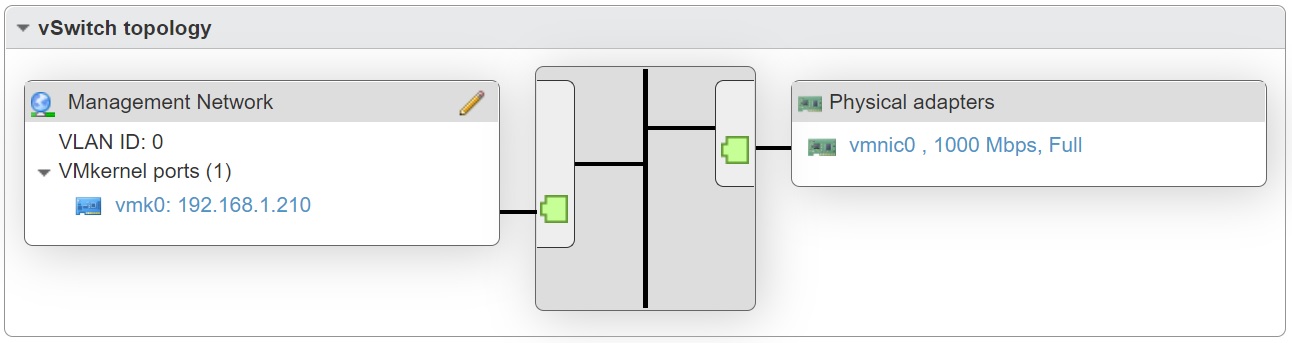
You should end up with something like below
|
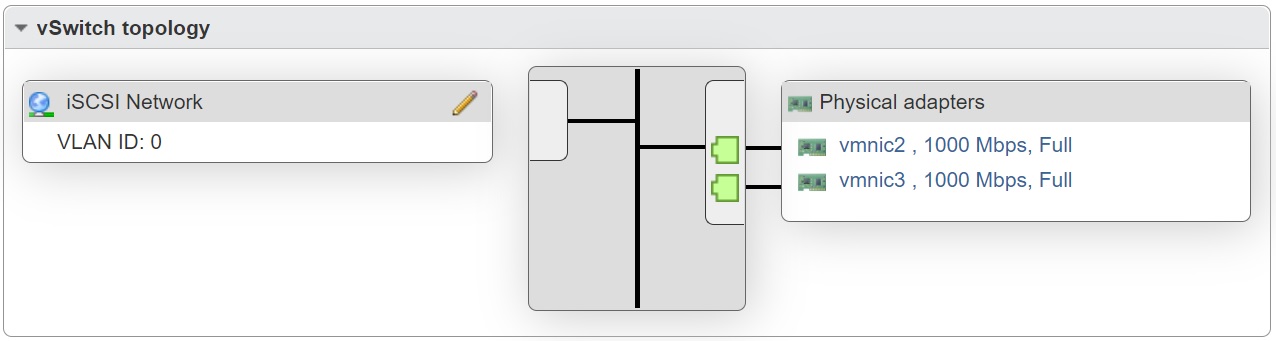
| Teamed Standard Switch | To create a teamed vSwitch it is the same as above, apart from selecting two or more physical adapters, you should end up with something like below
|
| Standard vSwitch with VLAN support | ESXi supports two main methods of enabling access to VLAN's
To create a VLAN vSwitch follow below
Hopefully you should have something like below, in this example the switch has two VLAN's attached
|
| VMKernel standard vSwitch for vMotion | When you create a vMotion port group you will be asked for the following details
You can use vMotion across routers using the gateway but this is not a preferred way, normally ESXi servers are attached to the same network to increase performance and other problems. To create a vMotion vSwitch follow below
Hopefully you should get something like below, you may get a license warning come up, it still will create the port group.
|

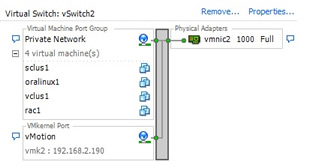
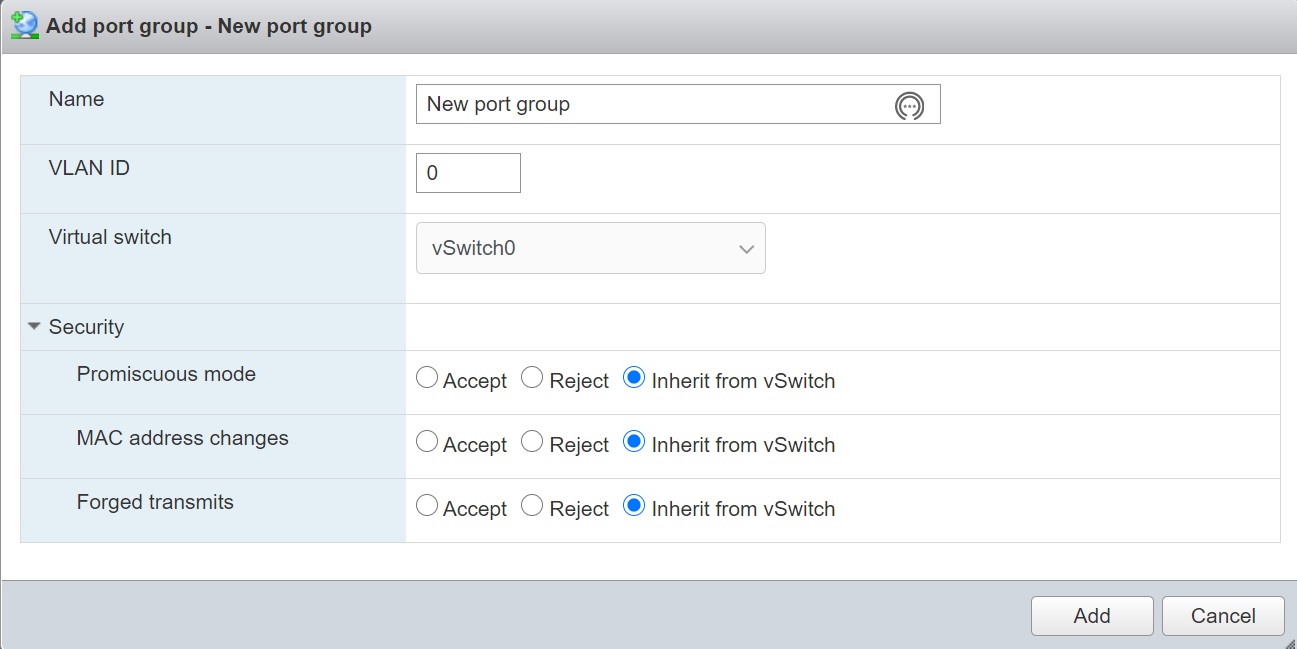
Virtual Switches (vSwitches) can be divided into smaller units called port groups, there are a number of services a port group can provide as per the image below

You could create one big fat vSwitch and connect all the NIC's to this (alot of companies do this if you have a couple og 10GB ports) but you should really separate the network traffic on separate NIC's. Try and name your port groups with a meaningful name so that the group can be identified quickly, idea names would be public network, iSCSI network, etc. An important note to remember is that if you rename a port group virtual machines become orphaned from the switch because the name of the virtual switch to which the virtual machine is attached is held in the virtual machines configuration file (.vmx), so bear that in mind if you rename a port group that many have many virtual machines deattached, that's a lot of work to resolve.

You have the option to configure the security settings of a port group, these can be inherited from the VMKernel NIC which we will discuss later, as a note if you are using nested ESXi servers you must set the all security settings to Accept on the physical server
A VMkernel port is to provide some sort of Layer 2 or Layer 3 services to the vSphere host. Although a VM can talk to a VMkernel port, they do not consume them directly, every VMkernel port can provide any combination of six types of services.
When configuring a vmkernel port you assign it to a port group and a vSwitch, set the MTU and specify the IP version you can either set a DHCP or static IP address and set the service type.

Distributed virtual networking (DVN) is completely new to version 4, it enhances the network layer of the VMkernel, in uses features such as below, however you must be using vCenter in order to create DvSwitches
- private VLAN's
- Network vMotion
- API support for 3rd parties
- VMDirectPath I/O
- new NIC drivers within guest o/s using vmxnet3.sys
At a basic level a DvSwitch is a global switch, rather than configure vSwitches for each ESXi server, you create a DvSwitch that can be applied to every ESXi server, they also implement private VLAN's (PVLAN) within VMware. DvSwitches can do all the things a normal vSwitch can do, they also offer more ports than a standard vSwitch.
DvSwitches use distributed virtual uplink (DvUplink) ports, it is merely a container for holding a reference to a physical NIC. When you create a DvSwitch the system attempts to set the correct number of DvUplink ports for you, it does this by looking at all the ESXi servers and searching for the ESXI server with the most uplinks. DvUplinks can be renamed this allows you given more meaningful names.
I am going to explain how to configure a DvSwitch using the vCenter server that can be used for iSCSI, I will also break out the port group creation so that its easier to understand, however this same process can be used to create VSAN, vMotion dvSwitches as well, I wont cover VLAN's as I want to focus entirely on DvSwitches.
To create a distributed switch we select the Datacenter -> Distributed Switch -> New Distributed Switch
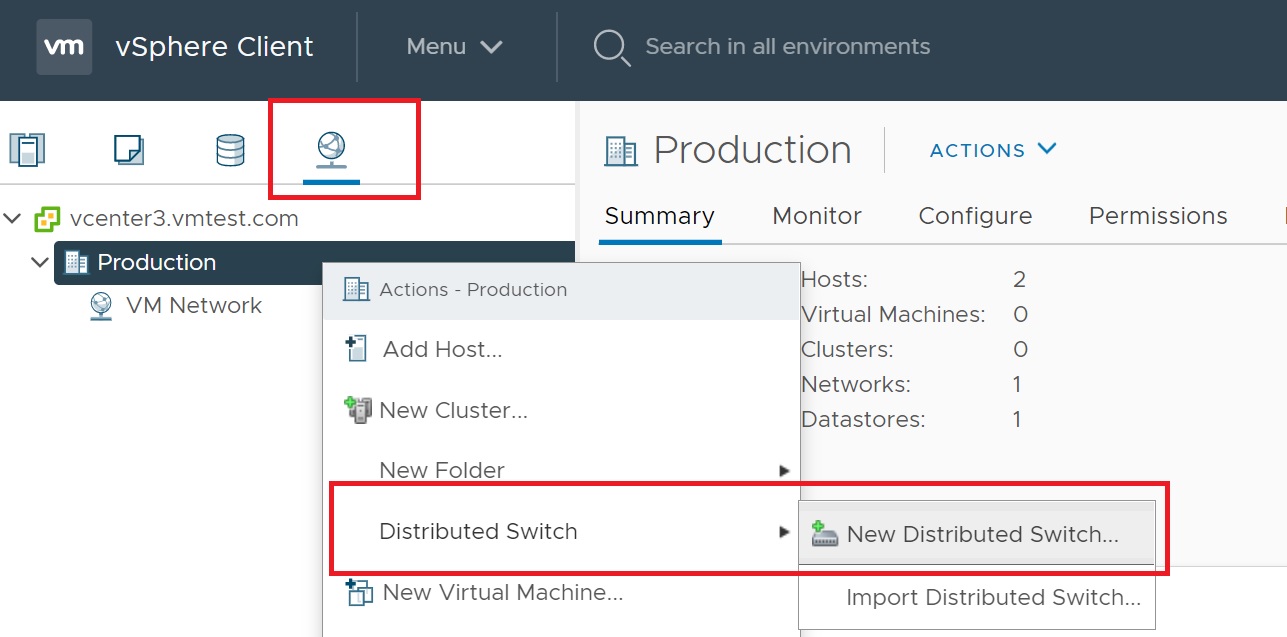
You will then be taken to a number of setup screens, the first being the name of the distributed switch

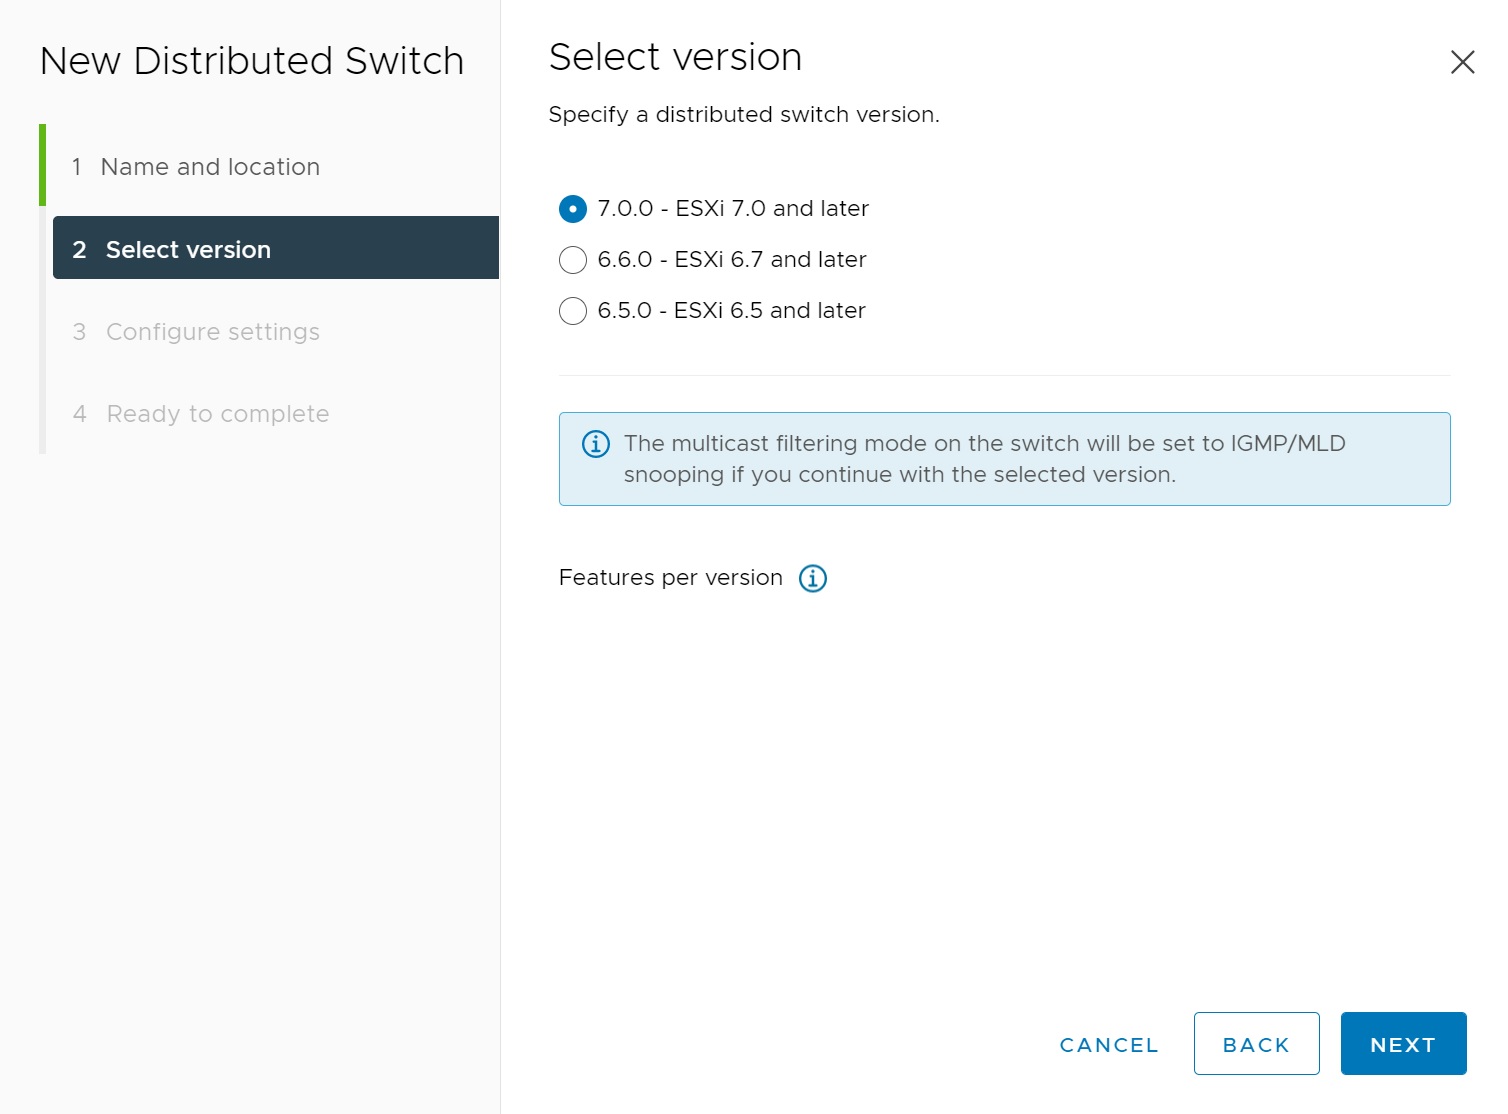
You have a number of different versions of a switch to be compatible with your environment if on a older ESXi version
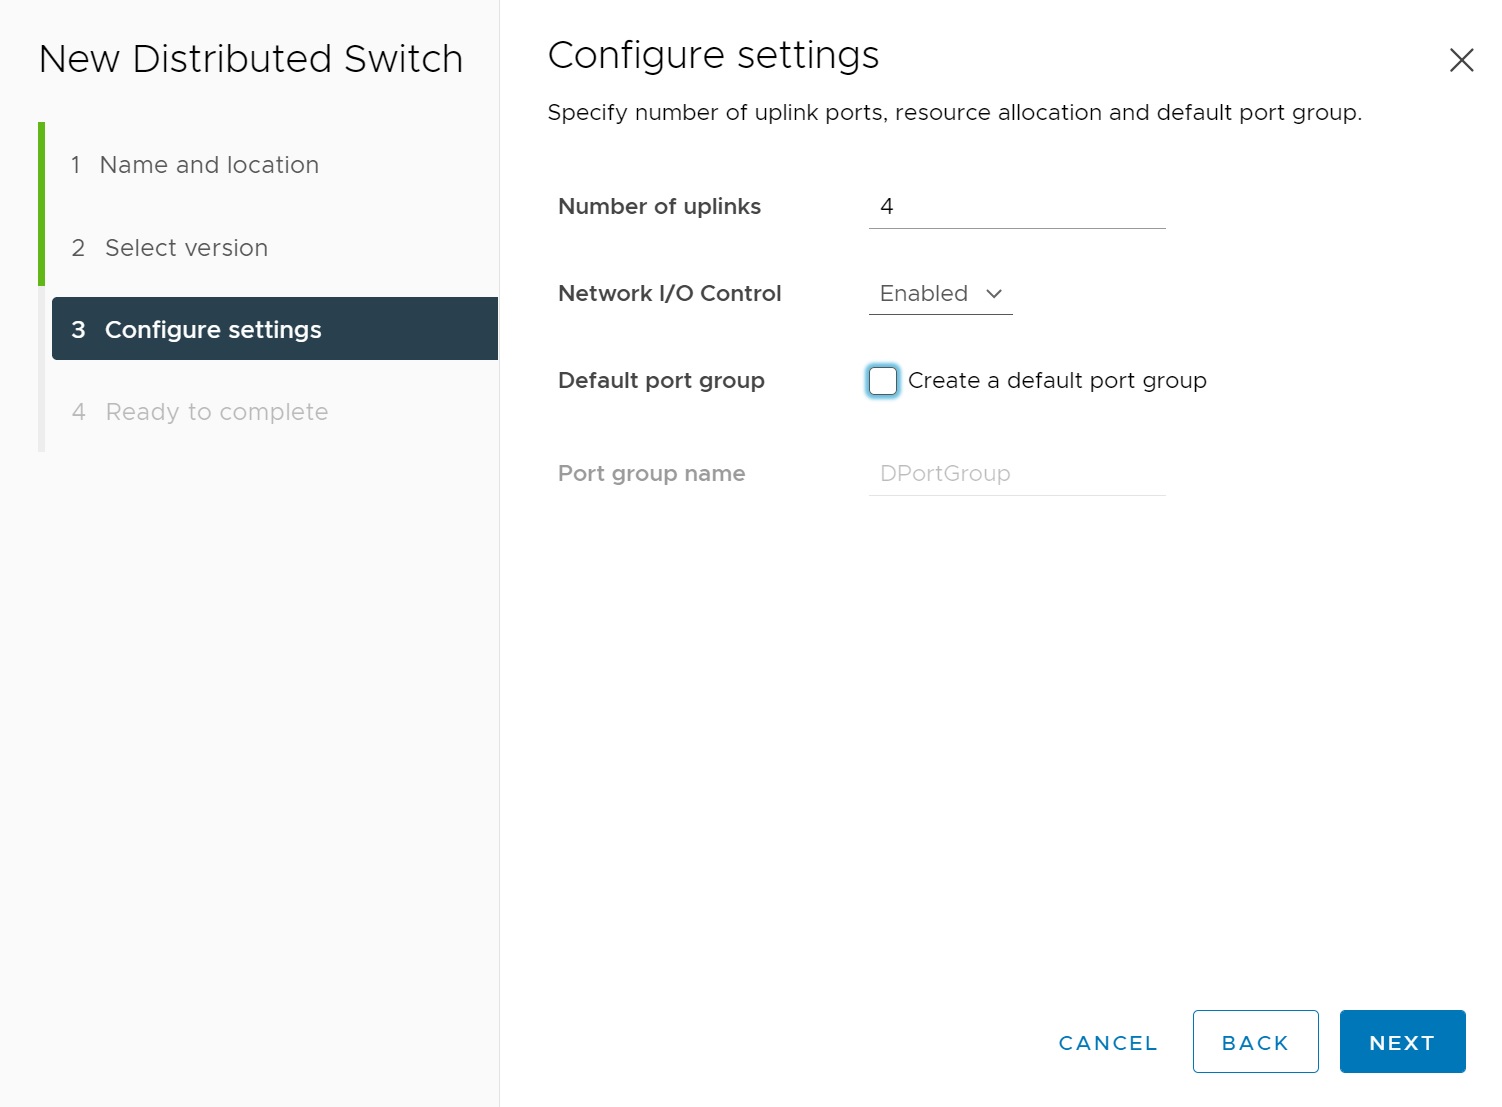
Next we can create how many uplinks (physical NIC's) we can use with the switch (think of this as the number of ports on the switch), you can at this stage create the port group but in this case I will defer to later
Lastly we come to a review screen, if you notice it actually states what the next actions are, you can do these in any order.

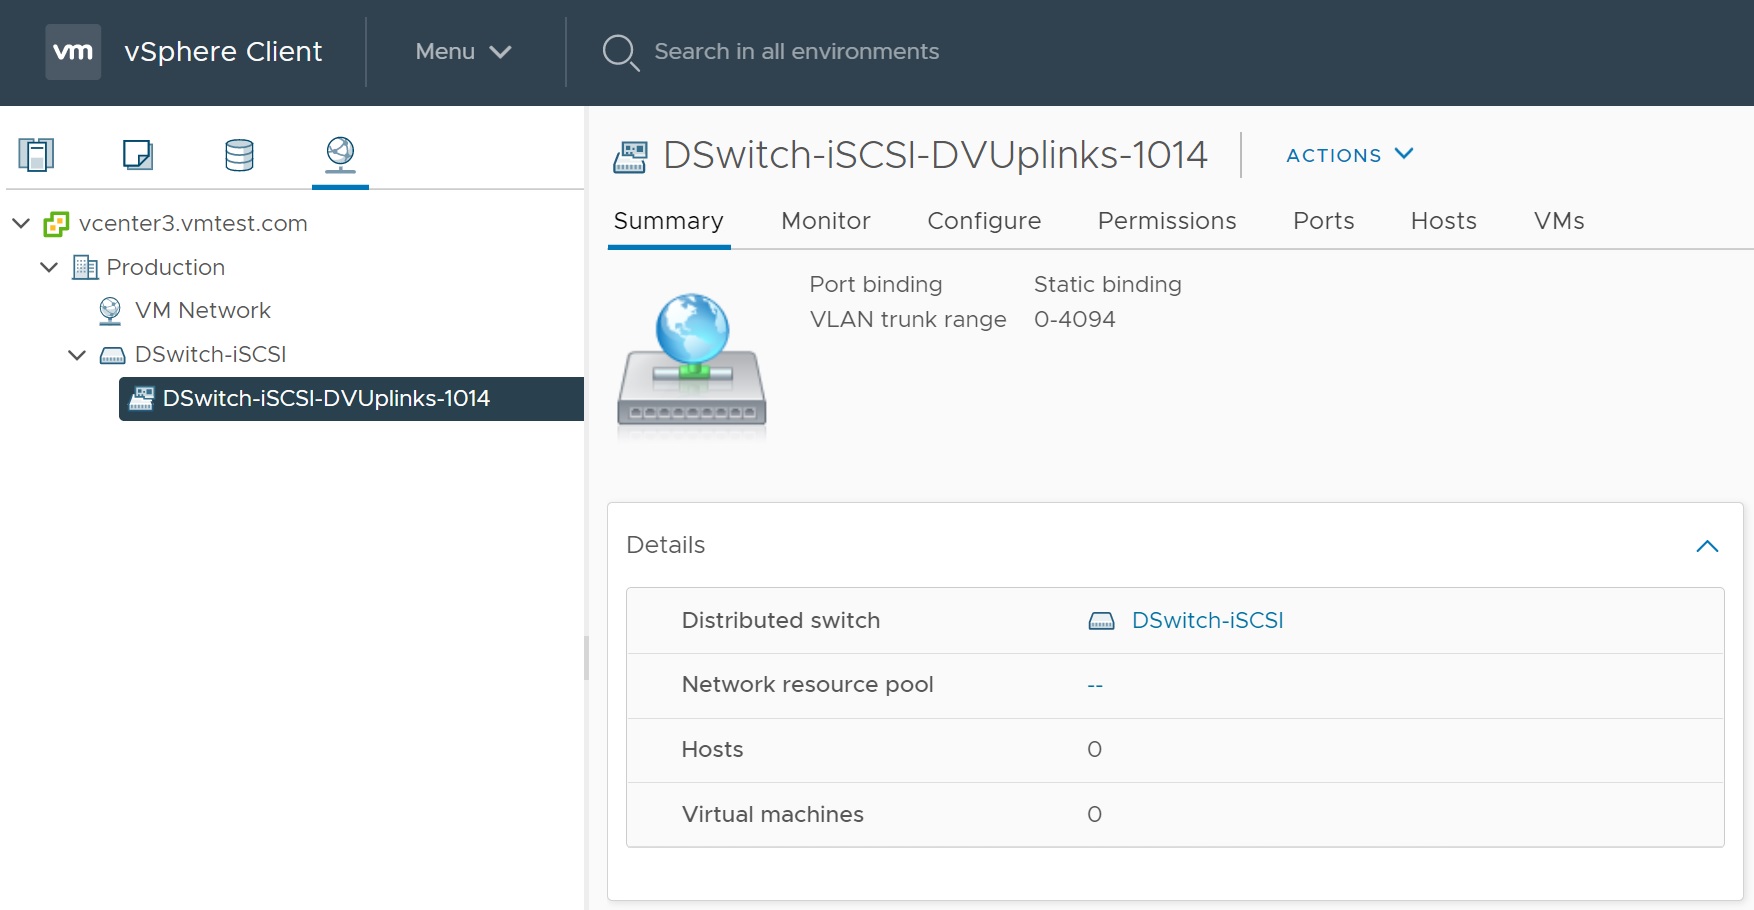
Once the distributed switch has been created you can view it in the main vCenter networking screen
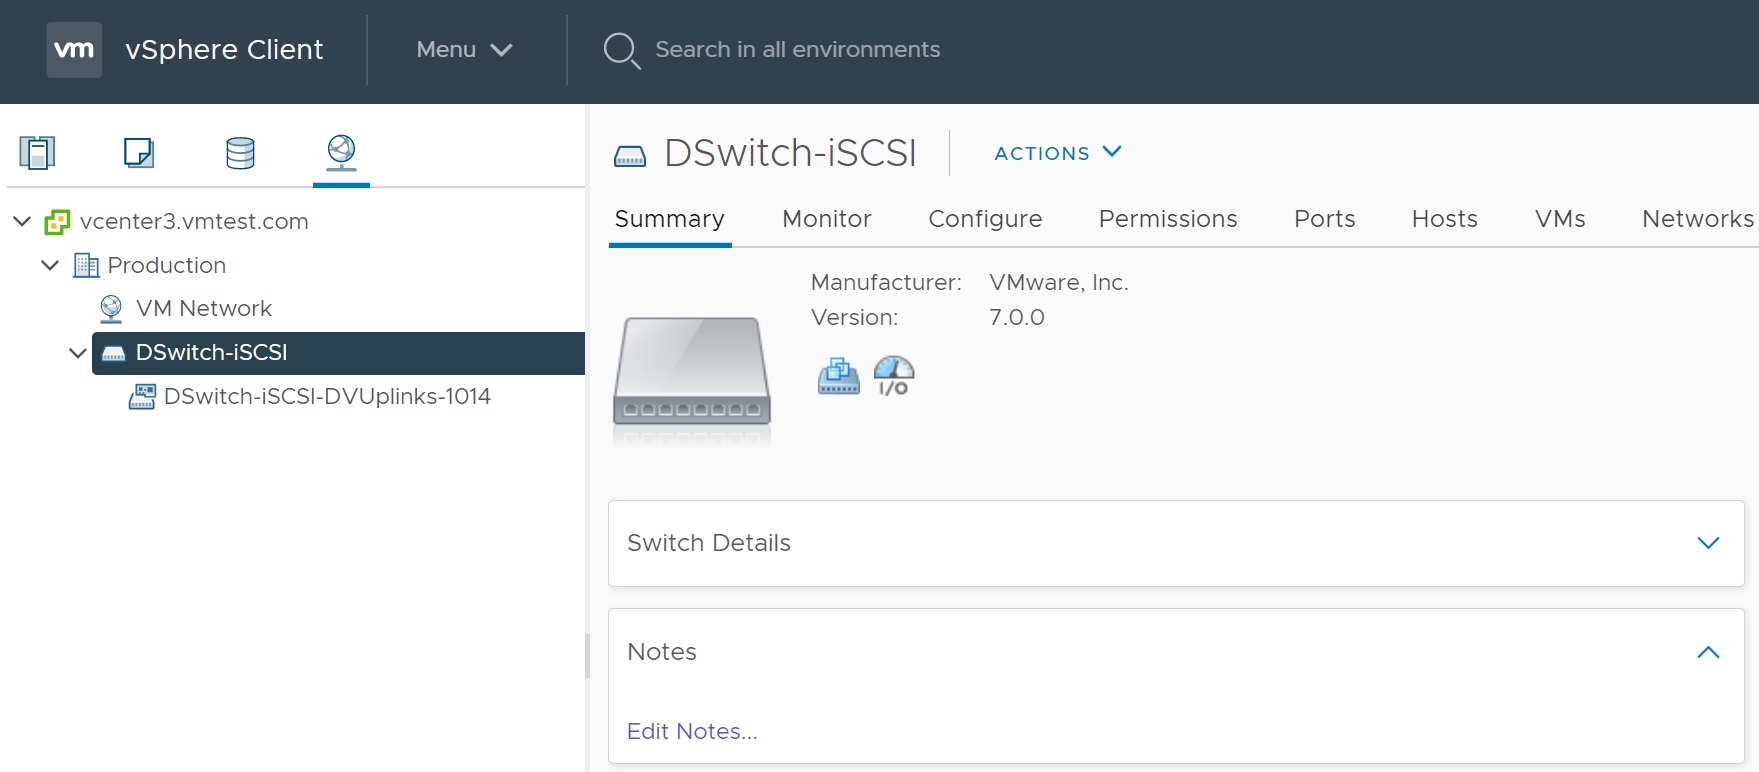
Looking in more details we notice that the switch has no hosts connected, we will do this shortly, but this is an idea place to configure or get information of the switch.
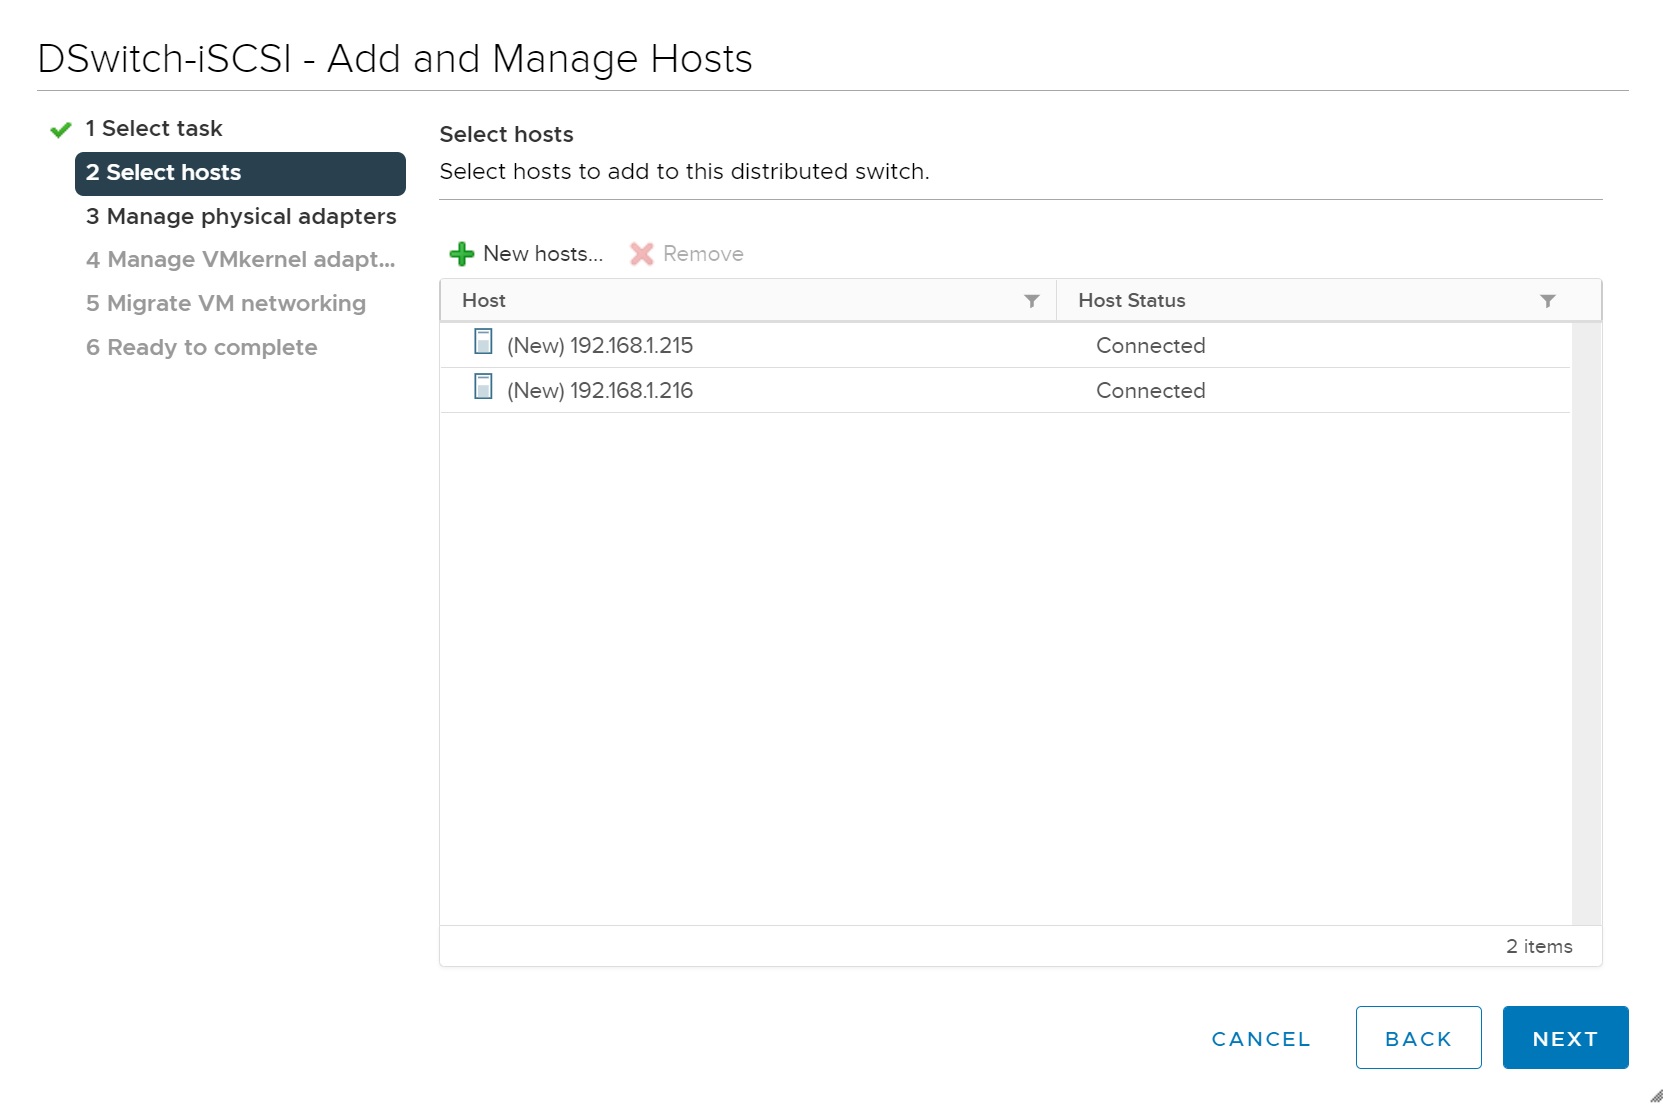
Next lets add some hosts so that they are conected to the switch, we do this by selecting ACTIONS -> Add and Manage Hosts, again we will go through a number of setup screen

The first screen you have a few optins to add, manage or remove hosts from a switch, in this case we are adding

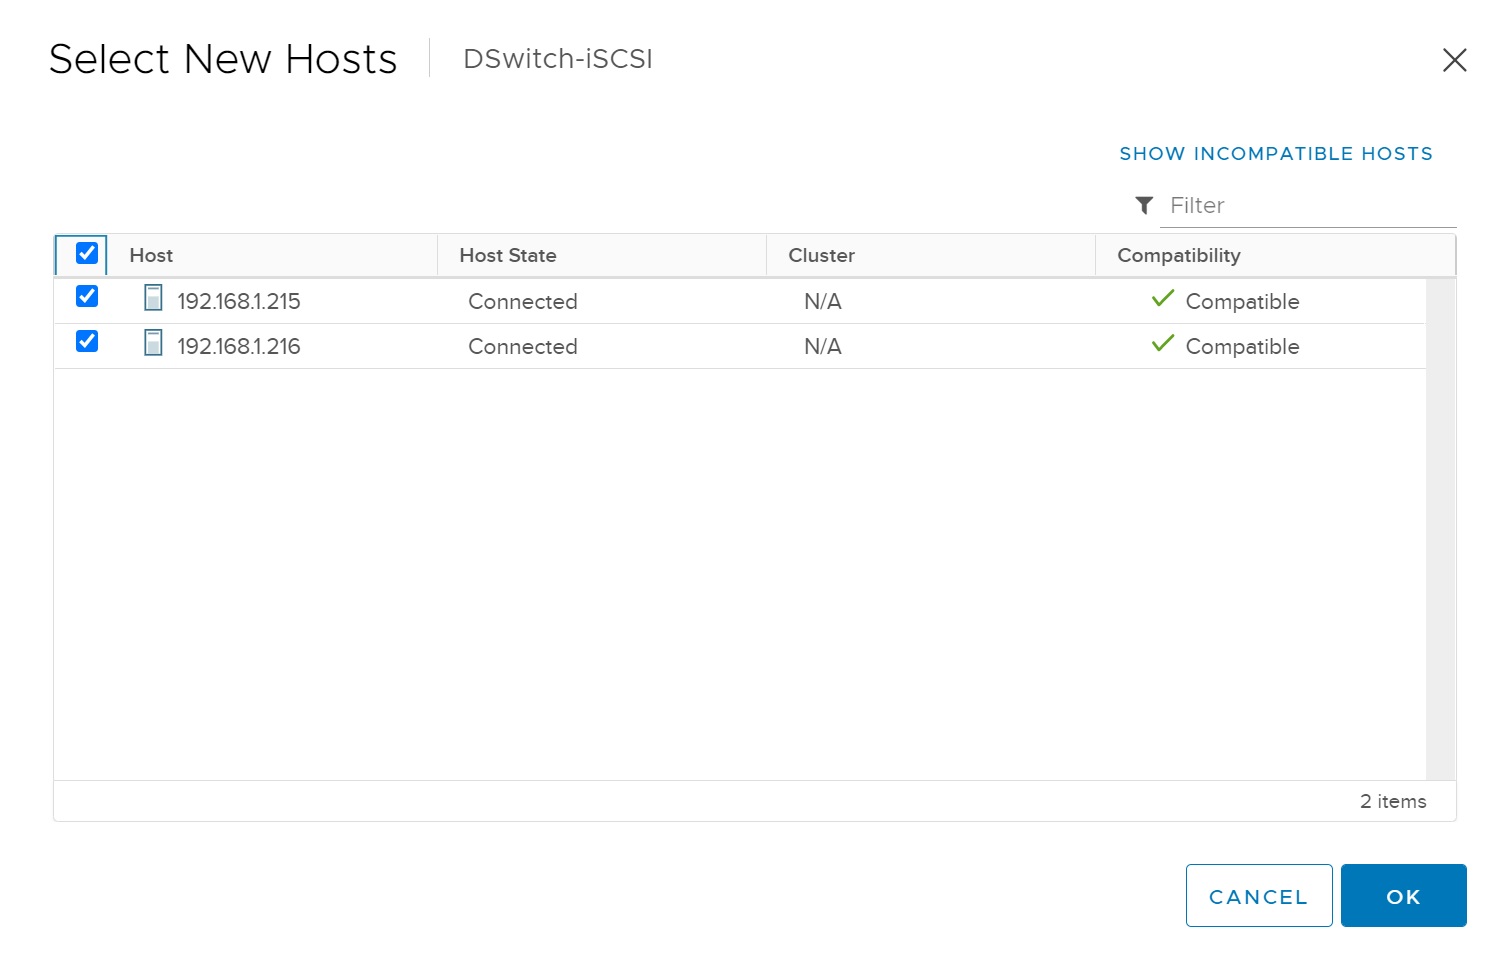
The next screen requests what hosts we would like to add, select the New Host button to add hosts

All the hosts that are available will be listed, select the hosts that you want connected to this new switch
You are returned back to the hosts screen
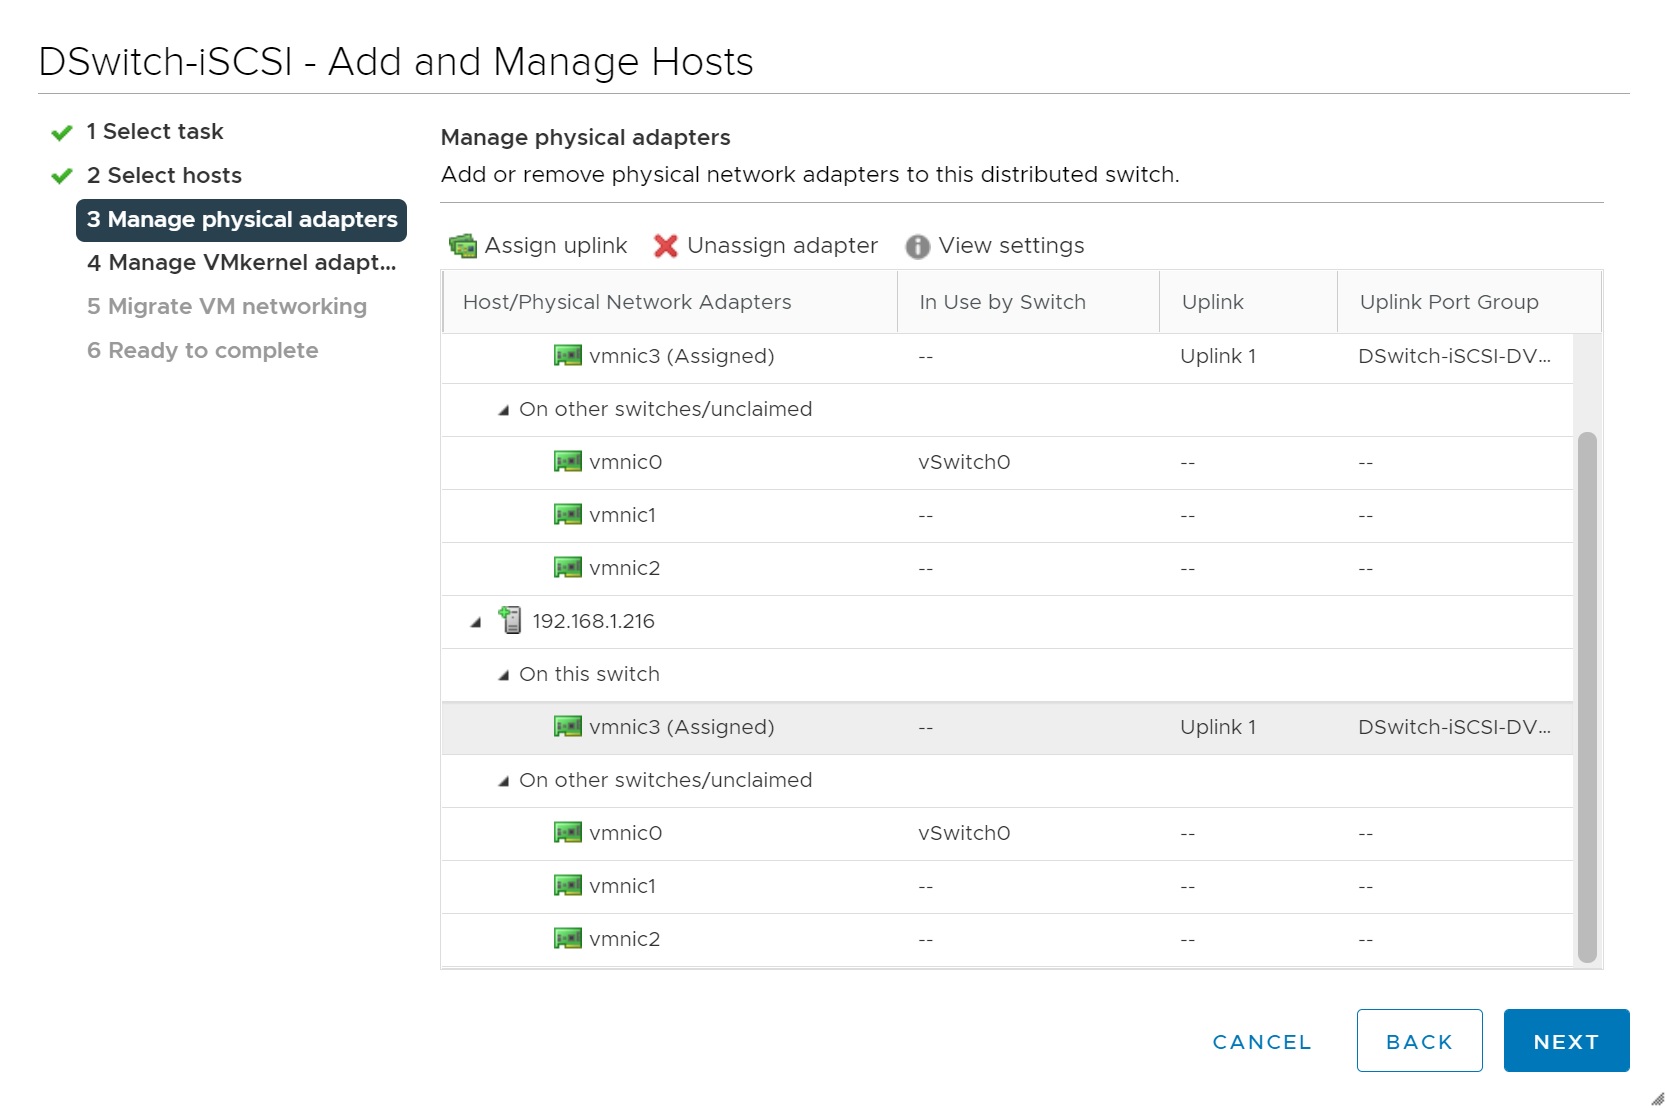
The next screen we add the physical neytworks and assign them to a uplink, you can even add more than one physical NIC for redundancy, etc.

As stated above you assign the physical NIC to an uplink.

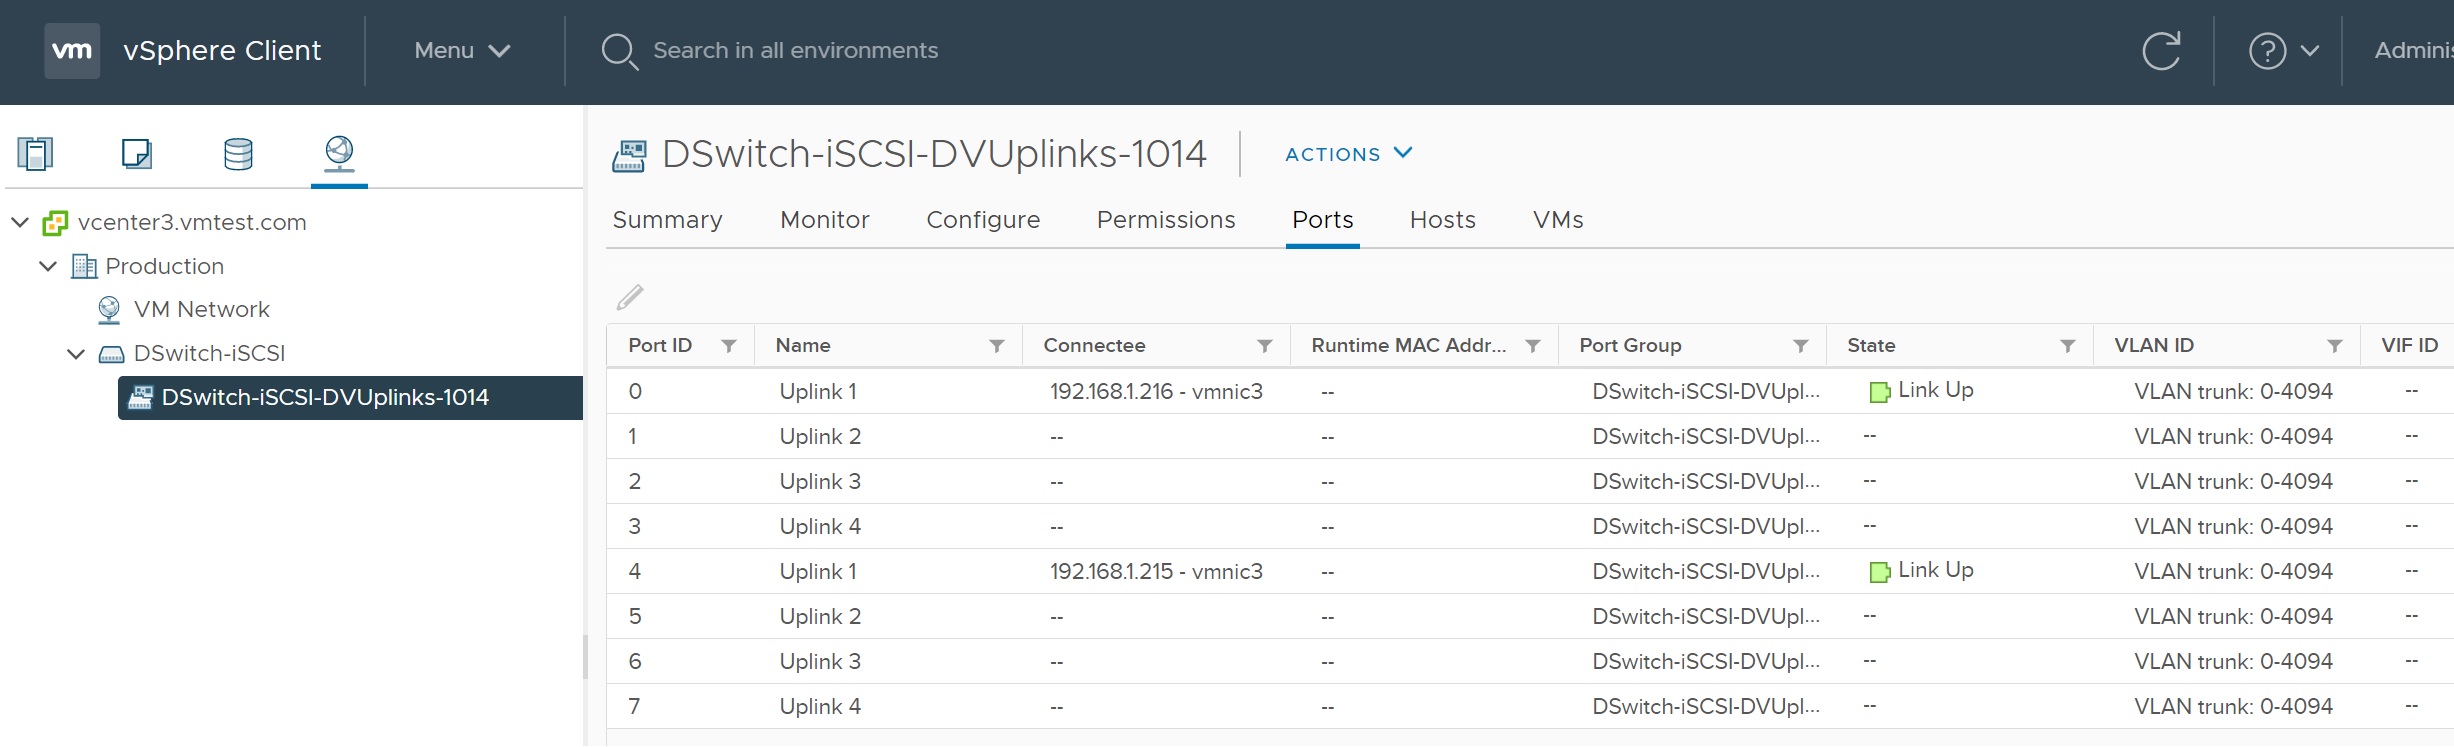
You are returned to main uplink screen, here you can see that I have assigned one uplink for each ESXi server
The next screen we can setup the port group and VMKernel adapters however as we have deferred this to later we can move on
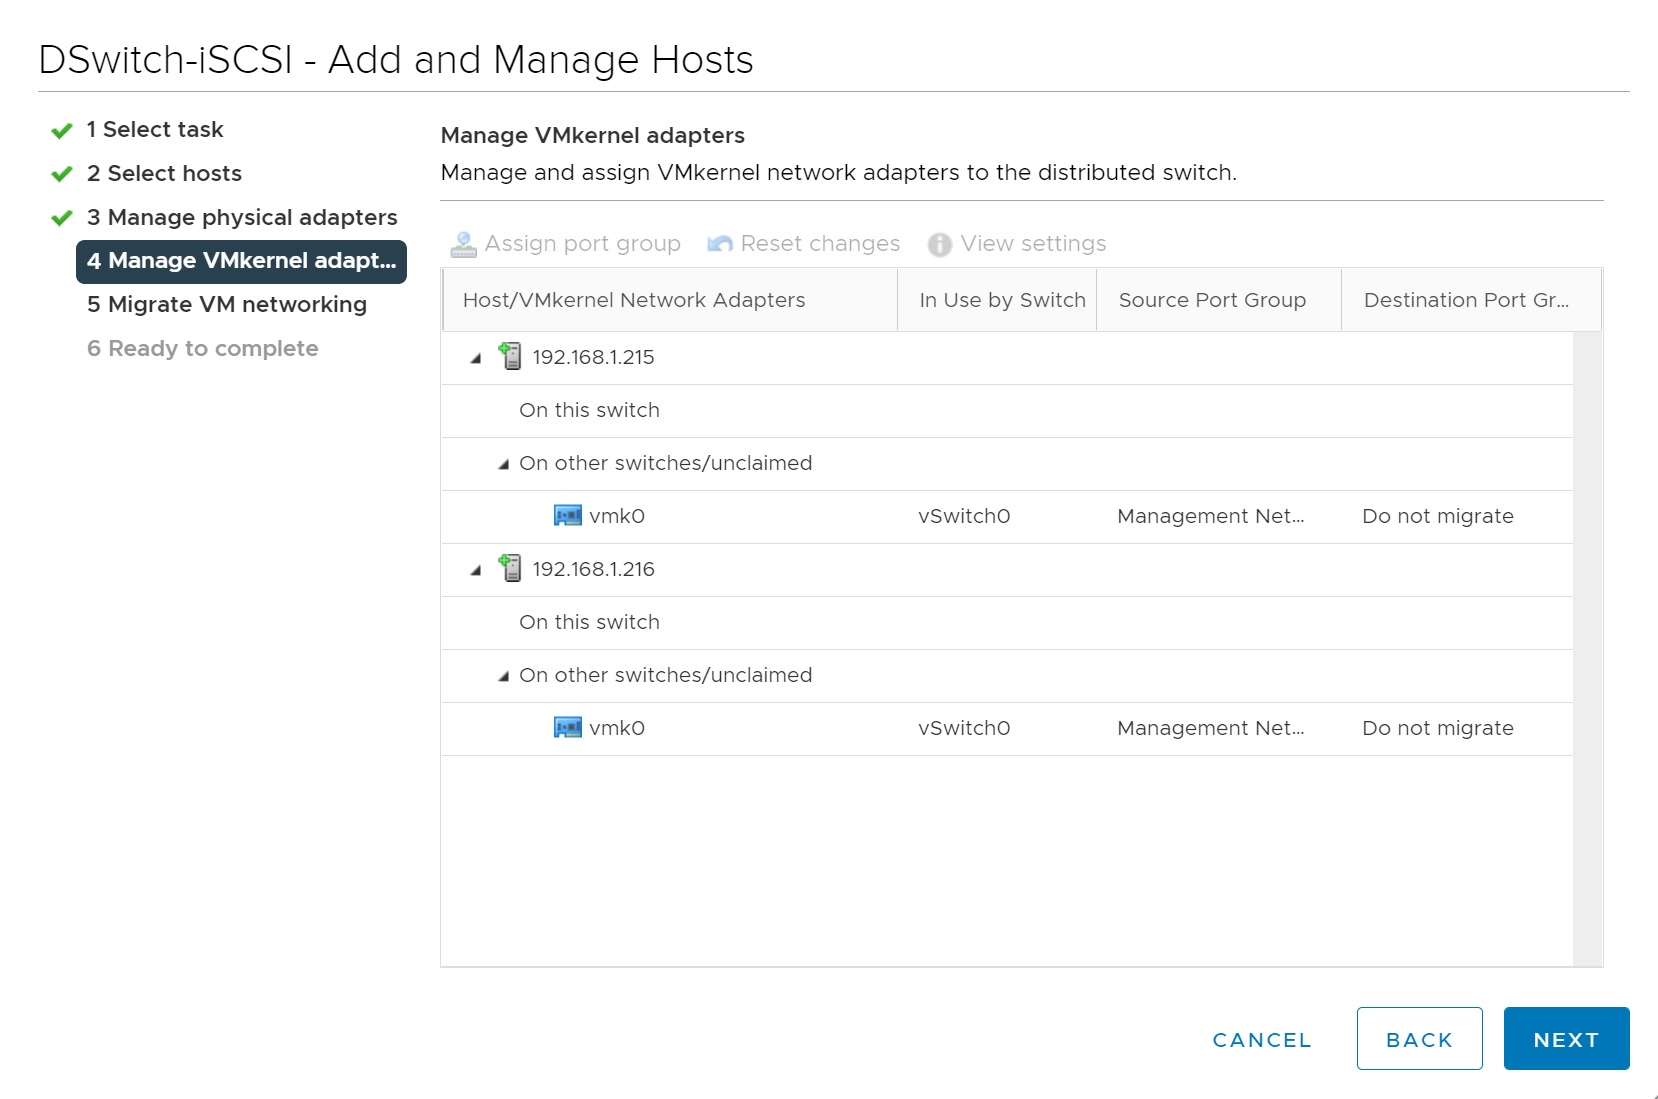
If the ESXi server already have network configured we coulkd migrate this into the vCenter, for example we could migrate each ESXi management network

Finally we get to the review screen, double check and click FINISH to add the hosts to the switch

If we now look at distributed switch we can see that the switch has a number of hosts connected to it, there is no problem in adding additional hosts at a later date.
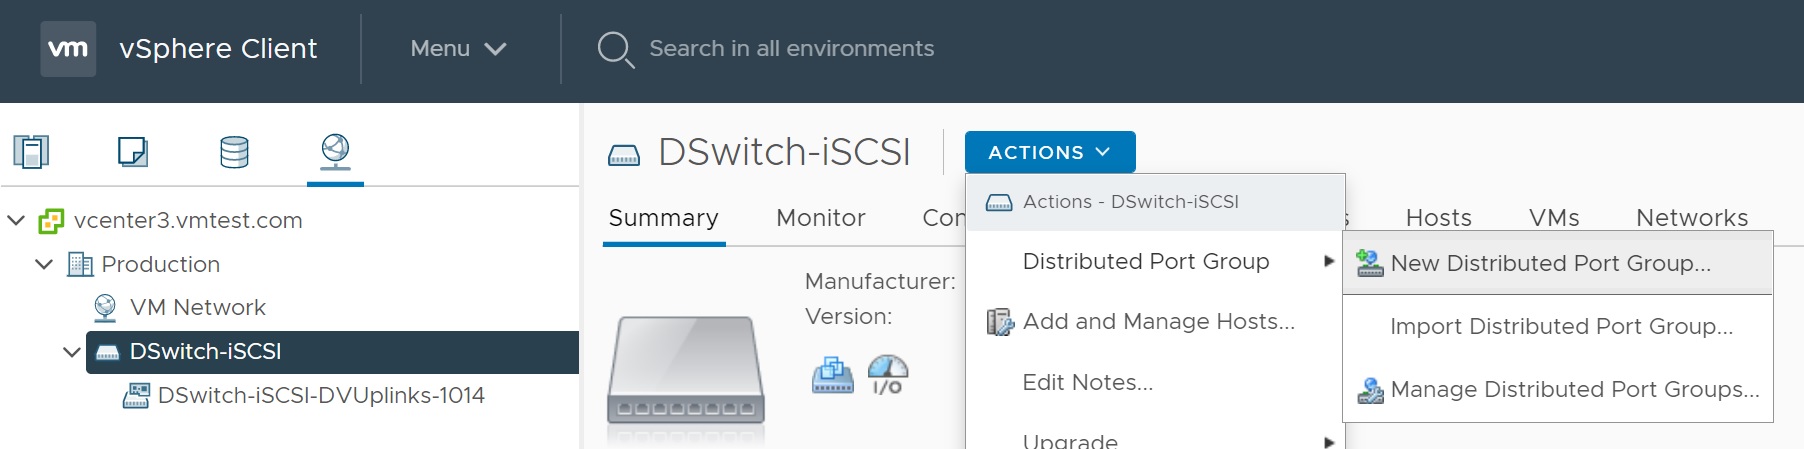
Now we are ready to setup the port group (as mentioned above I have broken this piece out), selecting the switch -> ACTIONS -> New Distributed Port Group, again we will be going through a number of setup screens
The first setup screen requests the port group name

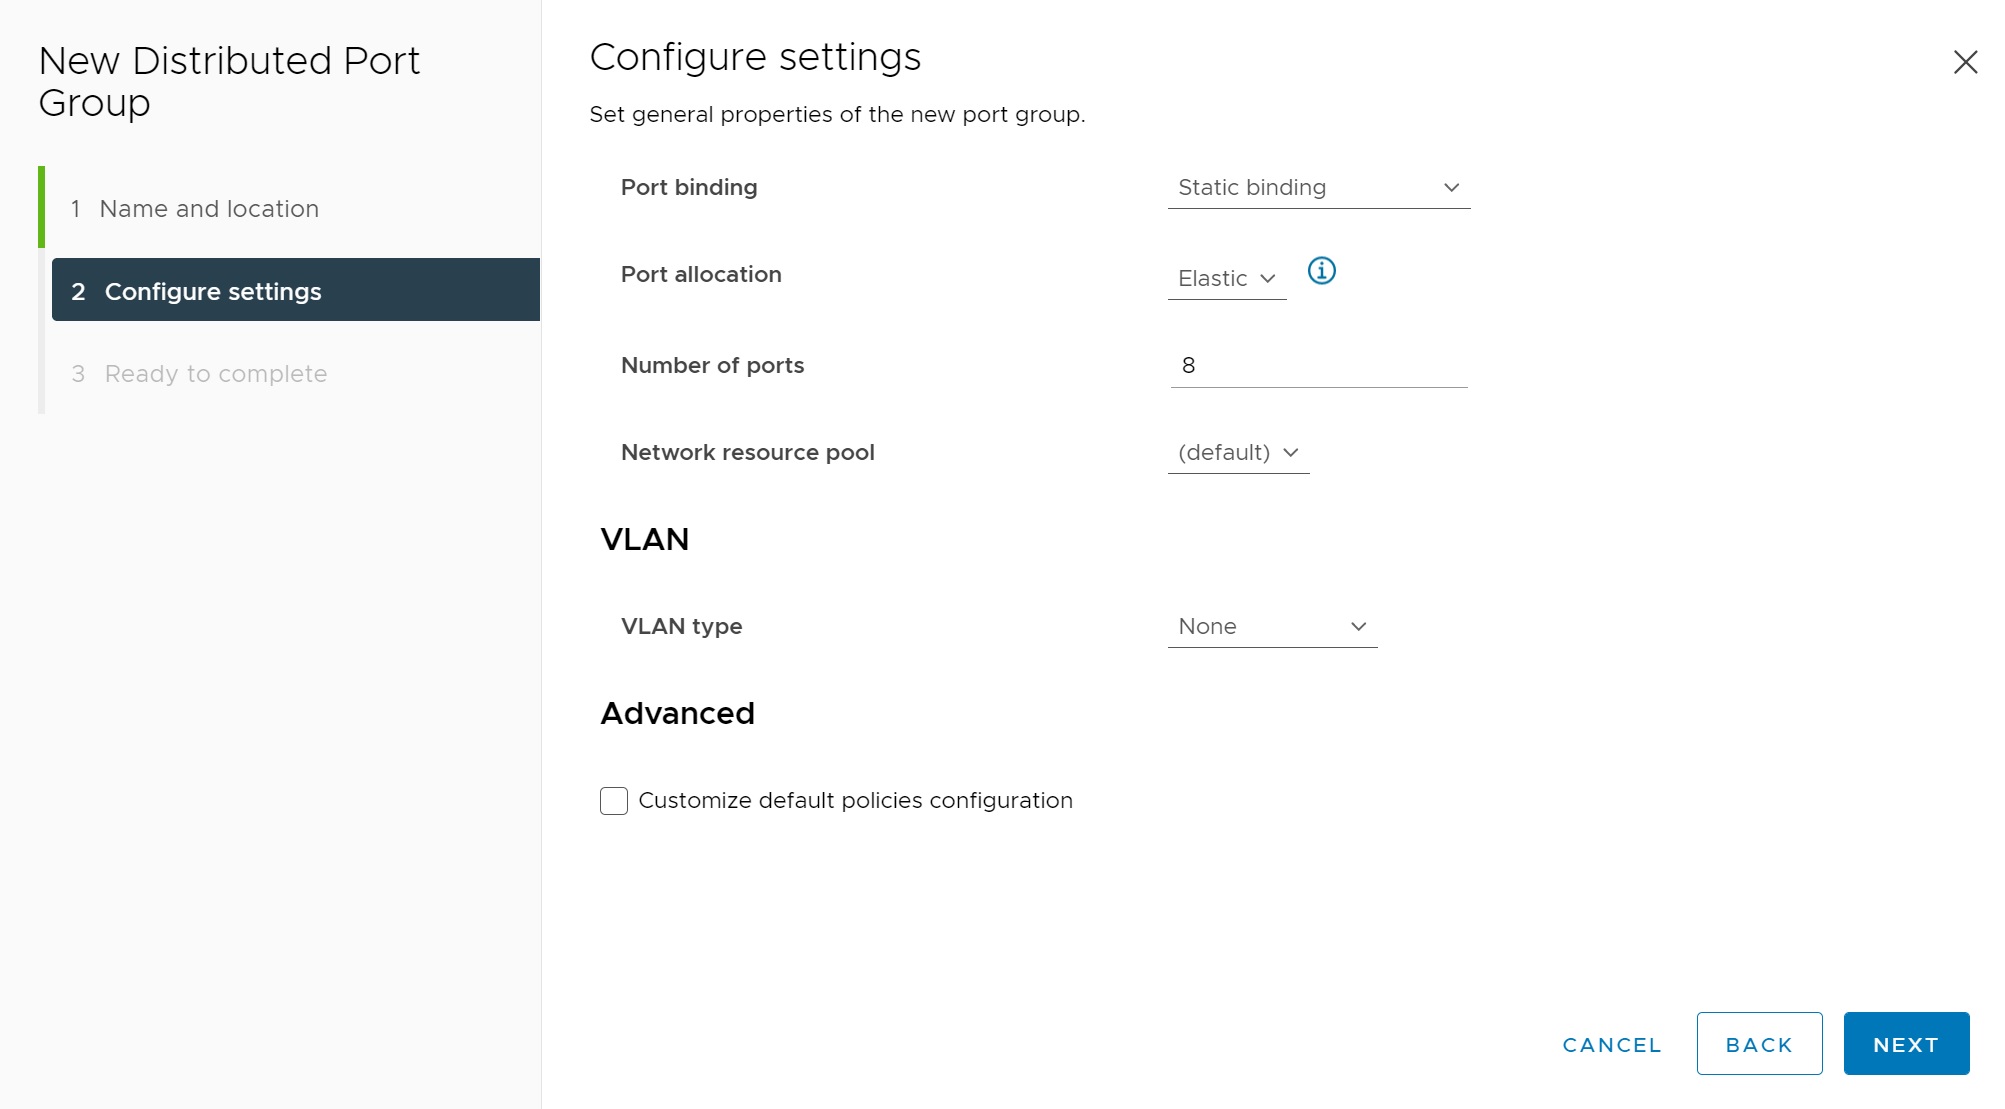
Next we have a number of options in regarding the port group, here you set the number of ports, use a network resource pool, etc, you can also setup VLAN type here as well, which I will cover separately.
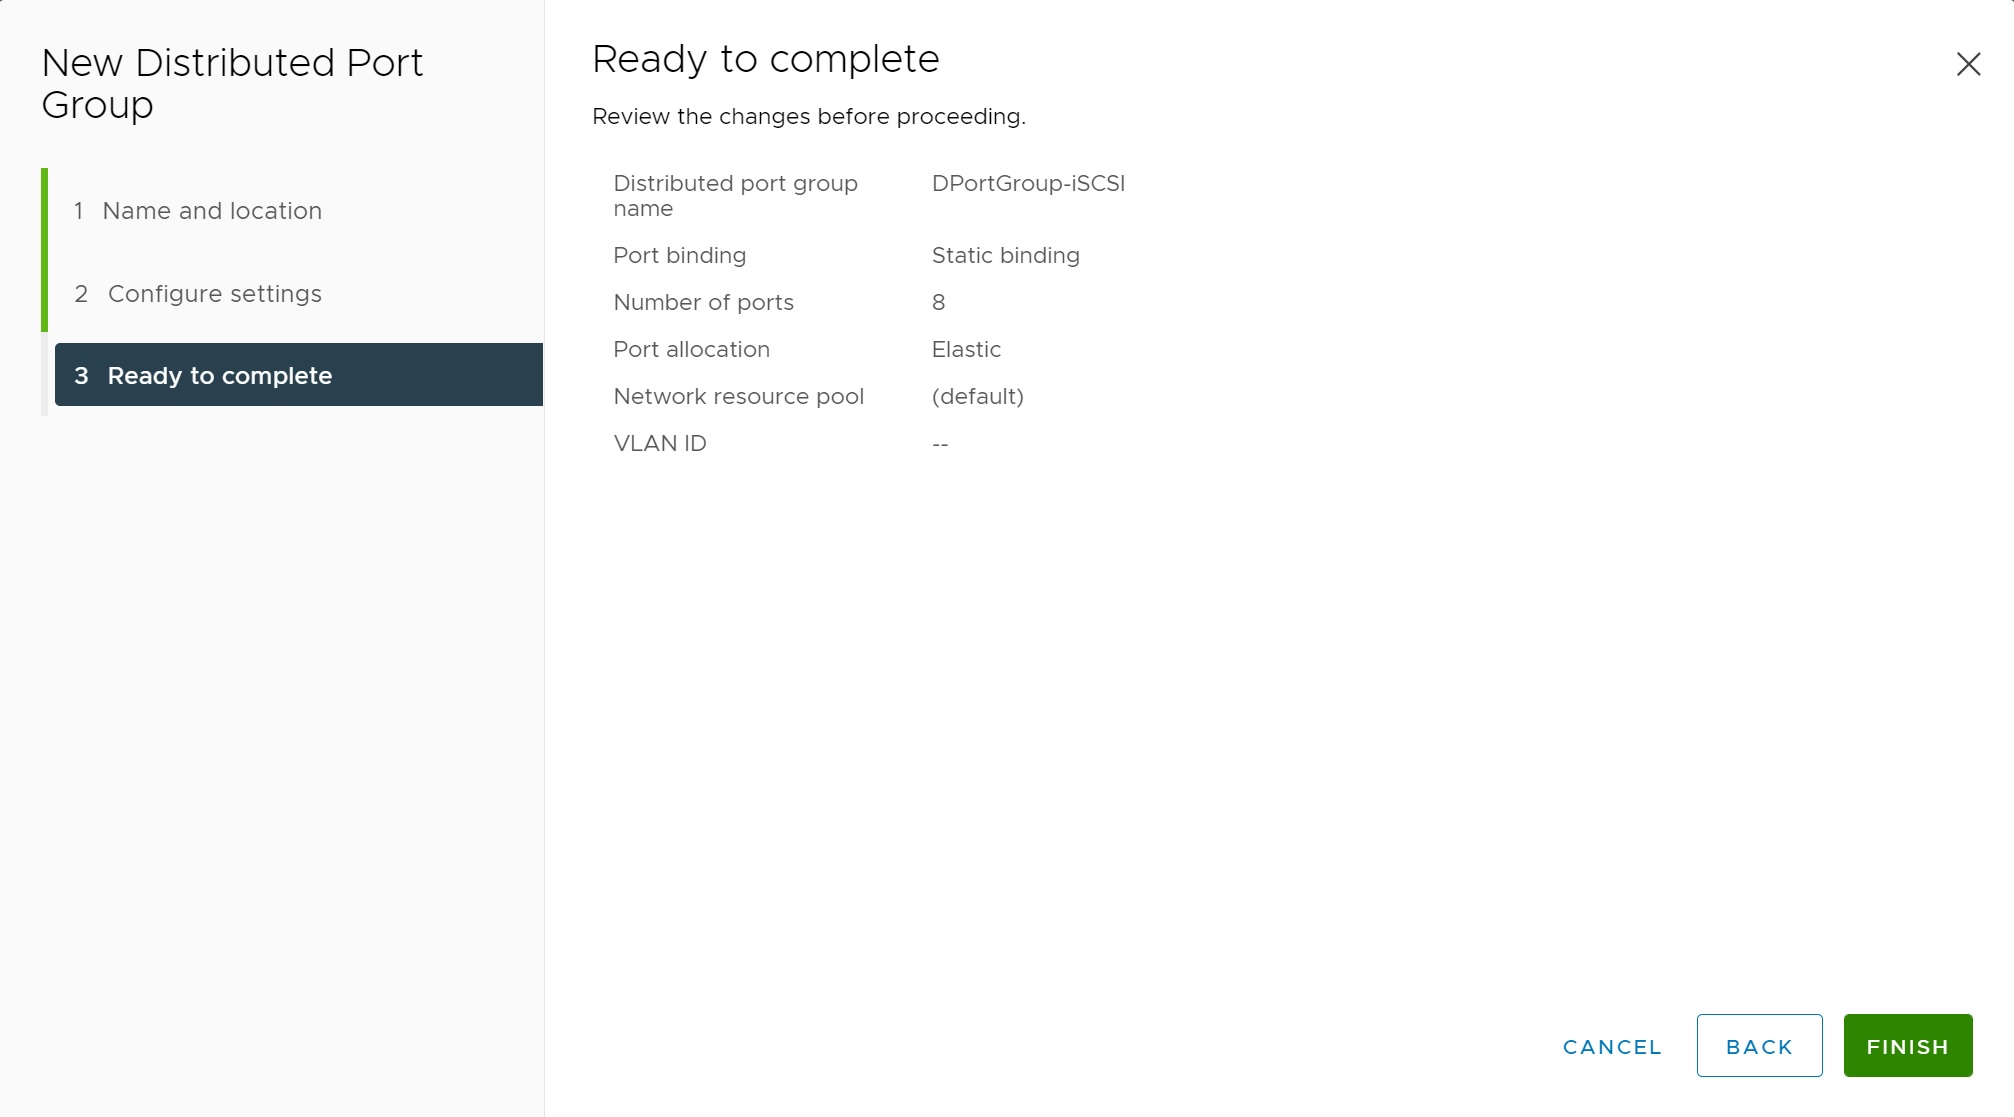
Lastly we get to a review screen.
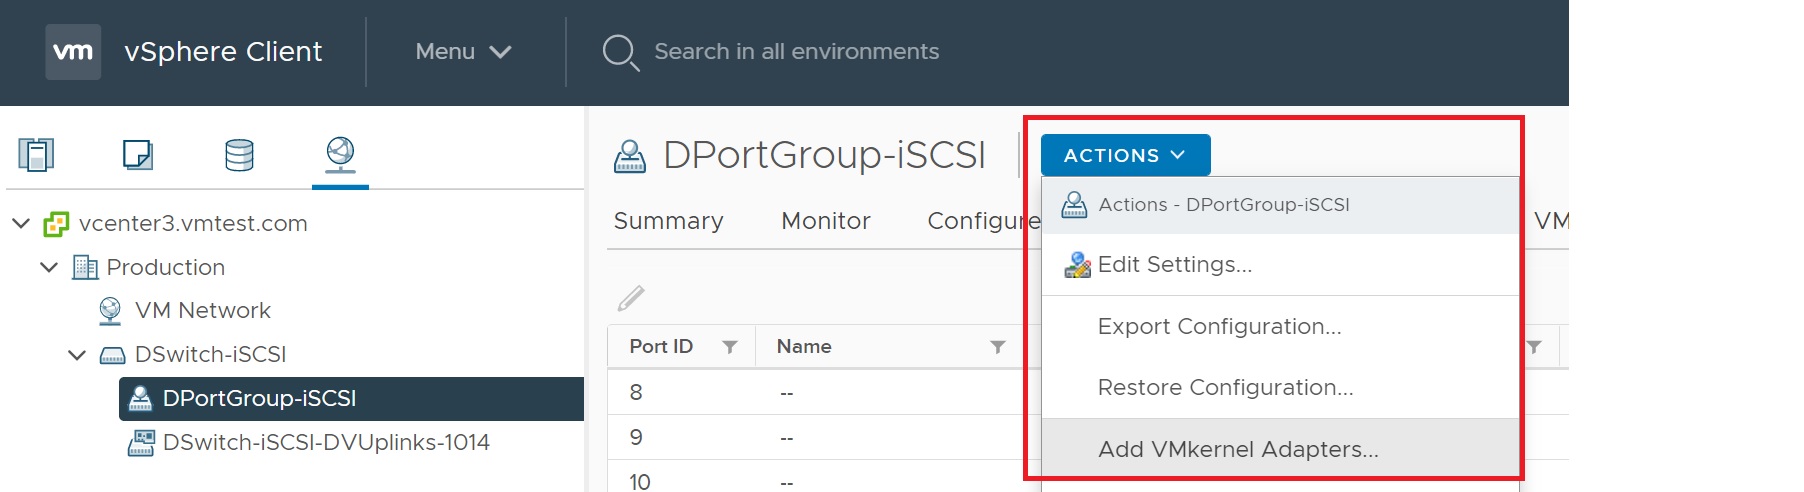
Although we have a port group we don't have any adapter (IP addresses) connected, which is what we will do next.

Selecting the port group ACTIONS -> Add VMKernel Adapters, again we will be taken to a series of setup screens
First we select the hosts that will be affected by this port group

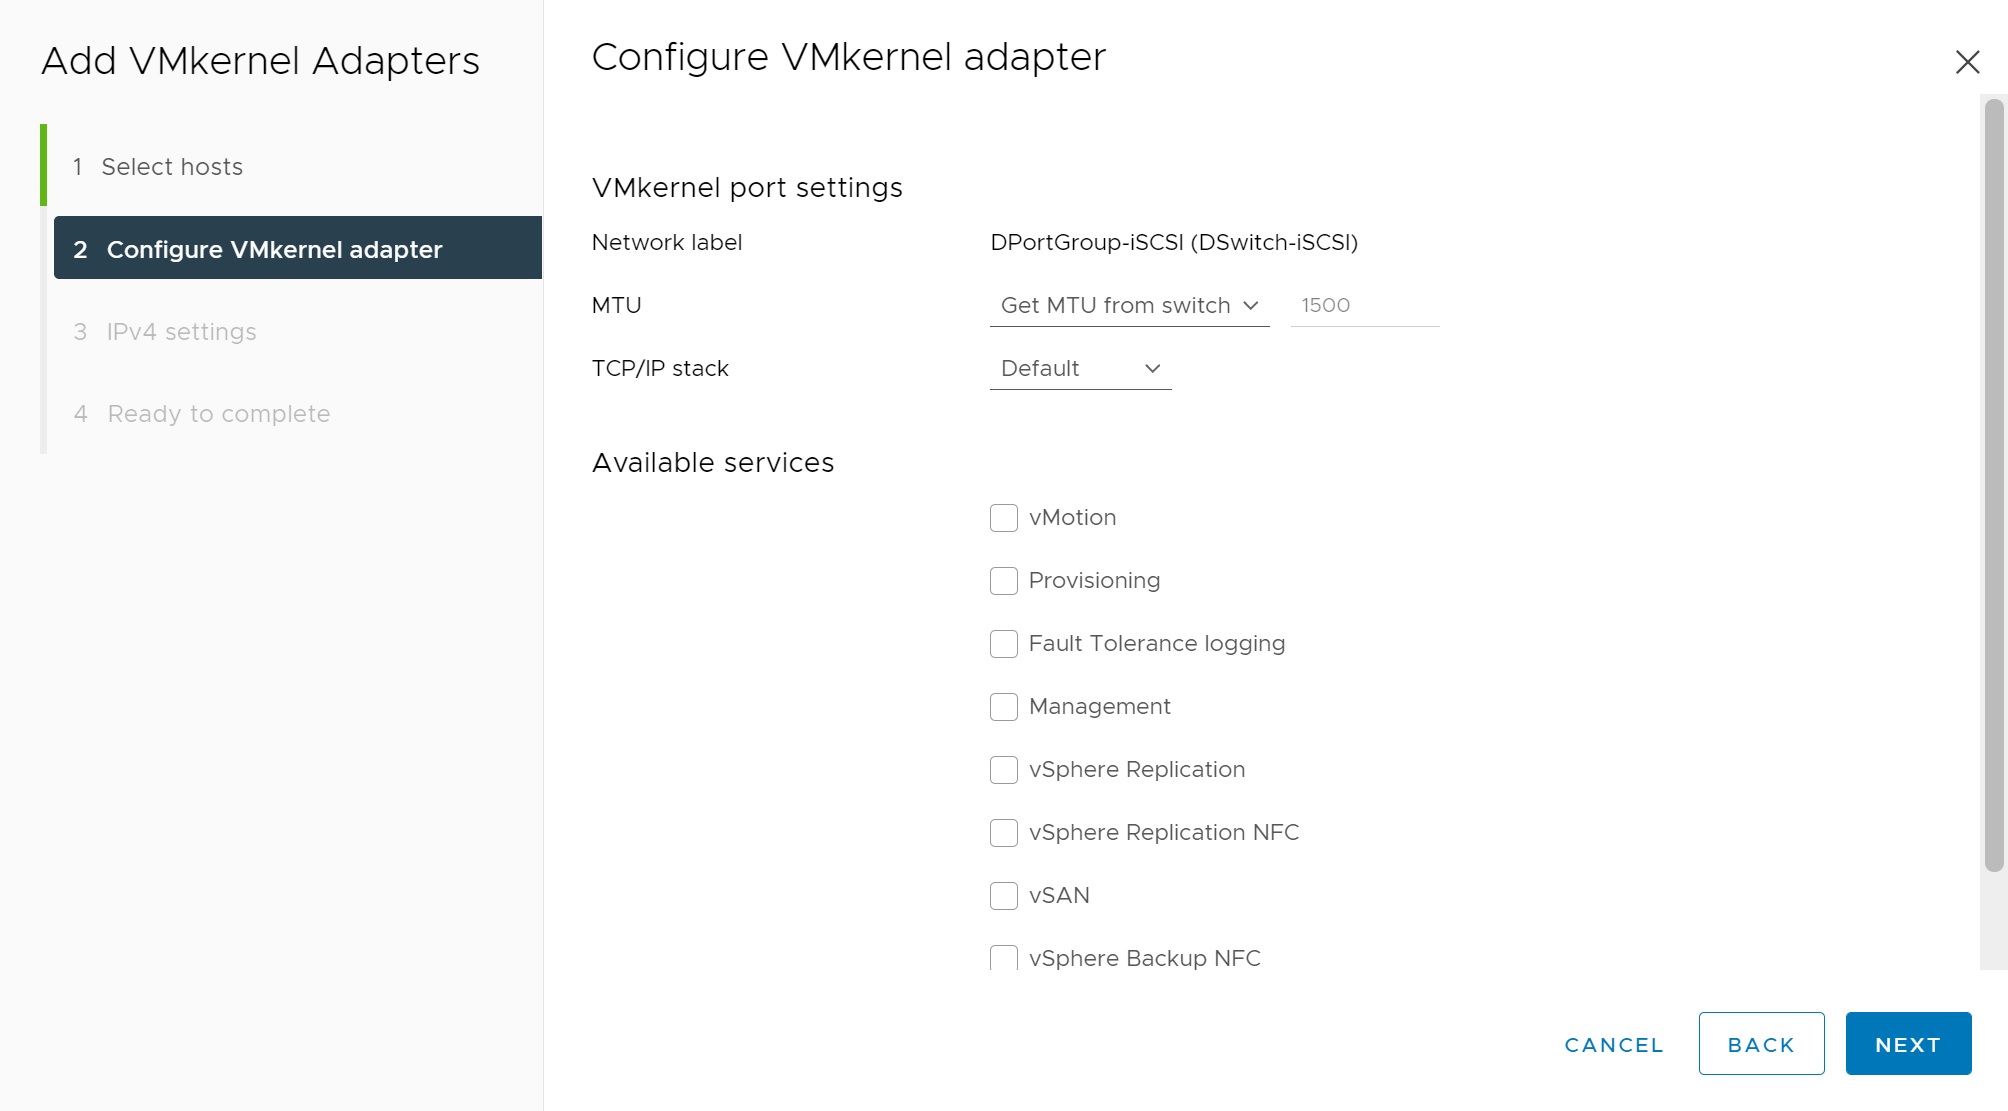
The next screen details the service that will run over this port group, as I am using iSCSI there is no service for that, but you can use various servies such as vMotion, VSAN, etc. You can also change the MTU here (or configure the switch MTU), for example i could change the MTU to use Jumbo Frames (9000).
In the next screen we allocate the IP addresses that will be assigned to each host (I am using statically assigned), we add the subnet mask and the gateway

Finally we get to the review screen, double check everything and click FINISH to create the port group
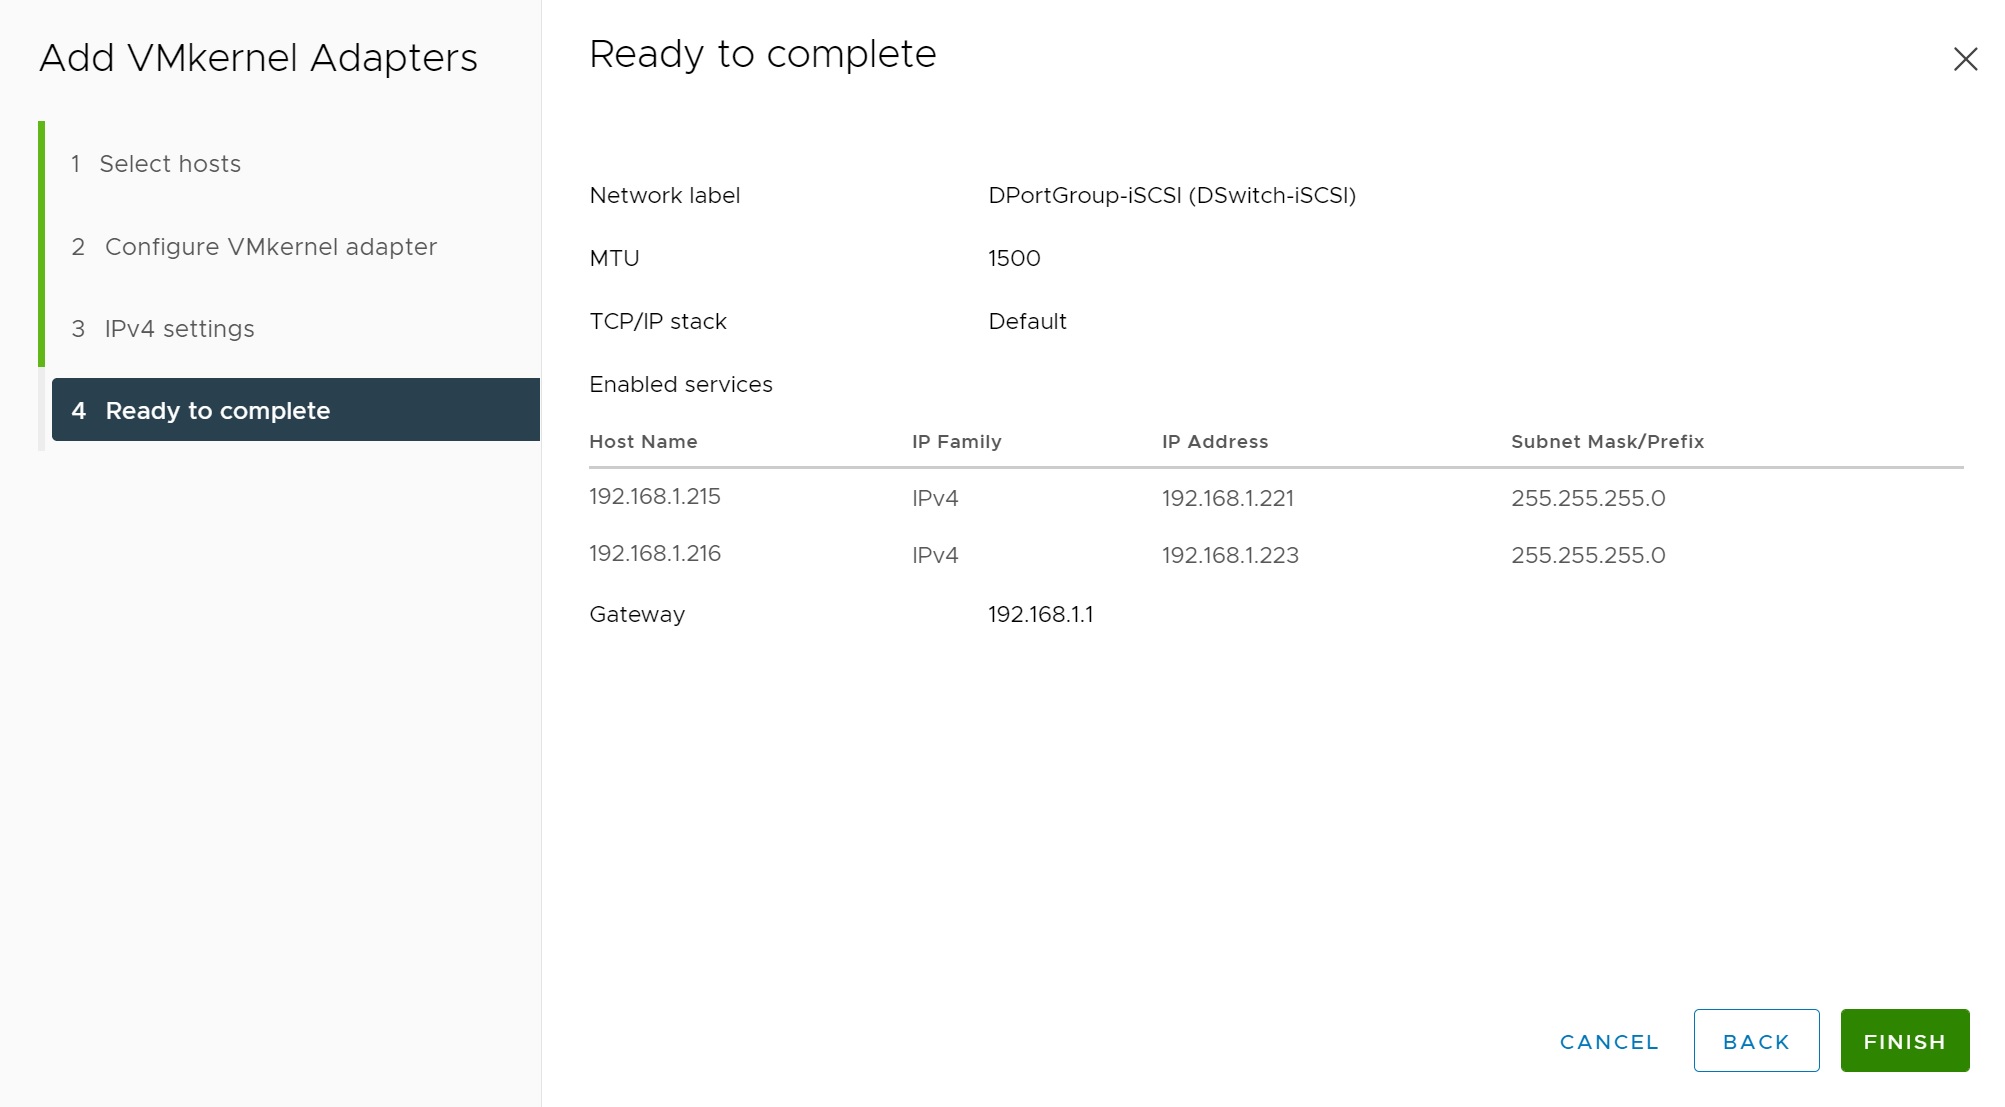
We can look at the port group view the vCenter main screen, here you can see that assigned IP addresses for each host.

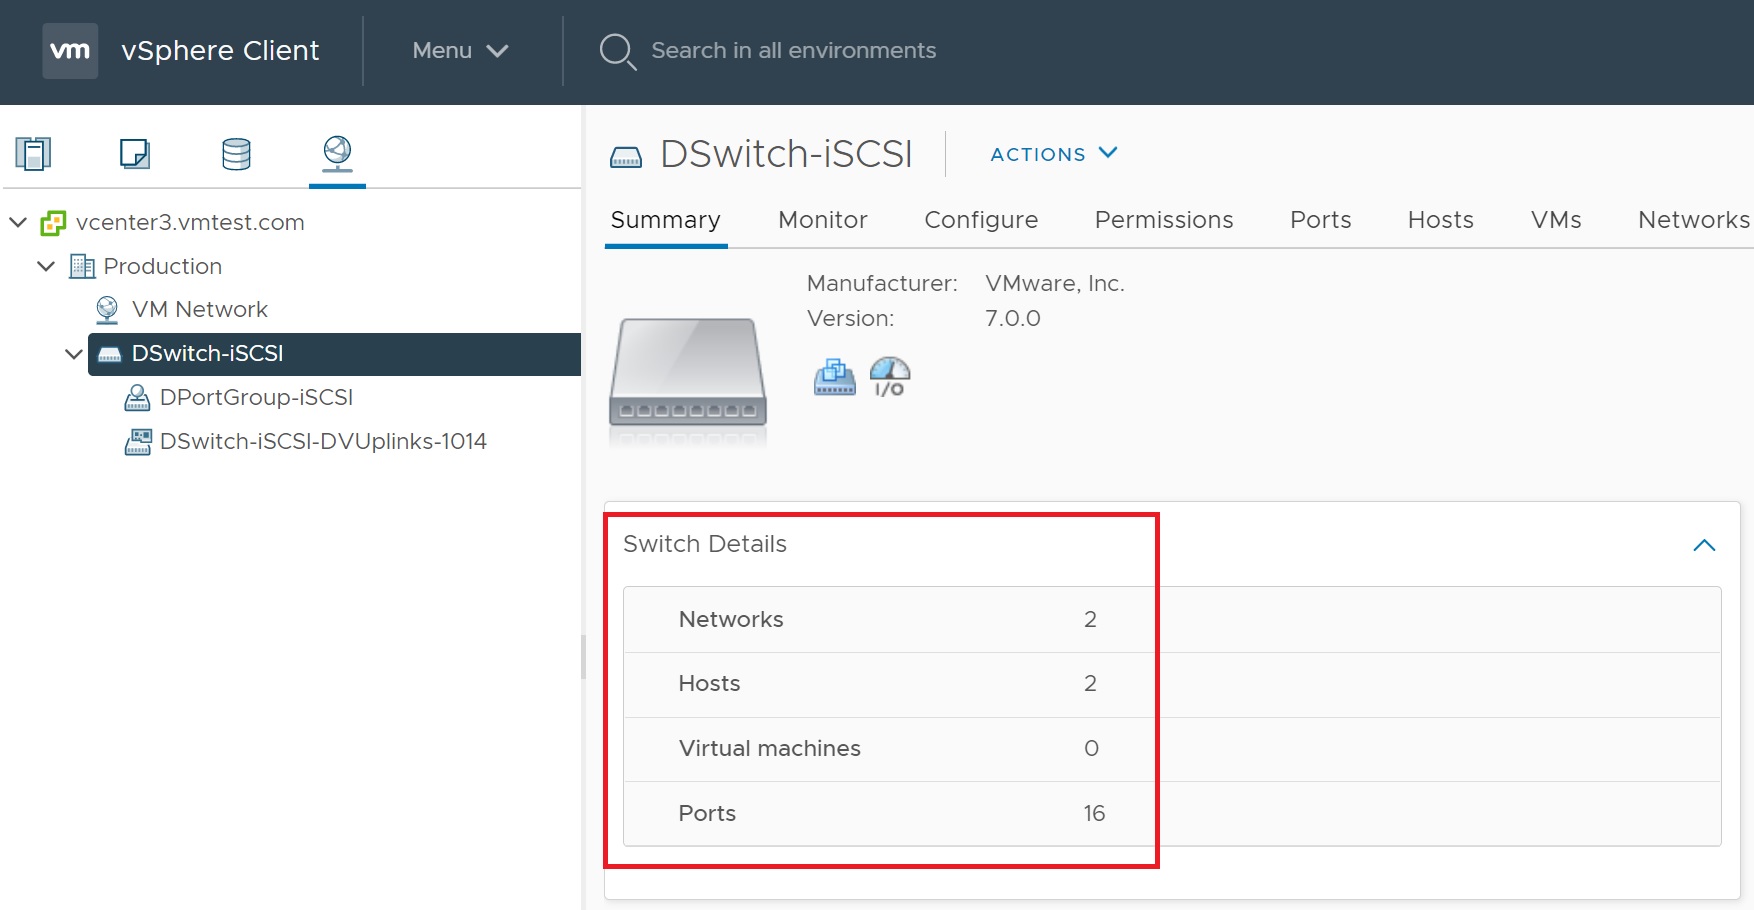
Returning to distributed switch we can now see that 2 hosts have been added and a total of 16 ports ( 8 ports for each host)
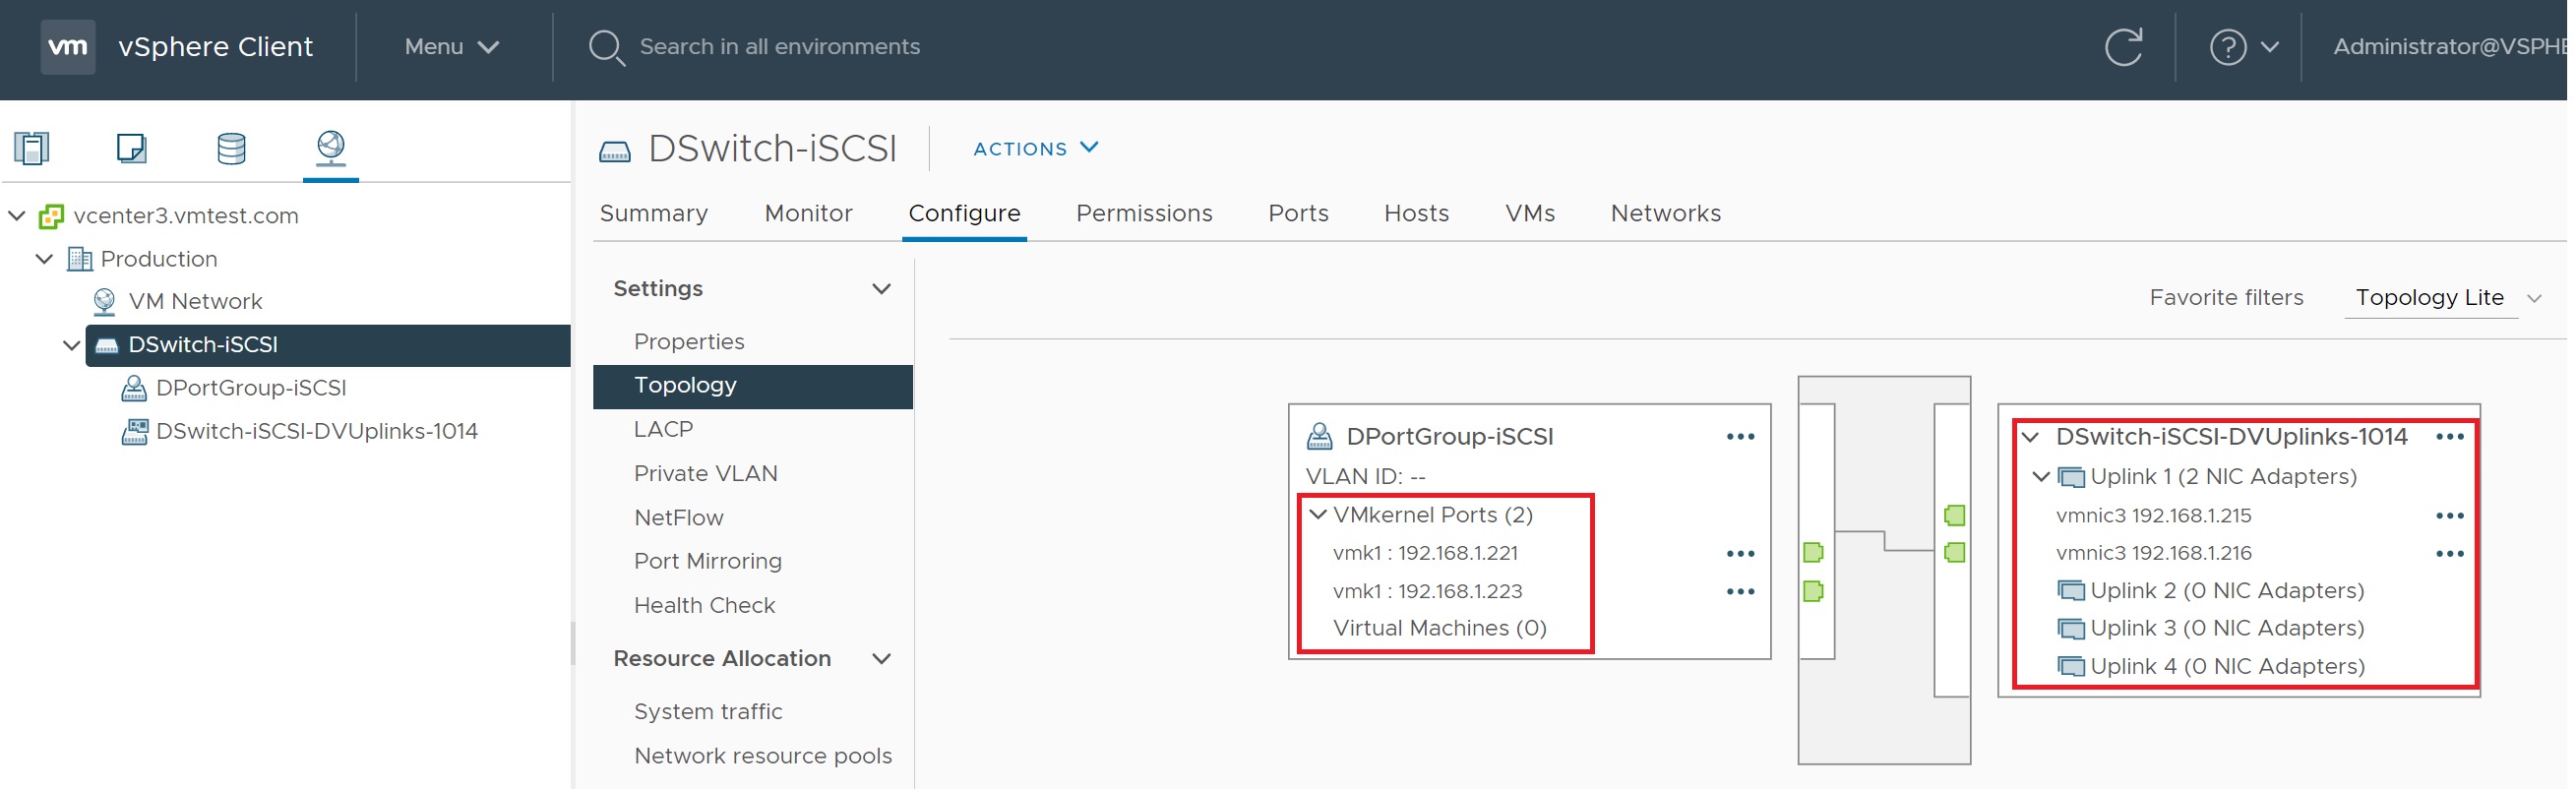
Drilling down into the configure -> topology we get a graphical view of the port group and the switch, notice we can see the IP addresses and the NIC's that have been assigned
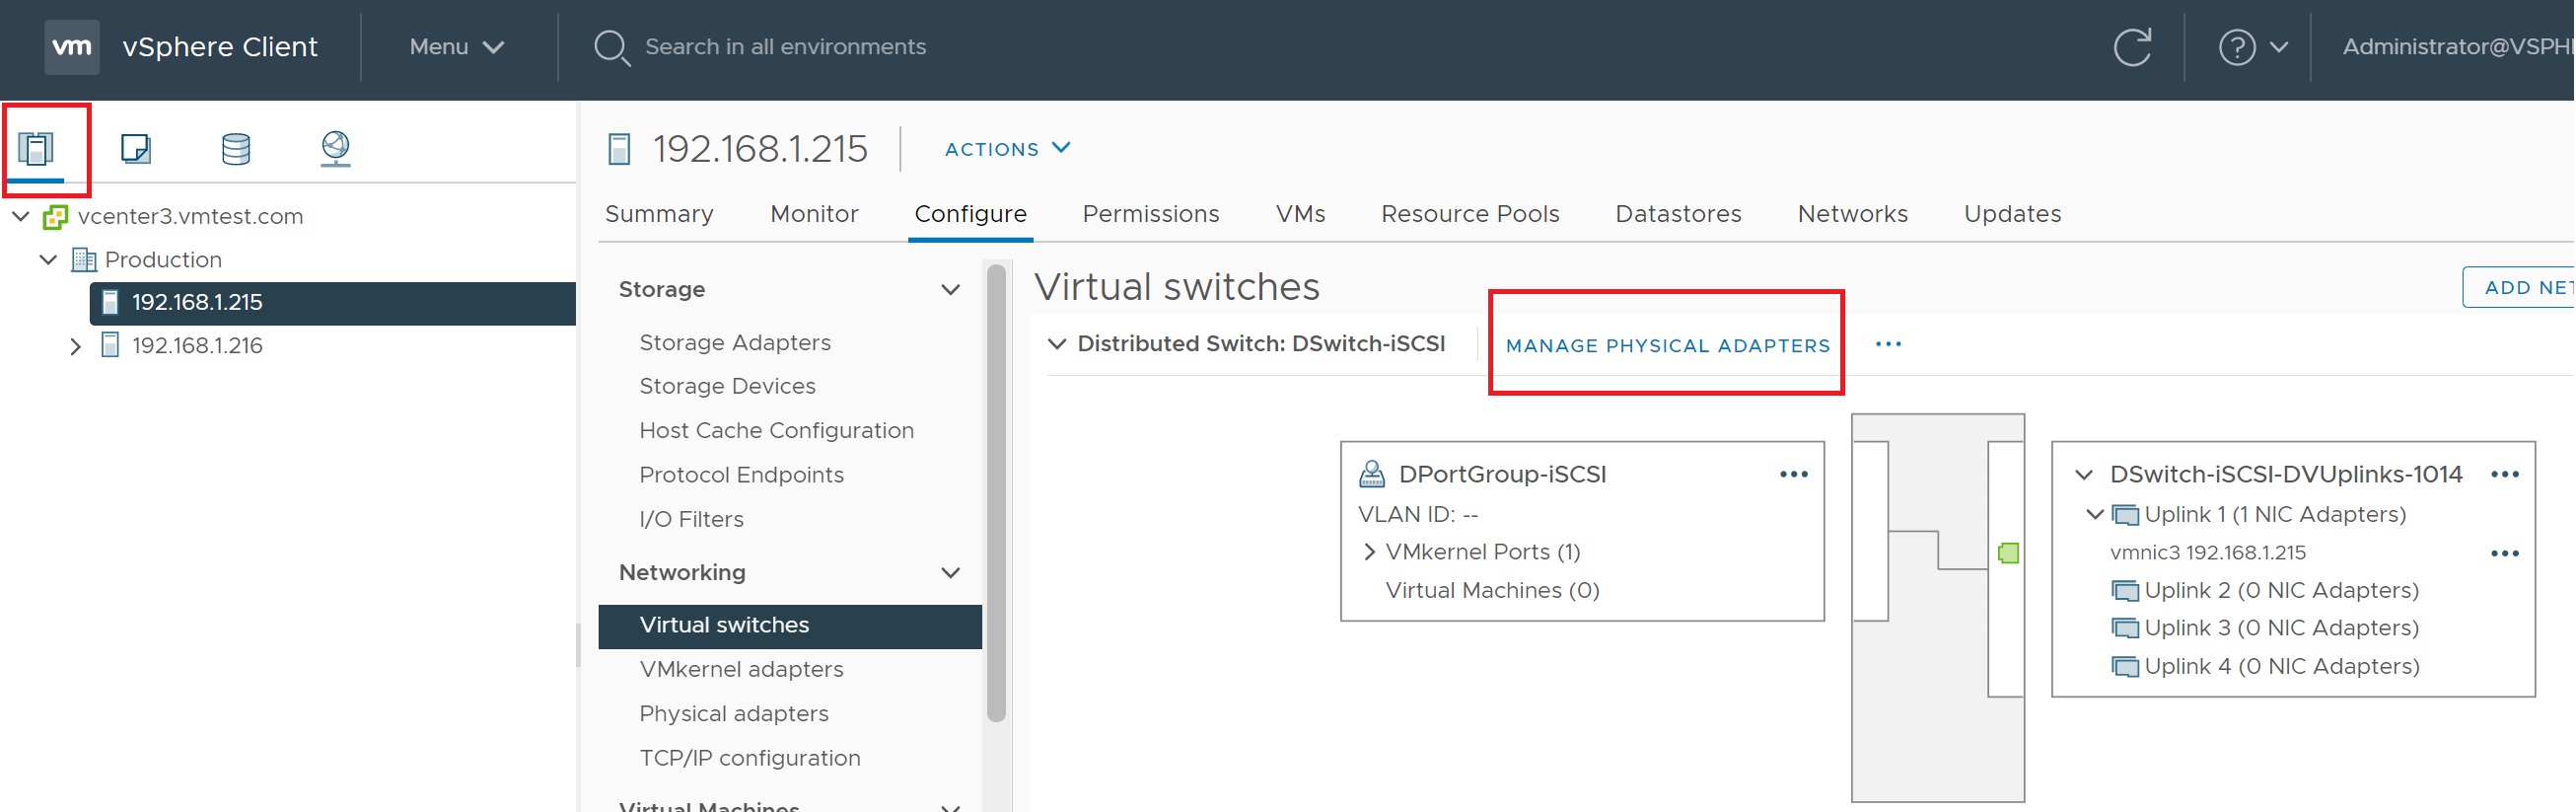
If we return to the host -> networking -> distributed switches we can see what switches this host has been connected too.

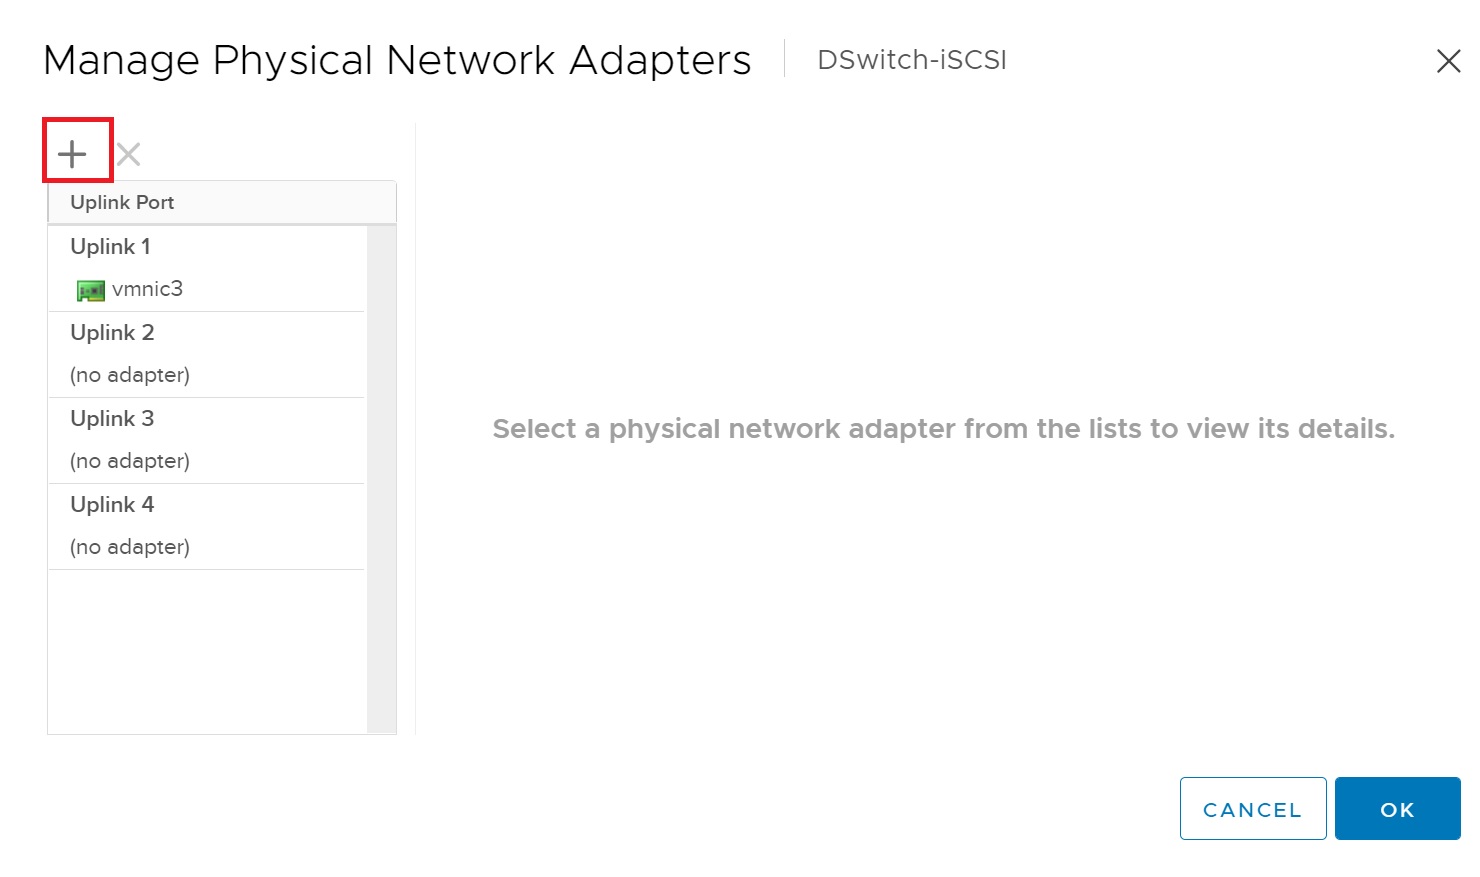
again use the host we can actually add additonal NIC (for redundancy) to the switch but going to configure -> networking -> virtual switch -> m,anage physical adapters
The network adapters screen allows to to add hysical NIC's for redundancy, dpending on what services the switch/port group uses will deternmine if you can have hot standy, active-active, etc.
Looking at the VMKernel adapters from the host screen we can see what services the adapter uses plus the IP address, etc.

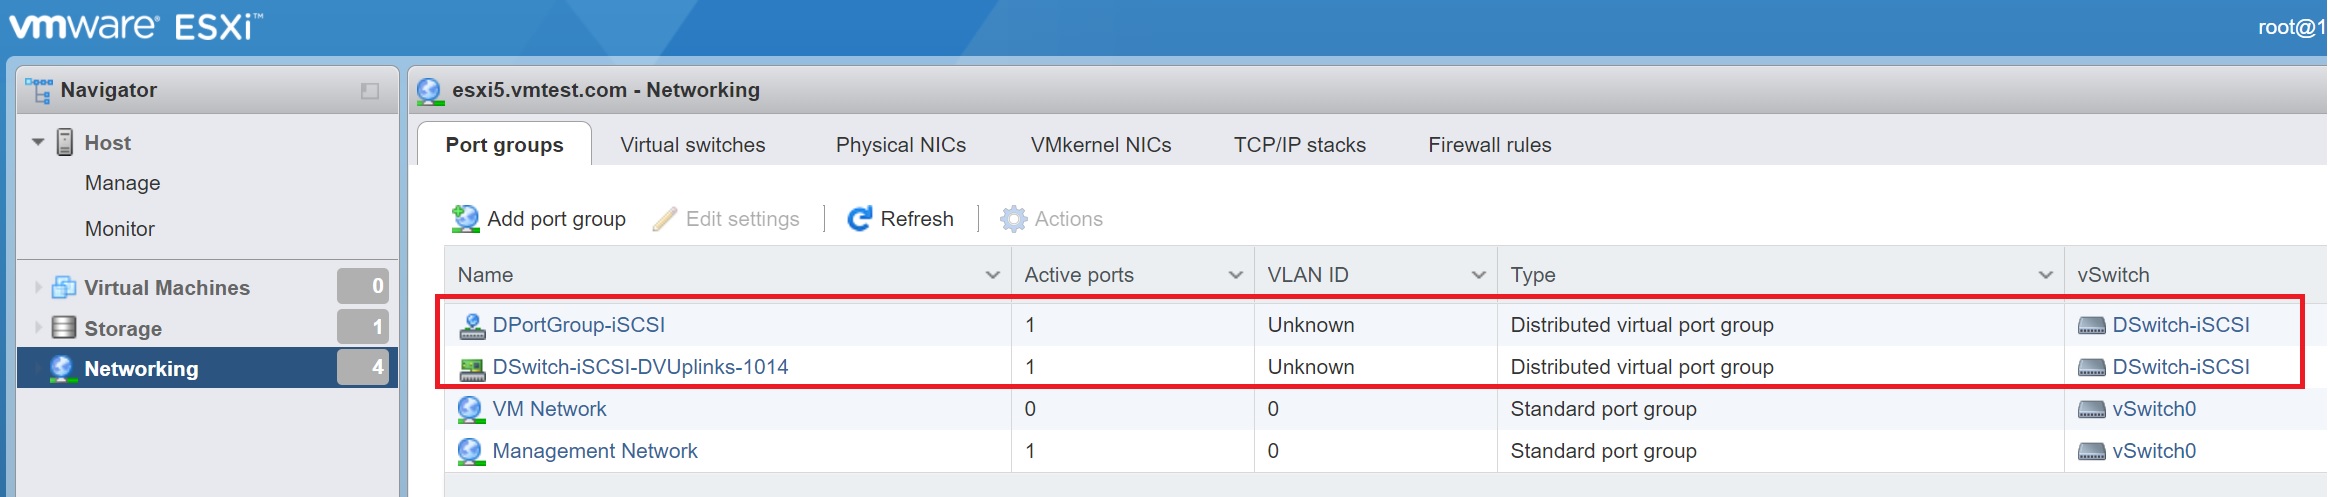
Last logging into the actual ESXi server we can see that the vCenter created the switch, port group and VMKernel adapters.
You have the option to configure the switch at a alter date, here you can see that we can change the MTU, discovery protocol and even add contact details.

You can even change the name of the switch

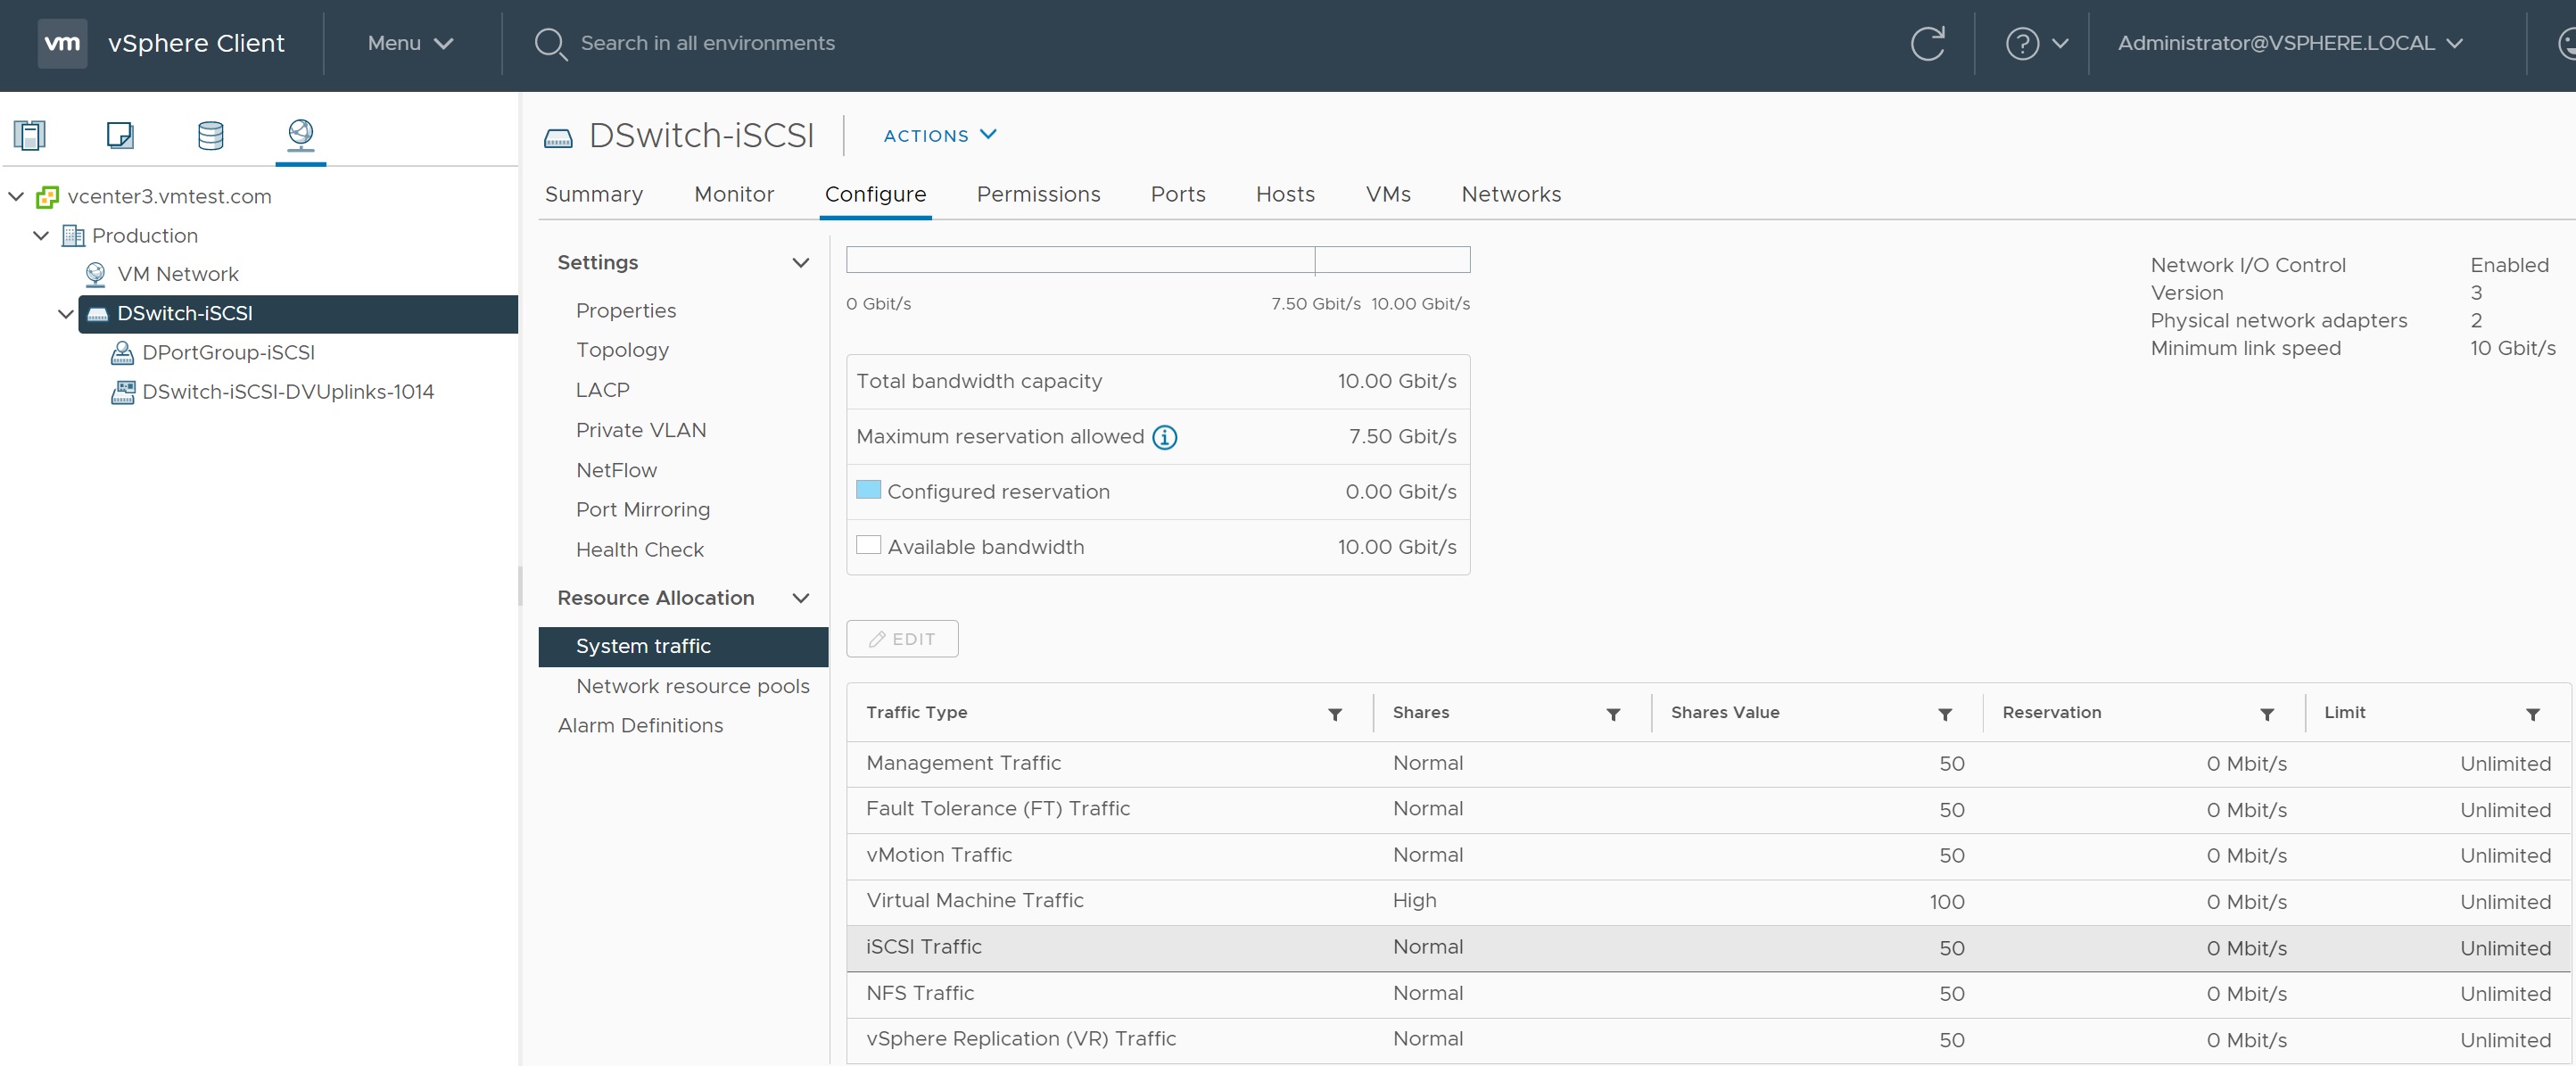
Another area to explorer is network resource allocation, personally i have not used this but its there if you need to throttle switches.
DvSwitches are idea for large corporations, it can be a headache to manage lots of standard vSwitches, but bear in mind that you do require vCenter to use DvSwitches which comes with a price and can be off putting to smaller corporations.