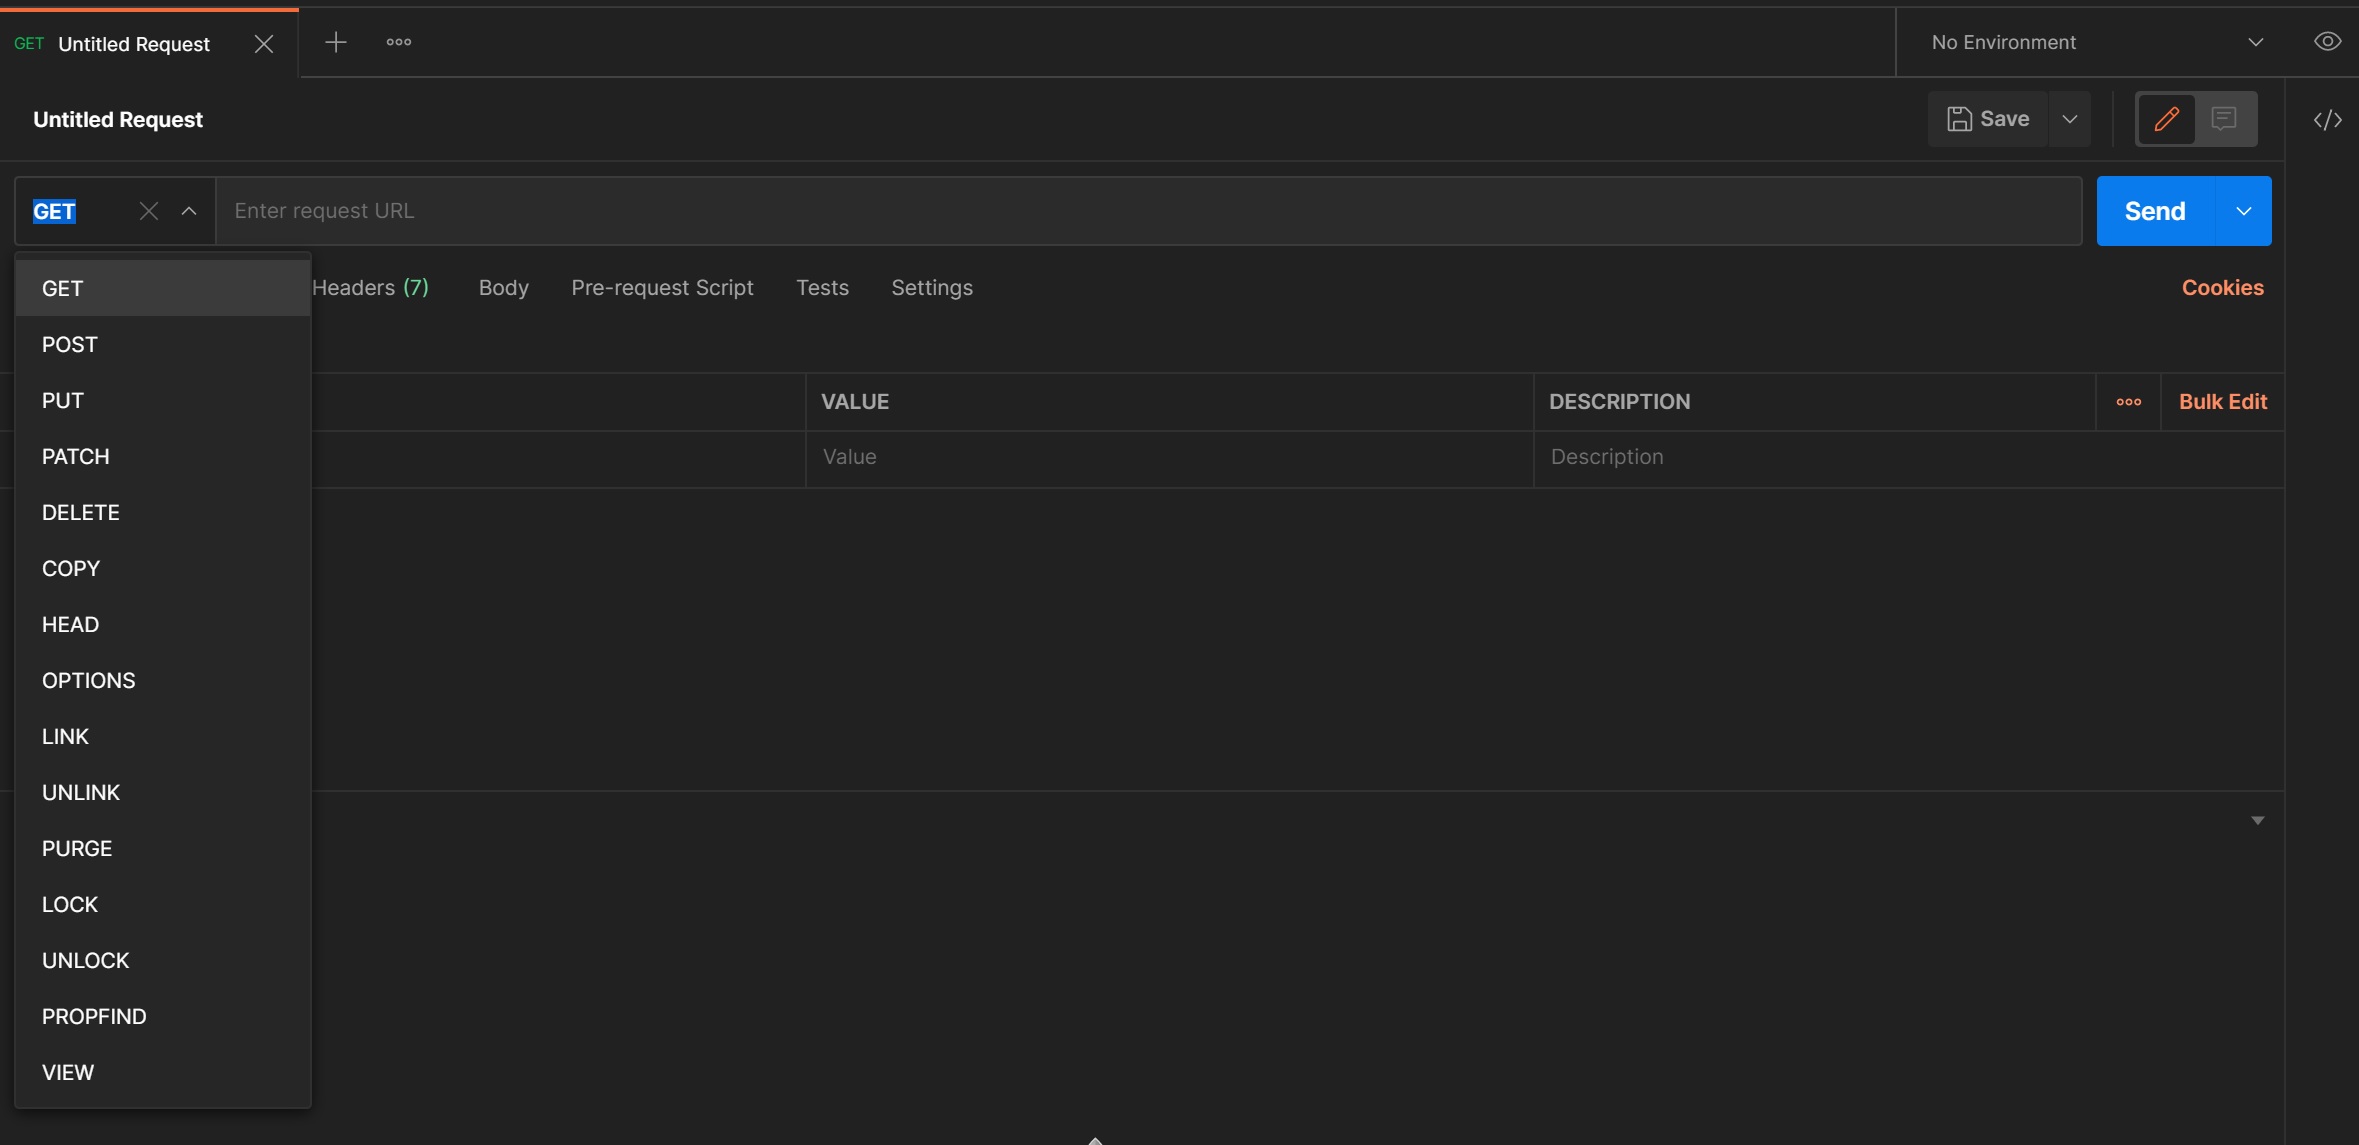
Firstly I am going to cover how to create a request in more depth and the various options that you can use, as mentioned in my first section Postman supports many REST API commands covering the most commonly used ones GET, POST, PUT and DELETE, the URL bar is available to any URL for example http, https, etc. Don't forget once you have created your request save it to a colelction for later use or to be used by a collection runner
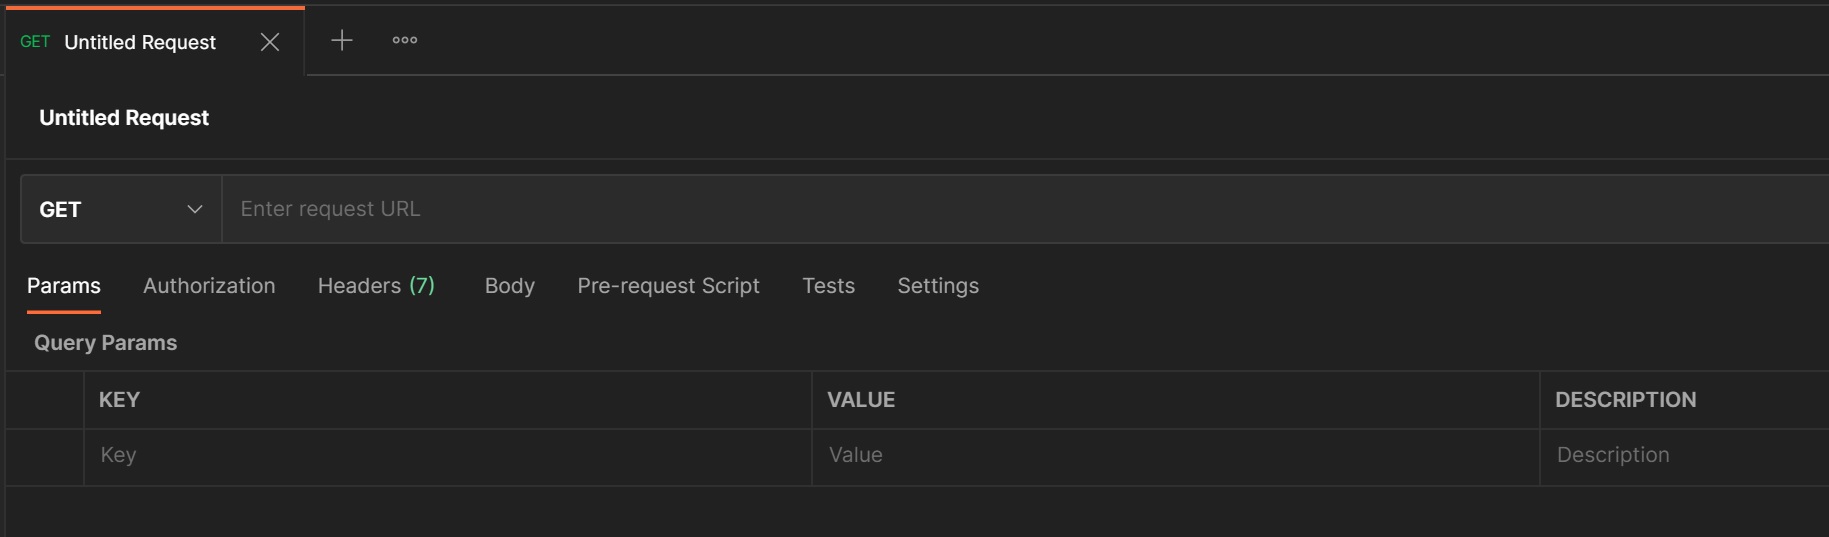
The Params tab allows to to enter any parameters that you want to send to the server, you can also do this on the URL bar, here you enter a key name and its value, you will see them being added to the URL bar
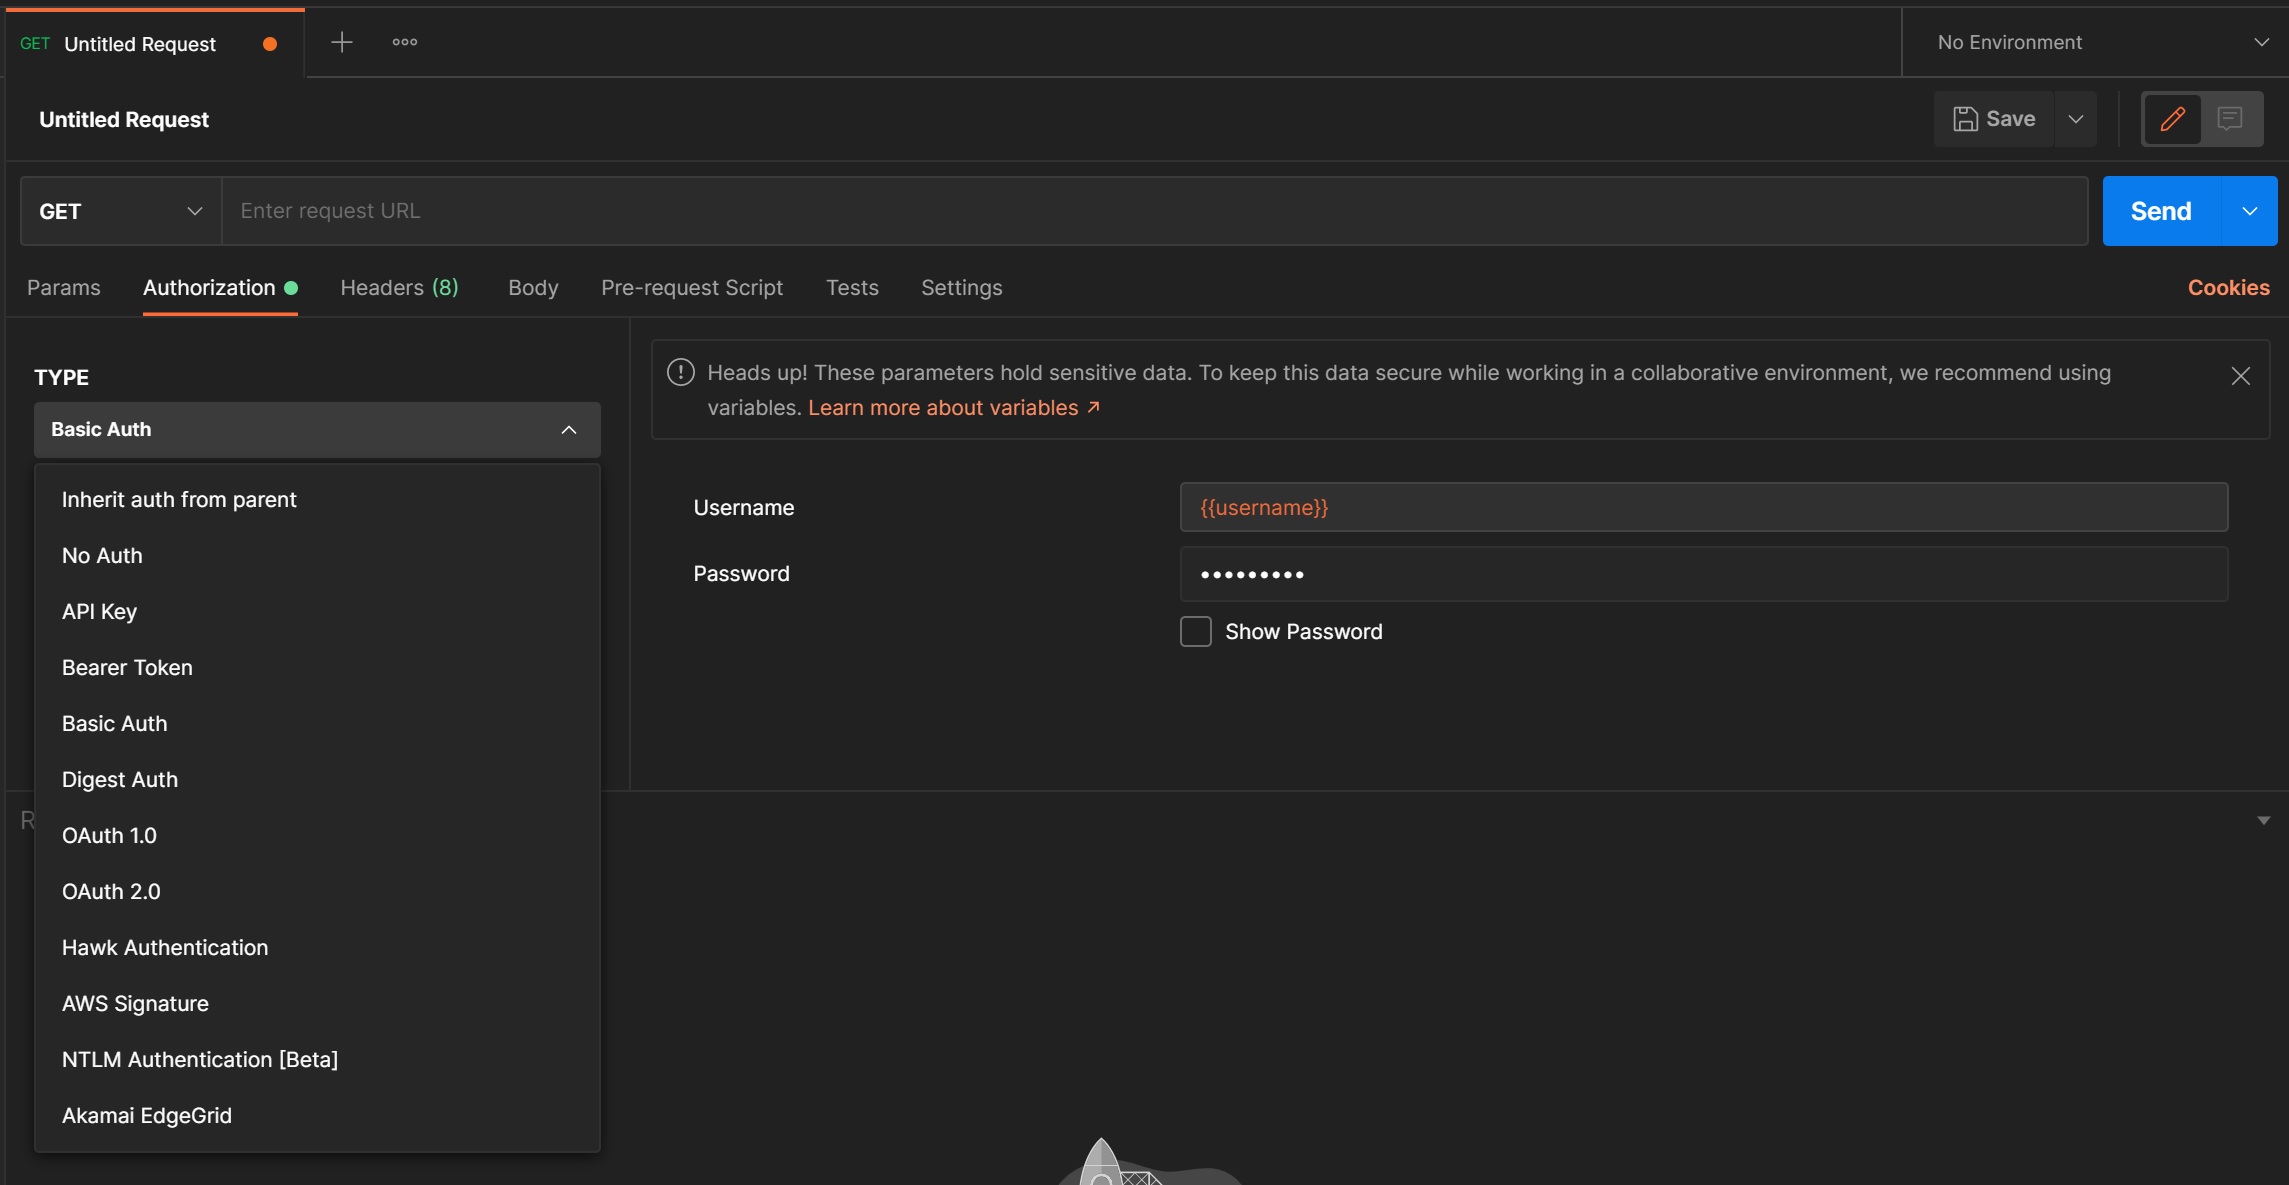
The target server or API may request authentication to process your request, postman supports many types of authentication as you can see below, here I am using a basic auth example, also notice that I am using a variable for the Username
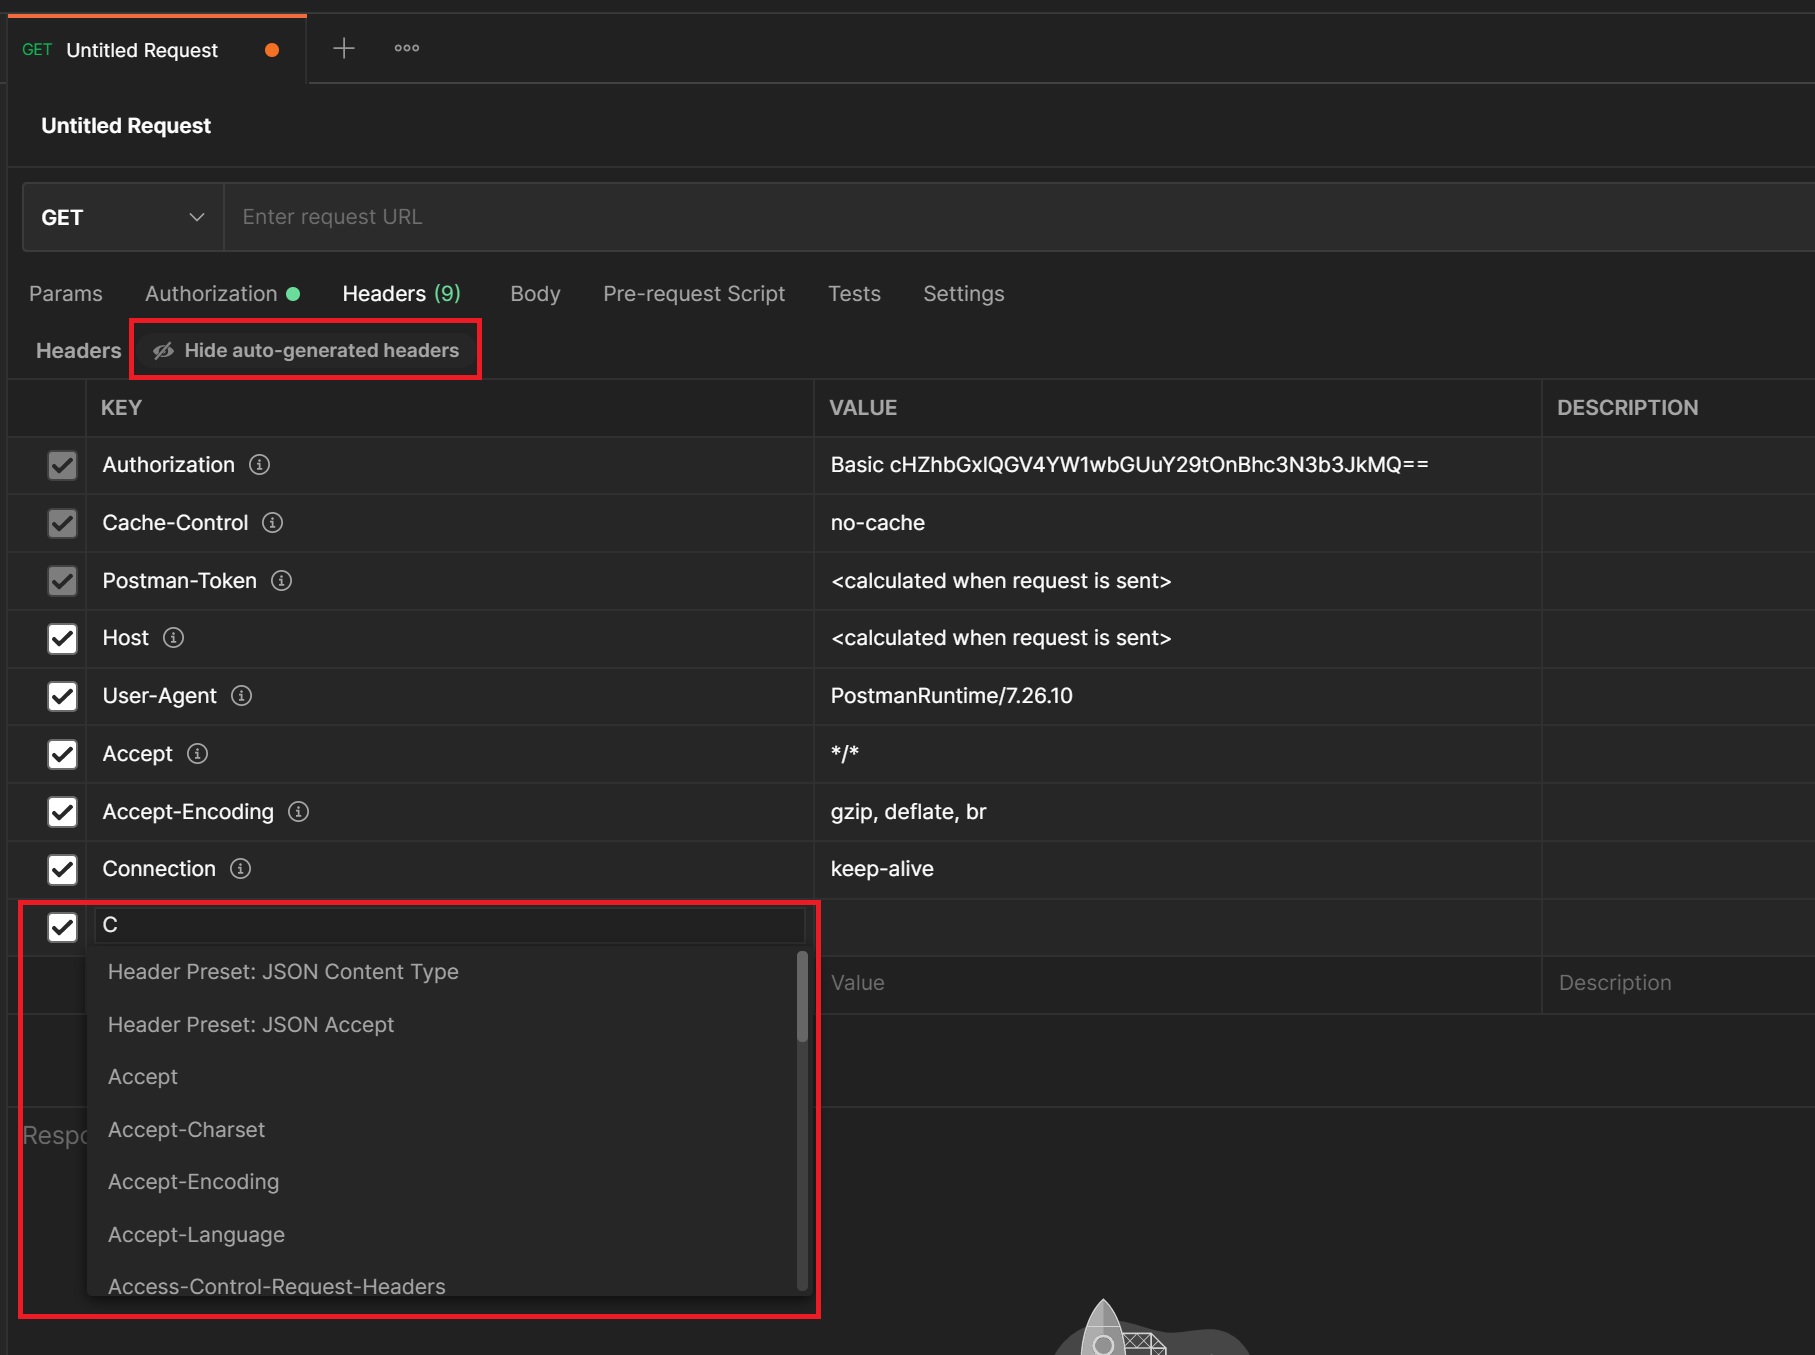
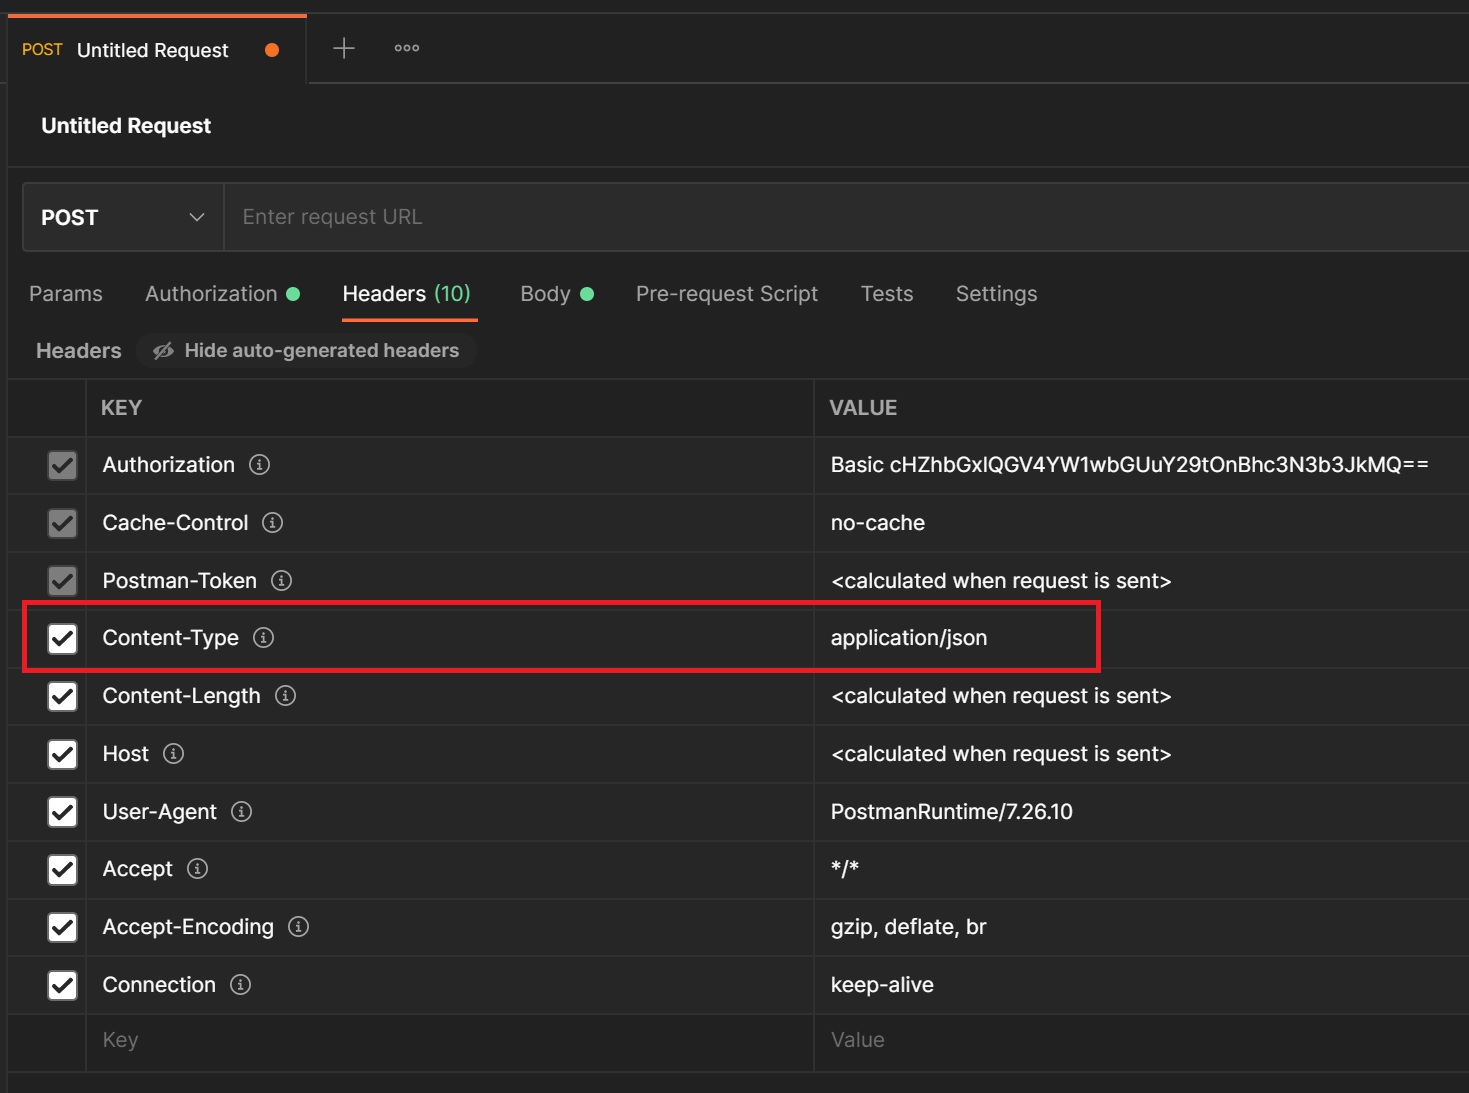
Next we come to headers, HTTP headers let the client and the server pass additional information with an HTTP request or response. An HTTP header consists of its case-insensitive name followed by a colon (:), then by its value, in order to see the headers click on the hidden button, there are many HTTP headers, when adding one Postman uses a autofill feature to ttry and determine the header you require, you can also add you own specific header. If you hoover over a header a tool tip pops up giving information about that header.
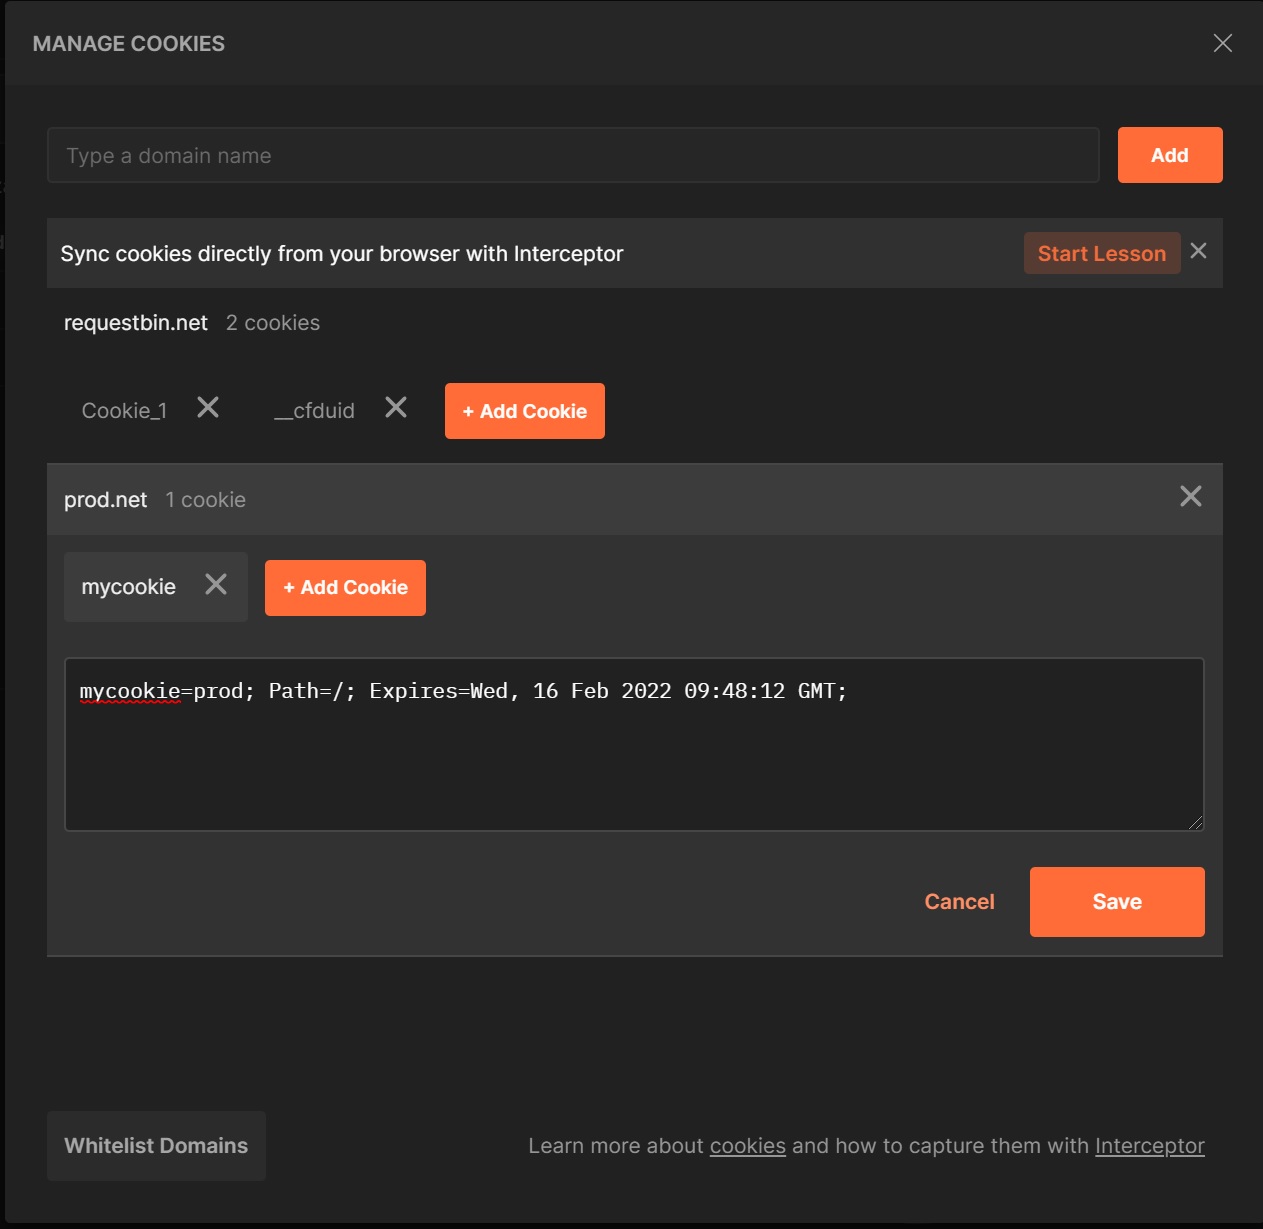
An HTTP cookie (web cookie, browser cookie) is a small piece of data that a server sends to the user's web browser. The browser may store it and send it back with later requests to the same server. Typically, it's used to tell if two requests came from the same browser — keeping a user logged-in, for example. Selecting the cookie button you open up a cookie manager screen, here you can see some cookies that have already been created from previous requests.

You also can create your own cookies, the basic cookie contains a name, its value and a expiry date, its also used for a specific domain as you can see in my example below, I have created a cookie for the prod.net domain called mycookie with a value of prod.
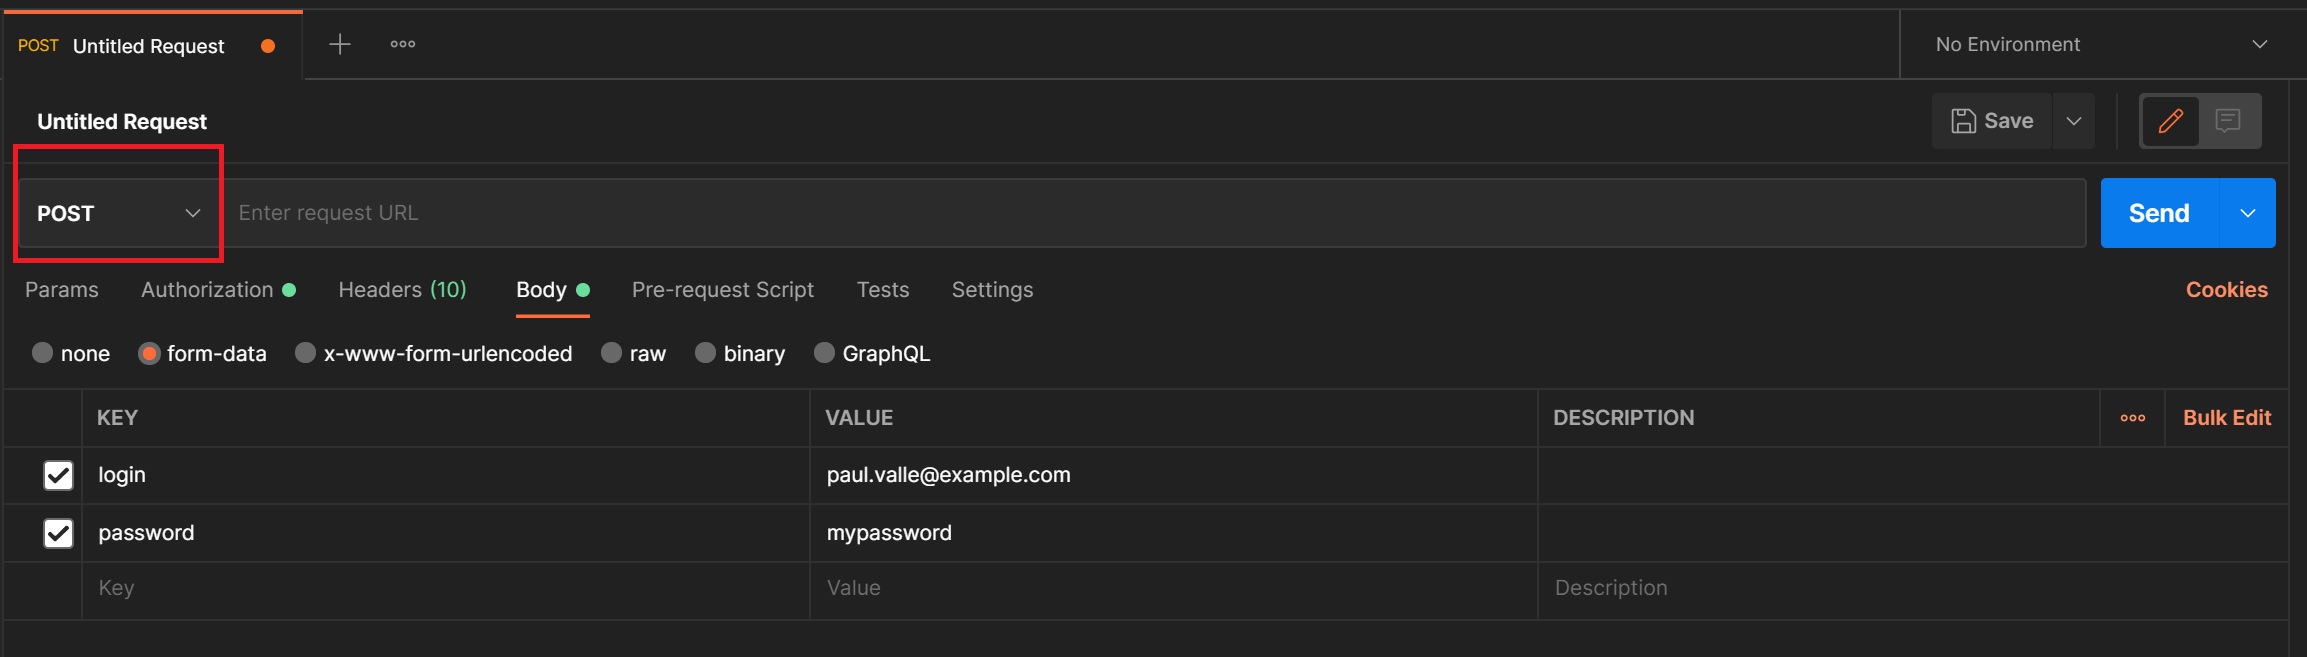
Next we look at the body which is only available for different HTTP REST requests, in my example below I am using POST, the body can be of different types, the most common are form-data which sends data as if it was a HTML form consisting of key/value pairs, the other is raw but using a content type of JSON
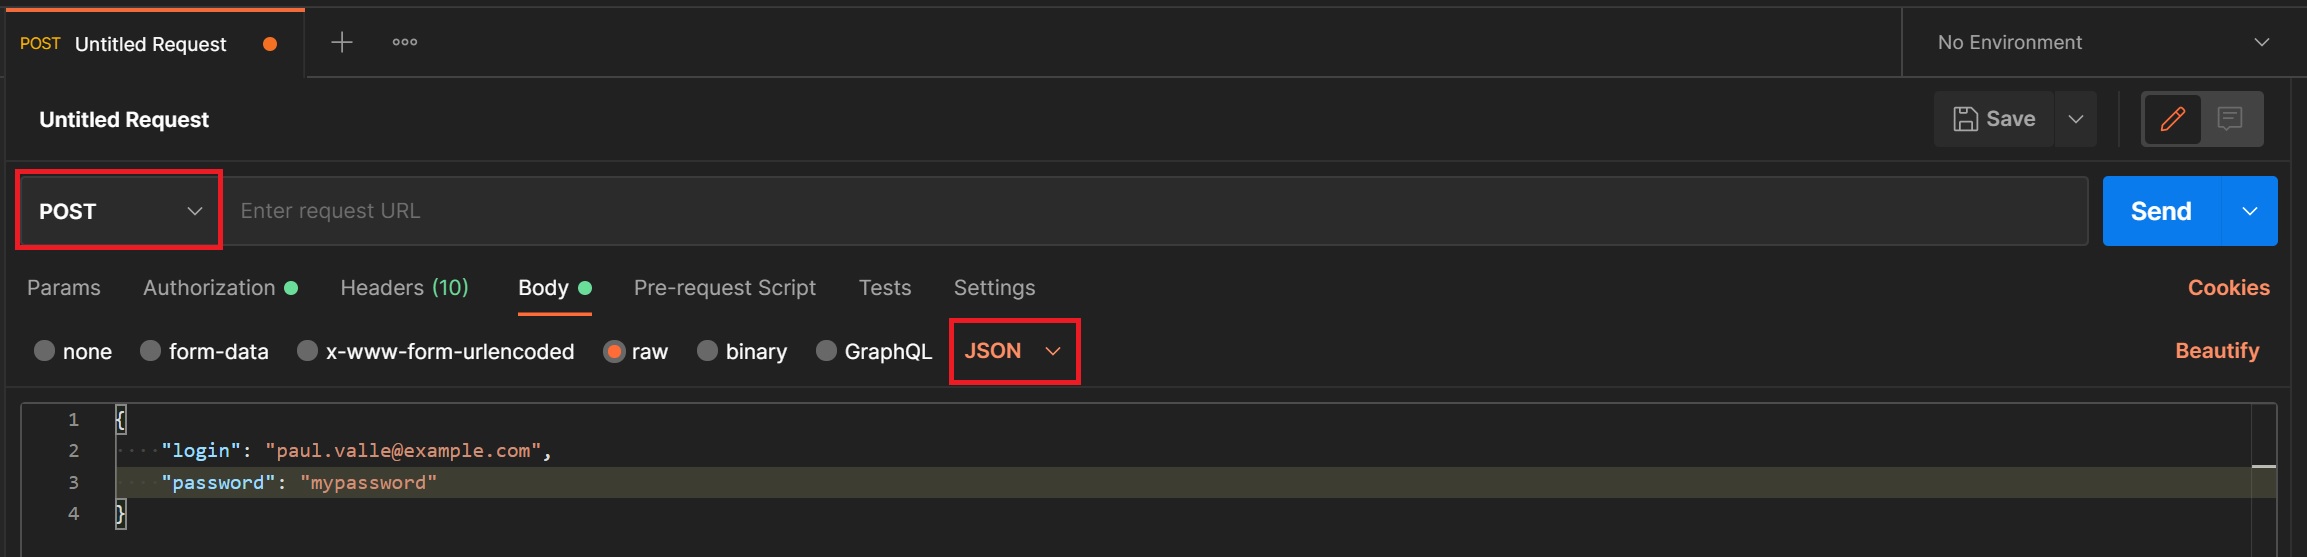
Below is my raw JSON type example, you can also send binary for example a image file
One thing to note is as select the boidy type the header Content-Type reflects what you are sending this header is used by the server to determine what data type you are sending in the body, instead of trying to guess what you have sent.
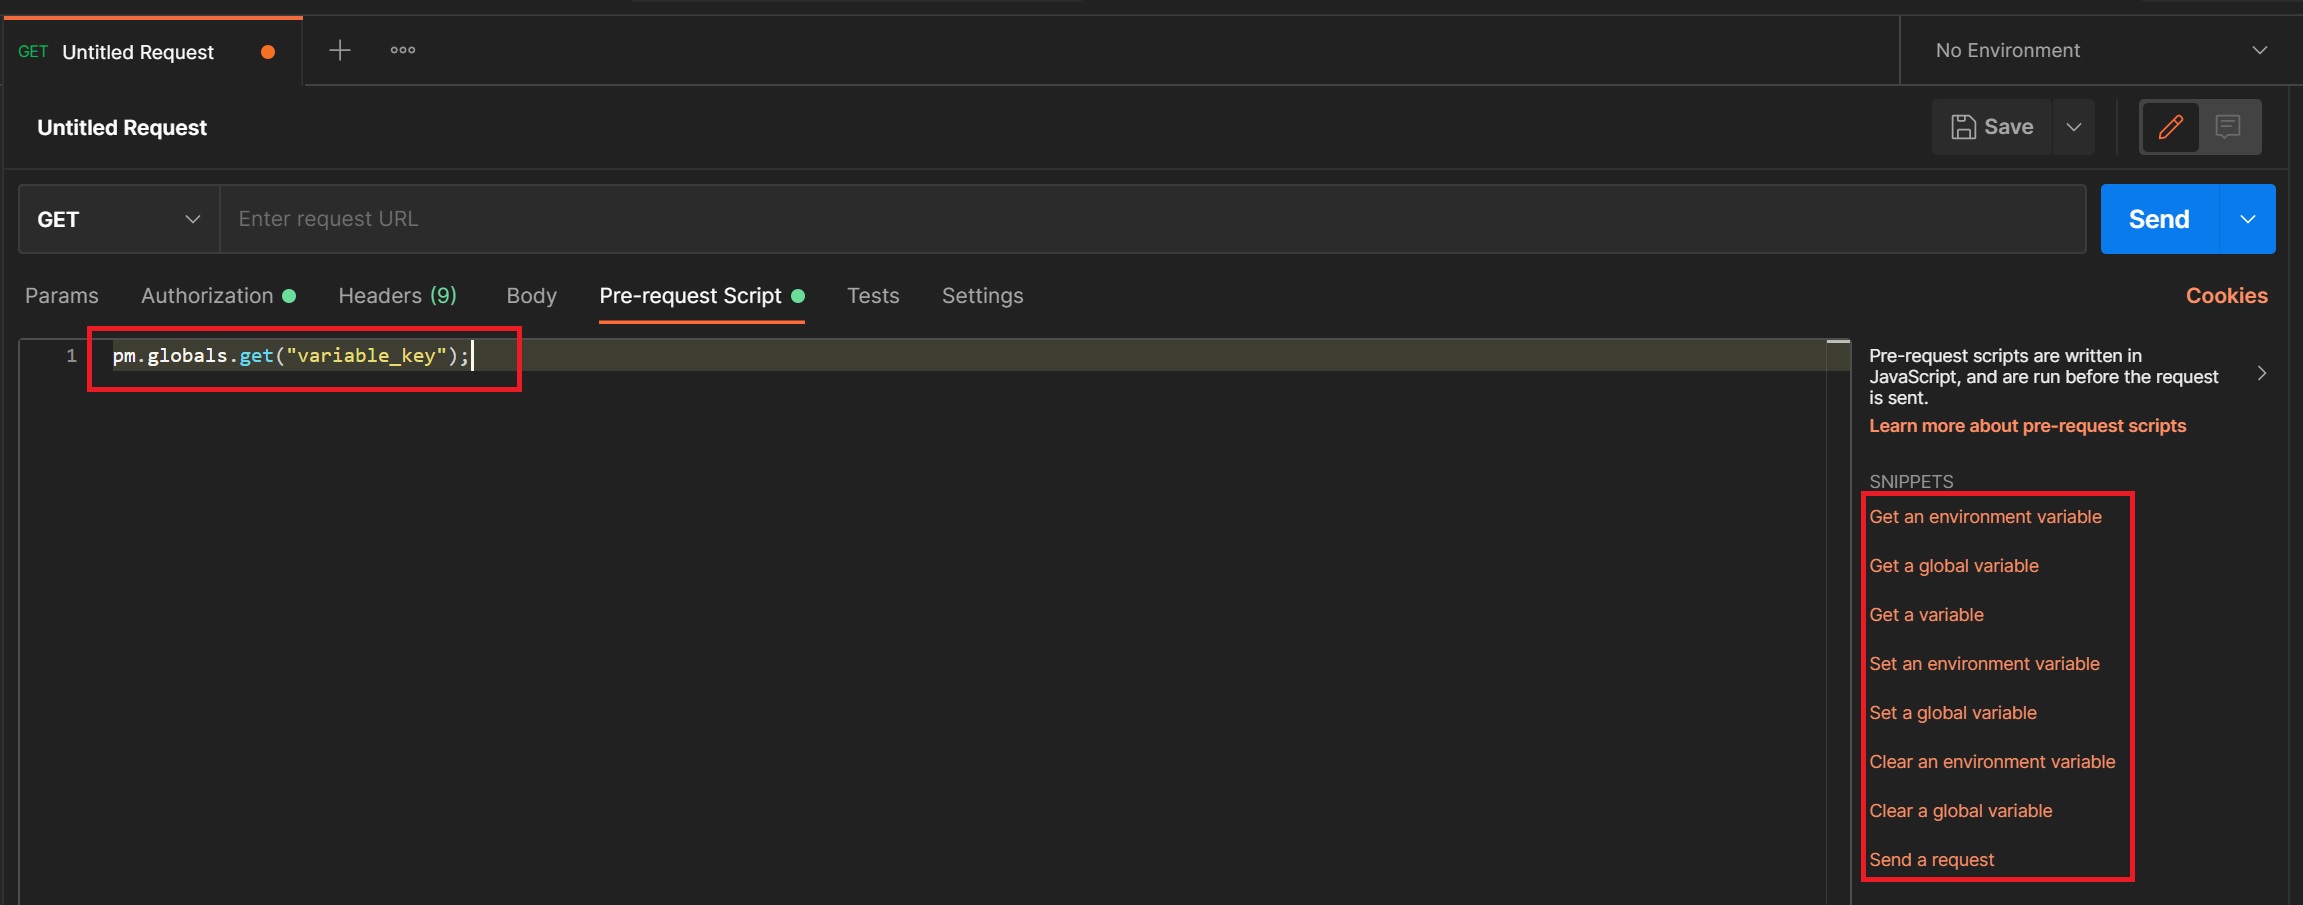
Next we add some pre-request script for example in the below I am obtain a variable, if you look to the right-hand side there are a number of preconfigured scripts, simply select one and it will be created in the scripts panel.
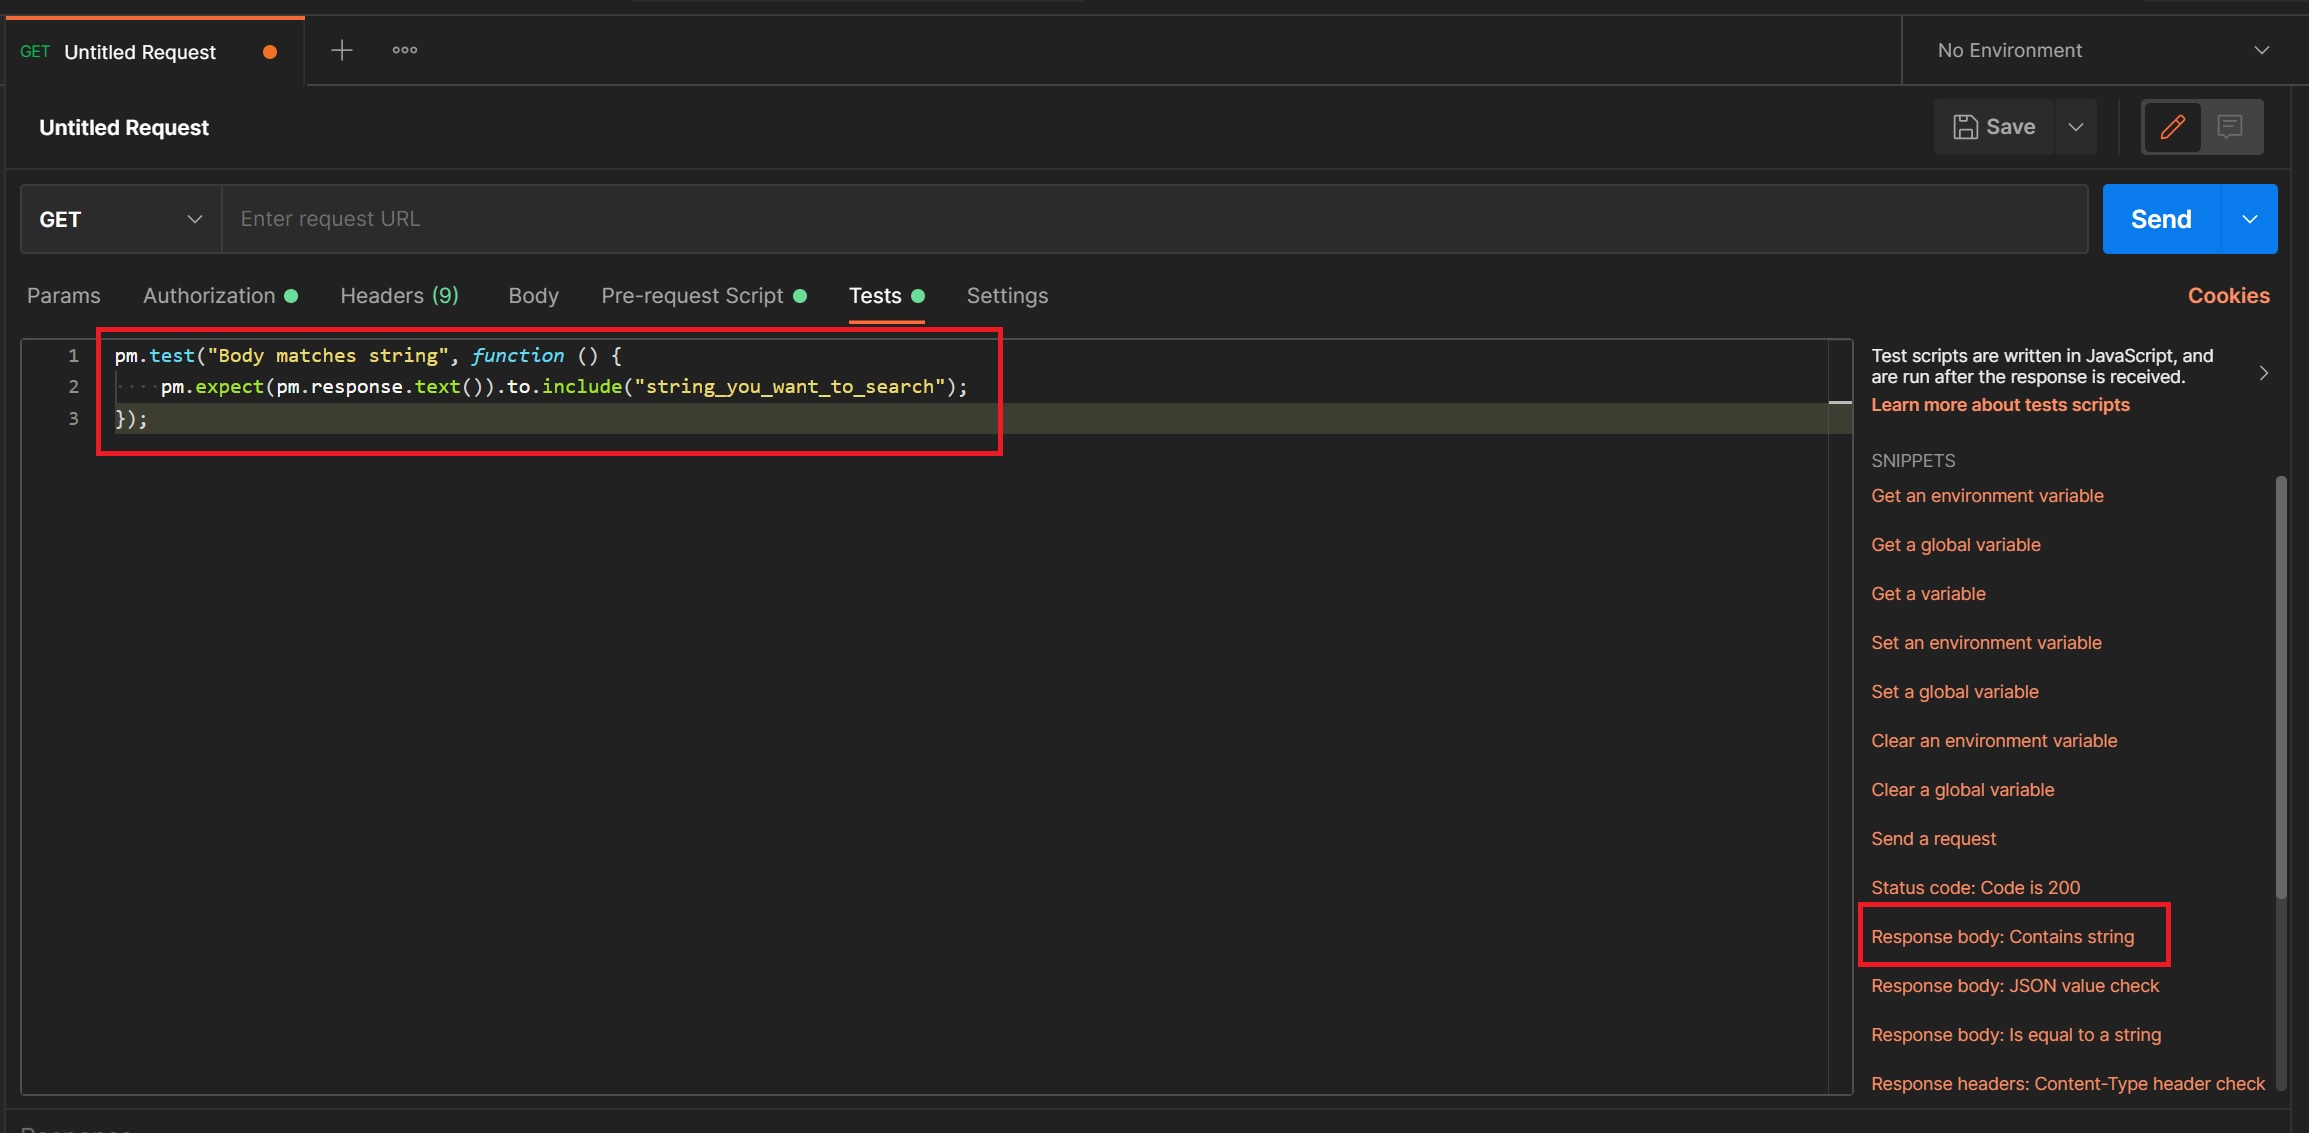
As with pre-request scripts we have many tests that we can use, again in the right-hand side you simply choose one and it will be created in the tests panel, in my example below I selected Response body: Contains string and the code was automatically generated for me.
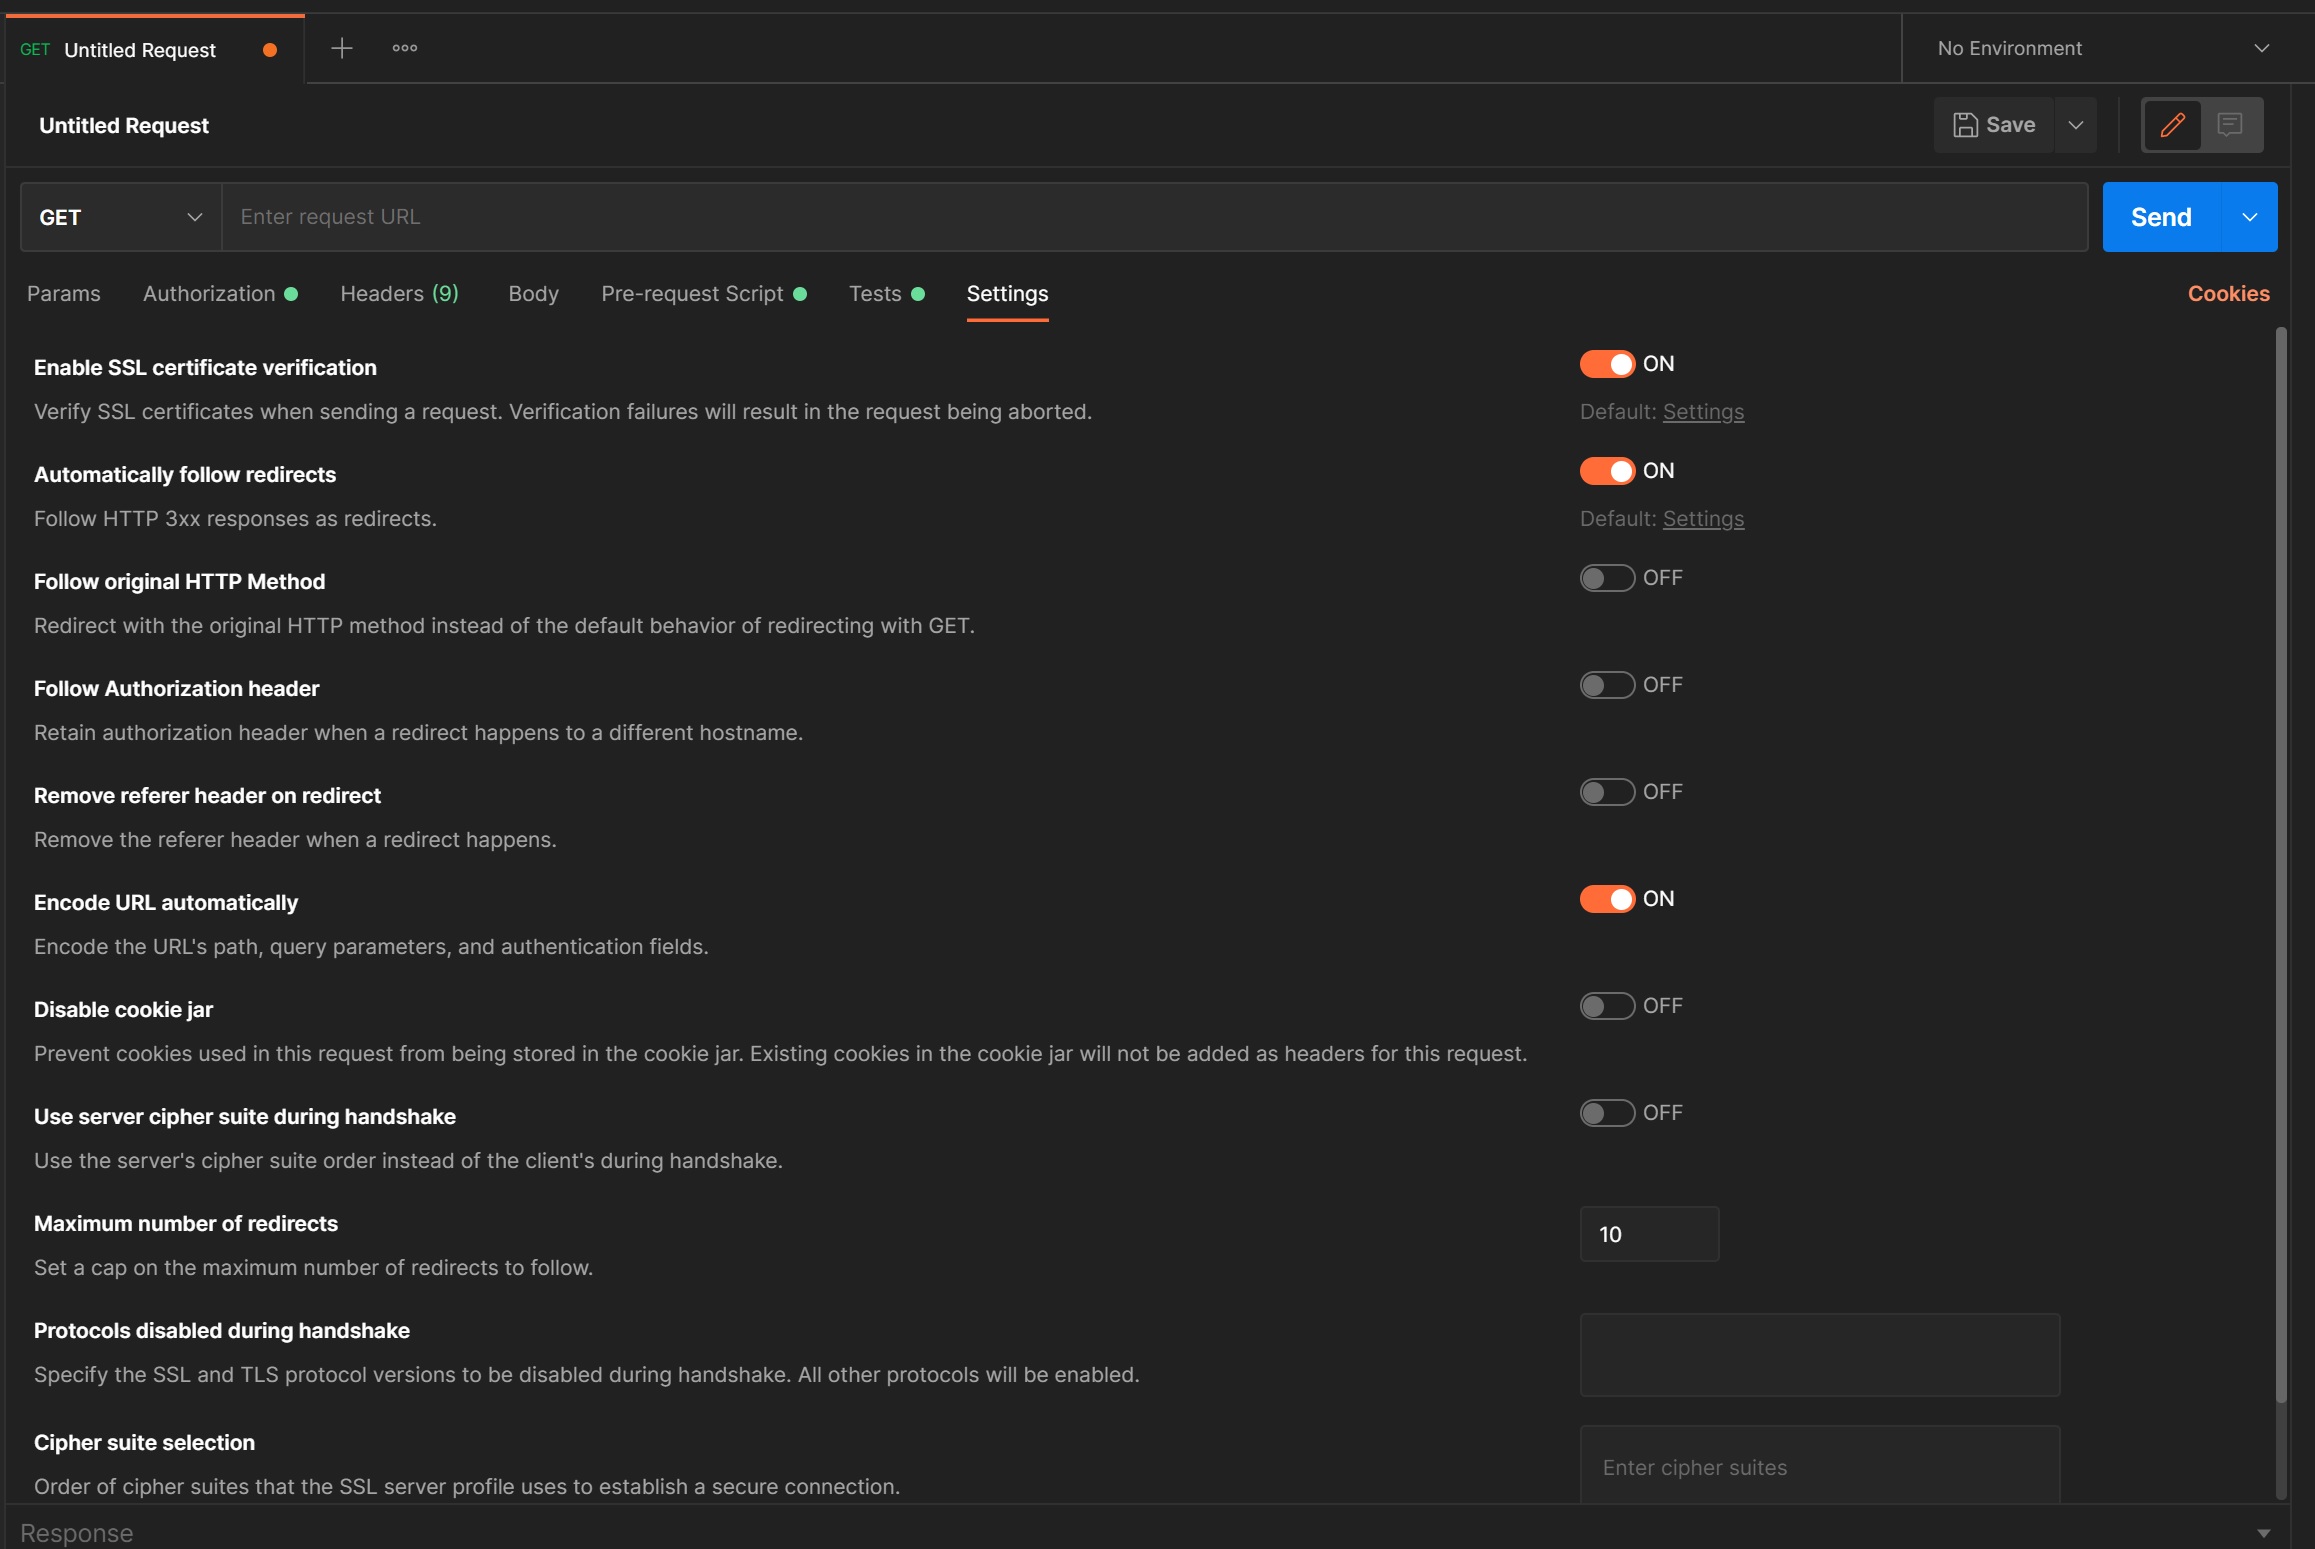
Lastly we have the settings page, there are a number of settings that you can either activate or deactivate, most of them are self explaining, sometimes you might need to disable (or not check) something during a test run
Once you have run your request you can view the result in the result oanel at the bottom of the request, first if you look at the top right-hand side you get various pieces of information about the request the important status code, how long it took (its not deadly acurate) and the size of the response in bytes (useful if transferring large amounts of data). You have a few options on how you want to display the results, pretty format being the most common of which you can view in JSON, XML, HTML, etc. You can also view the response headers and any cookies and if you have setup any tests the results of those tests.

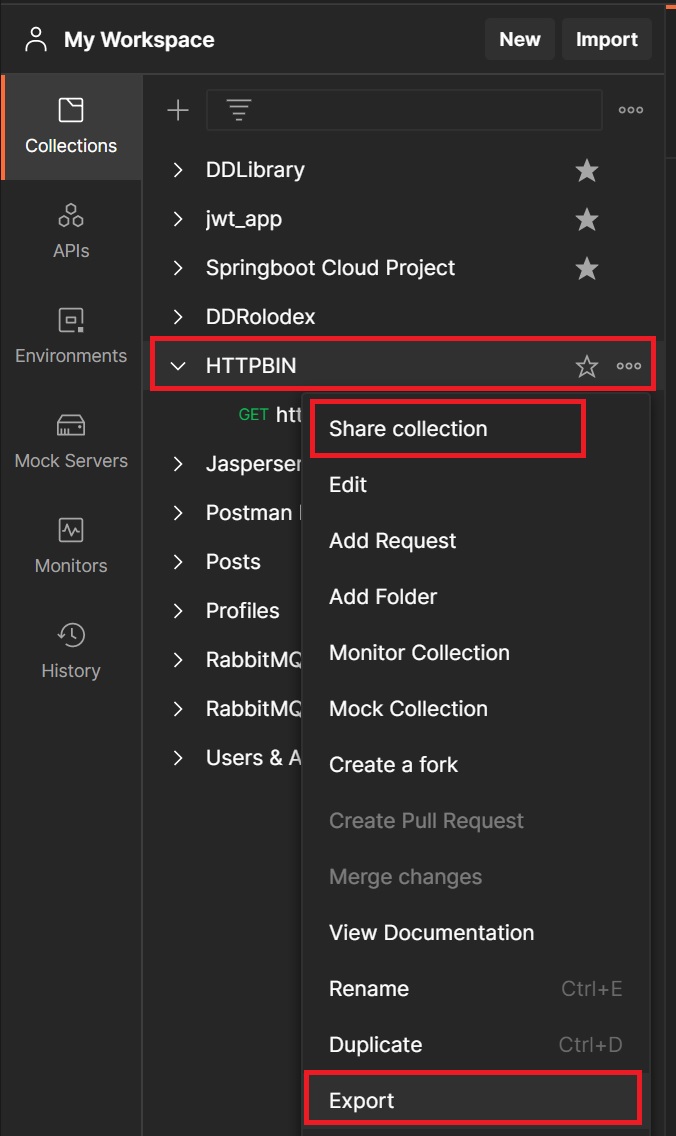
You can share you requests with other staff members, by exporting the collection, select the collection options and then select export, it will be exported as a JSON file or you can share a folder or files
As mentioned you can share collections with other team members by creating a team

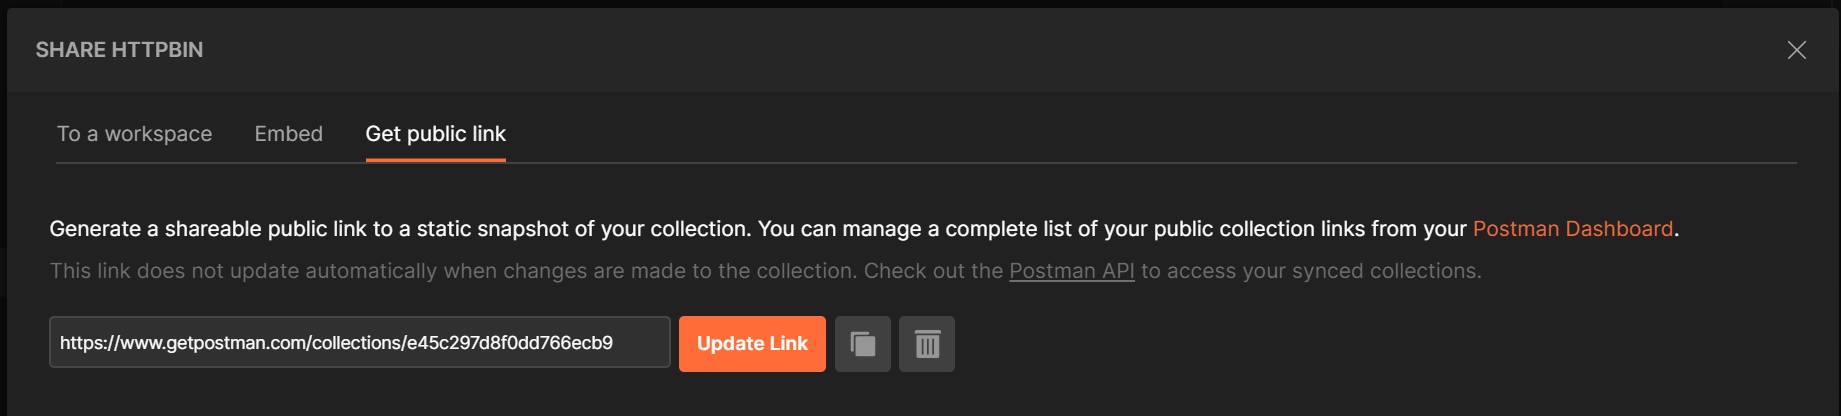
The other method is simply create a URL link as per below and sent the link to whom you wish to share with
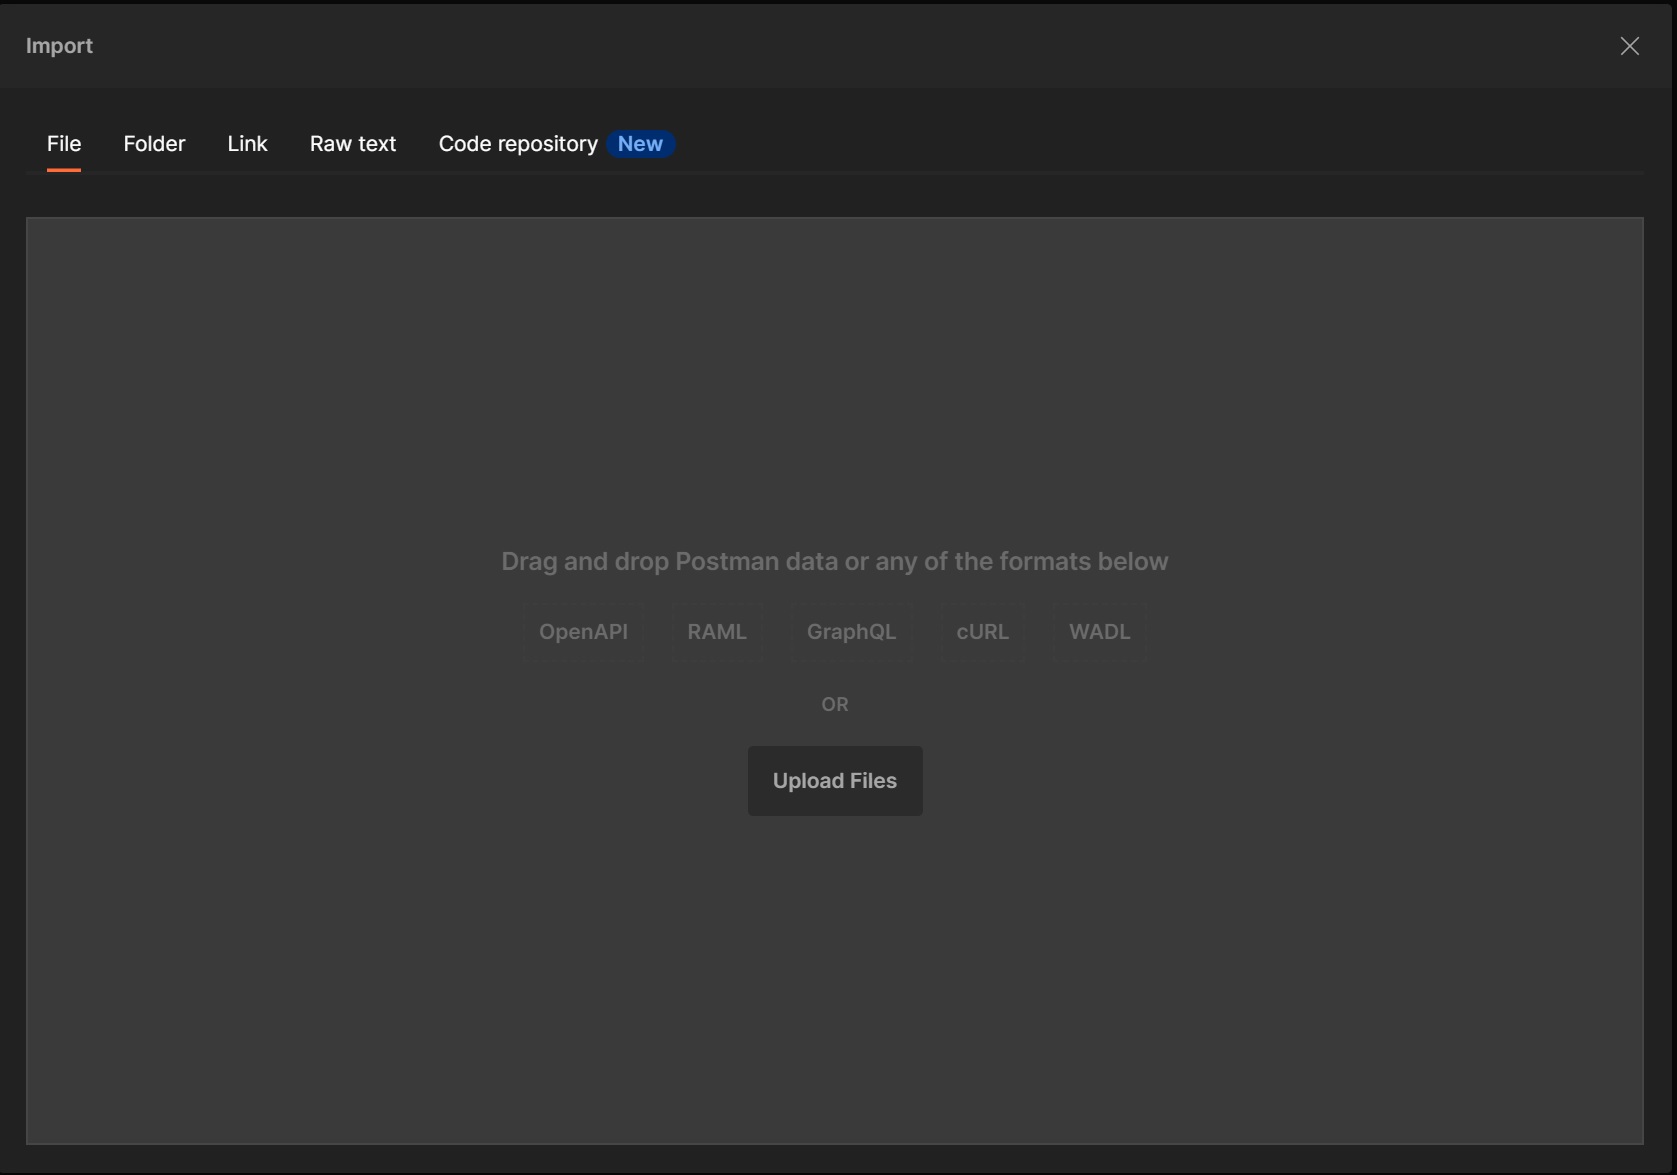
You can also import other staff members collections as well using the import button at the top of the collection panel
You have various way to import a collection, file/s URL link, etc.
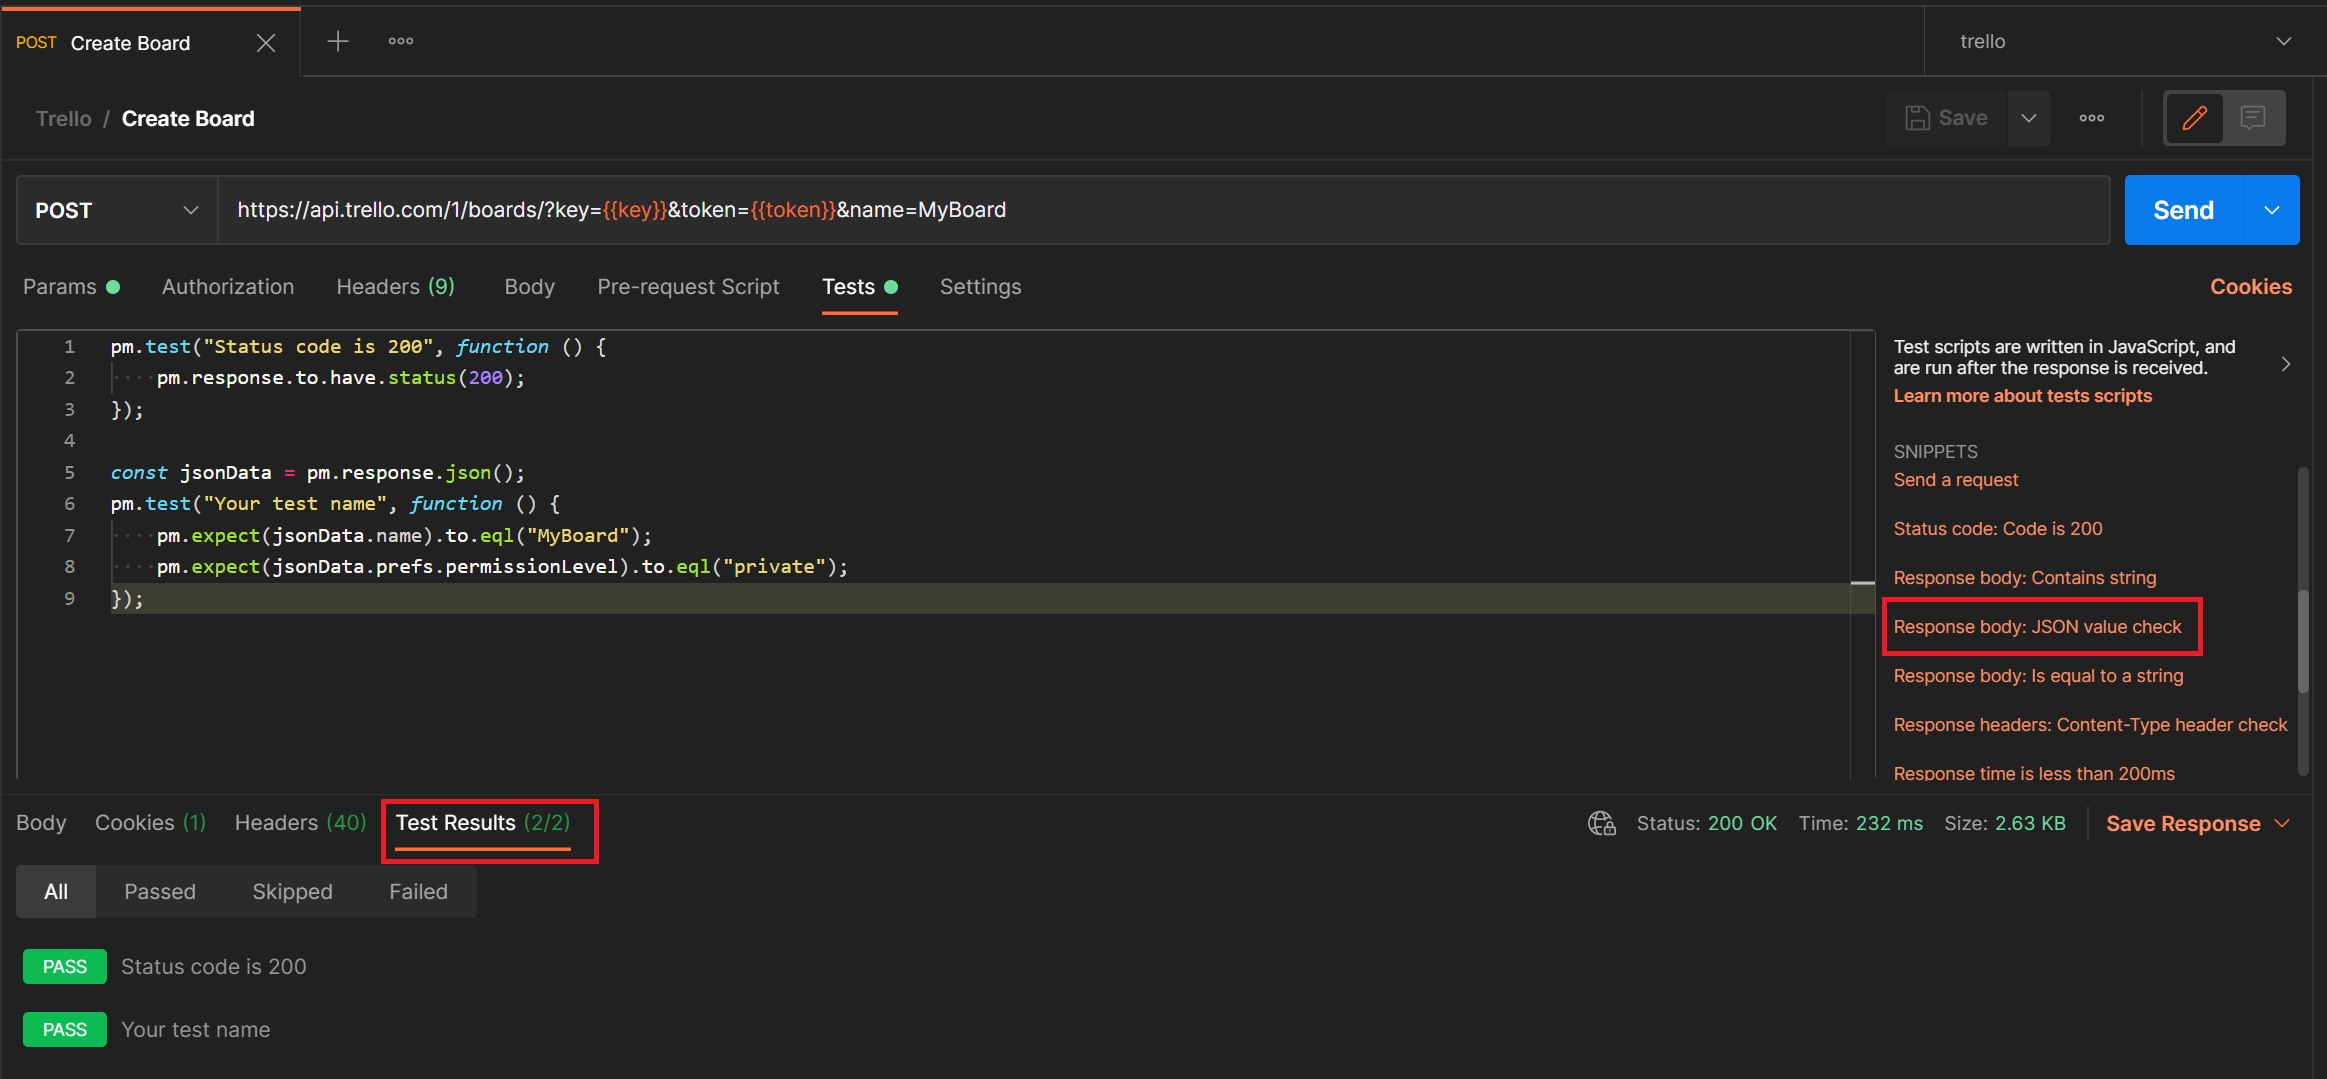
In this section I am going to cover basic test scripts, in the below example I am creating a Trello board, notice that I have created a trello environment with a key and token keys which will be used to login to my Trello account, I then use a name parameter for the board name, I will display the tests in a moment, when you send the request we get some data in the response I have highlighted the name and the premissionLevel which we will test next. Also notice that we get a status code 200 back meaning successful.
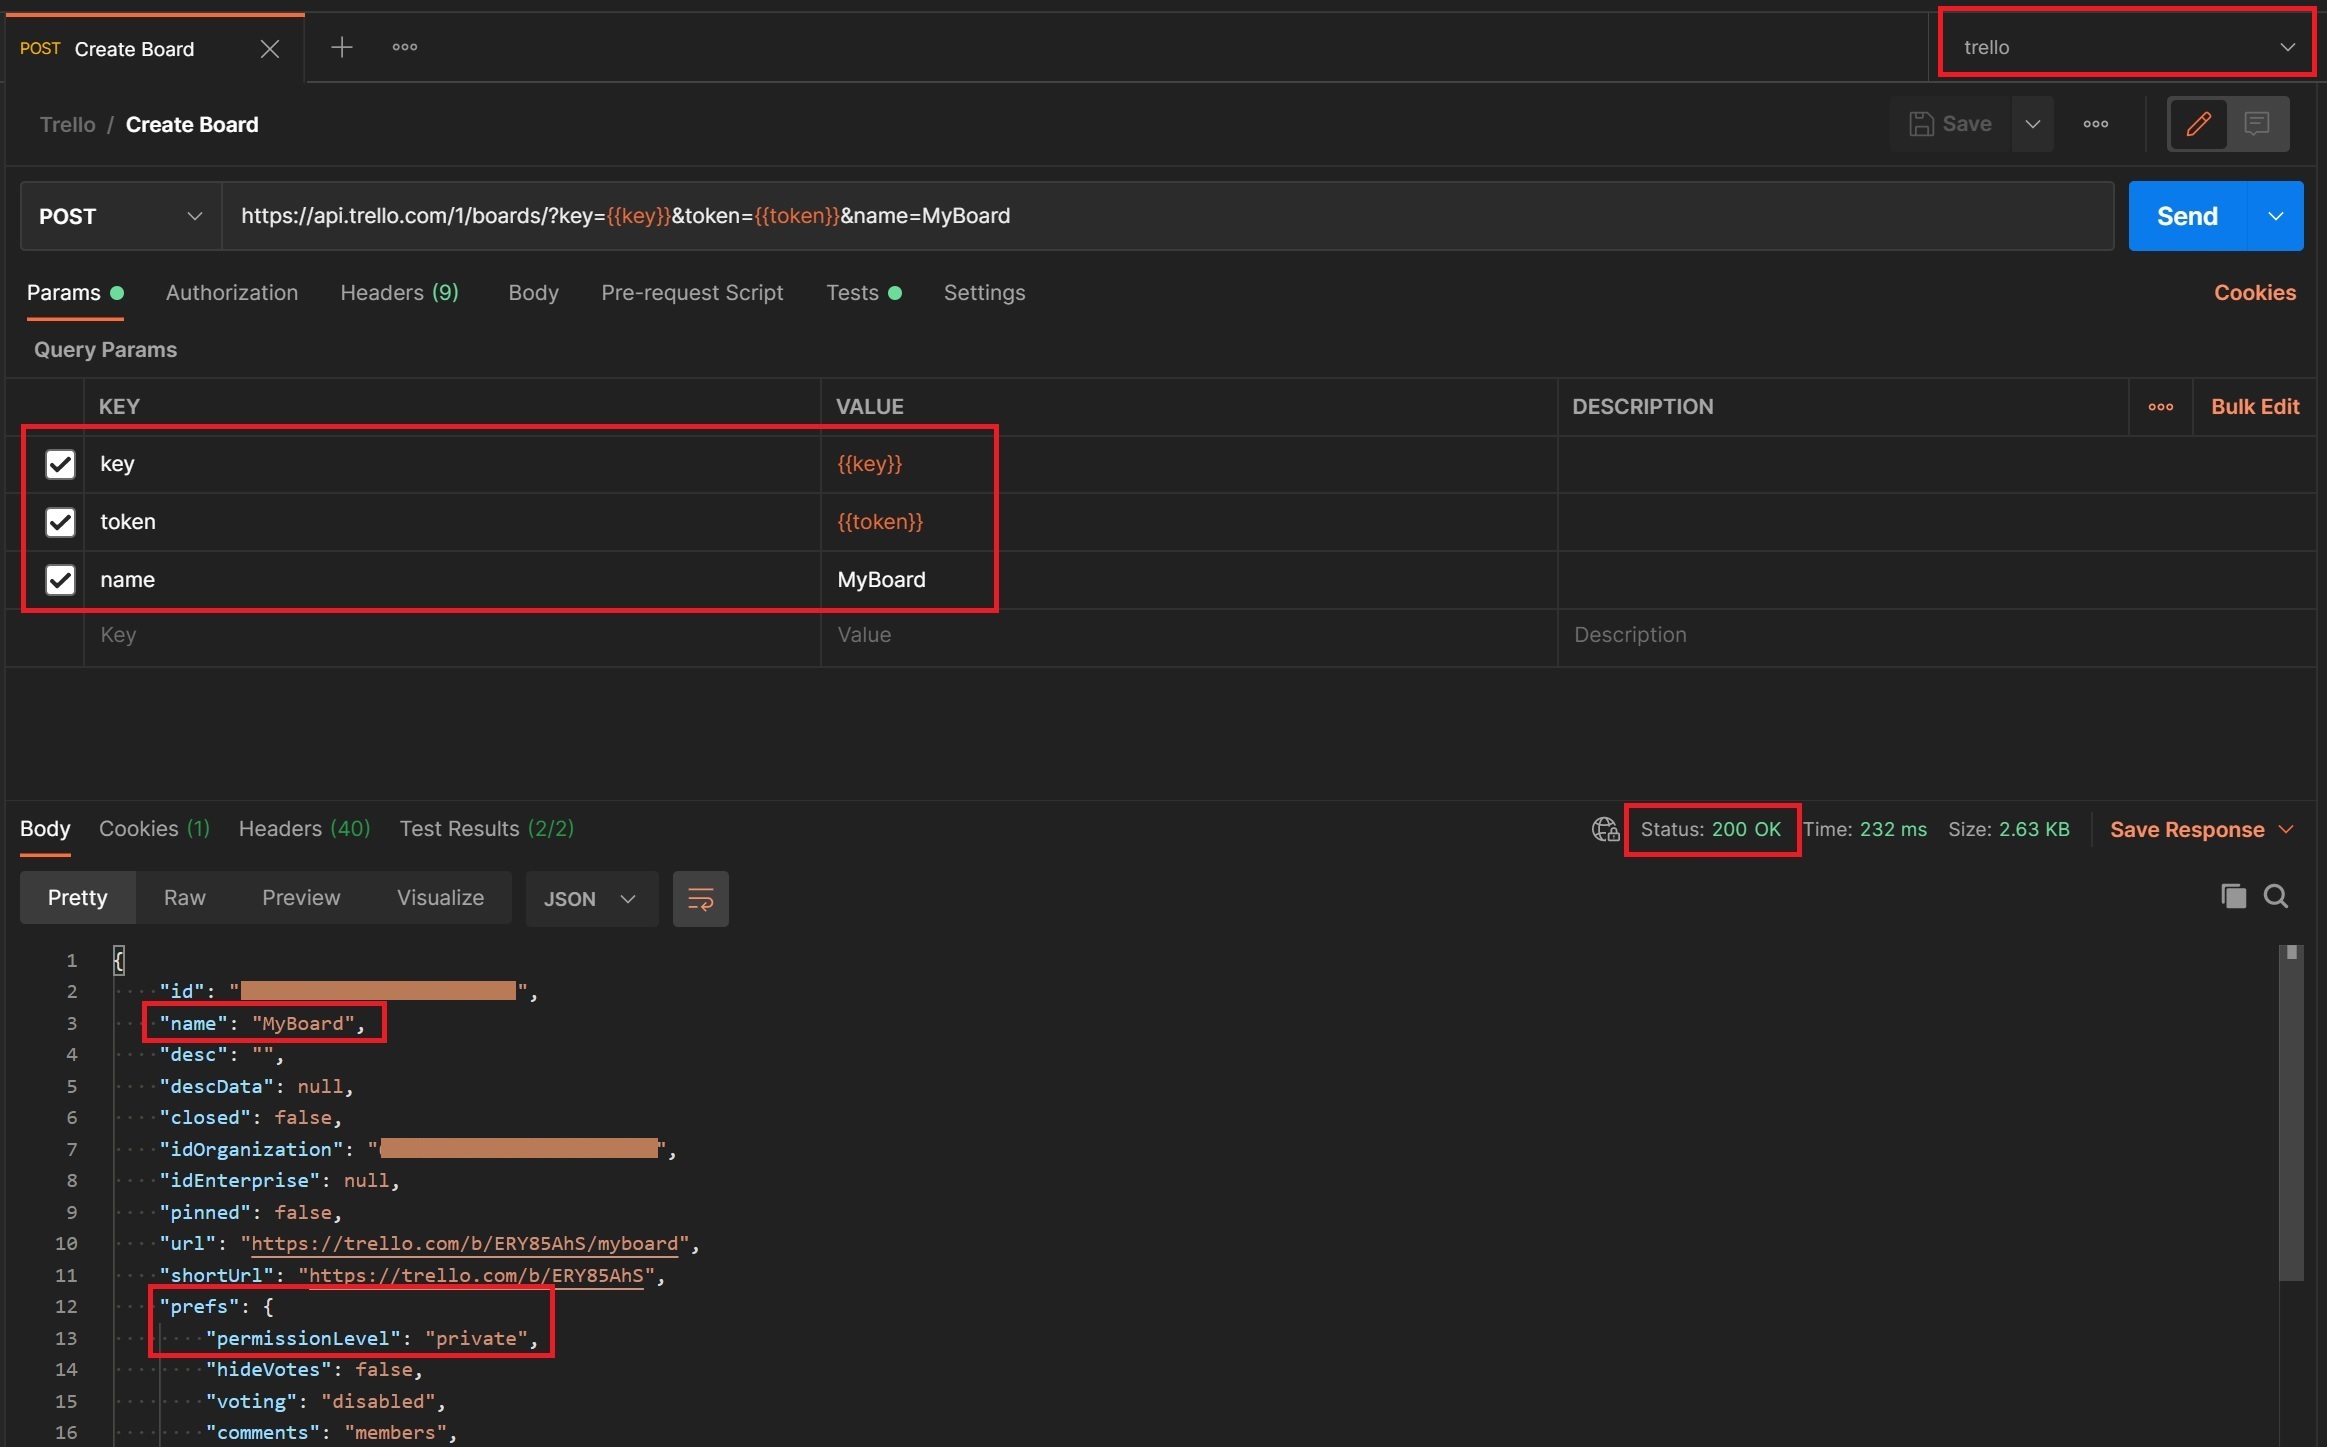
The first test is a simple test for a status code of 200, the second test I create a constant variable called jsonData which has the response data you saw in the previous screenshot, then I create two tests to first check the name is correct and secondly to check that the permission level is private.
To break down the test first we have pm.test which is always used for tests, the first argument is the test comment that you will see in the test results screen, then we have a standard javascript call back function which will indicate the test status true or false in my case.