In this section we take a look at using variables and tests, you can use the global variable section or even create your own environment in which you can create specific variables for that environment only. Lastly we take a brief look at tests and how we can incorporate them into a your testing.
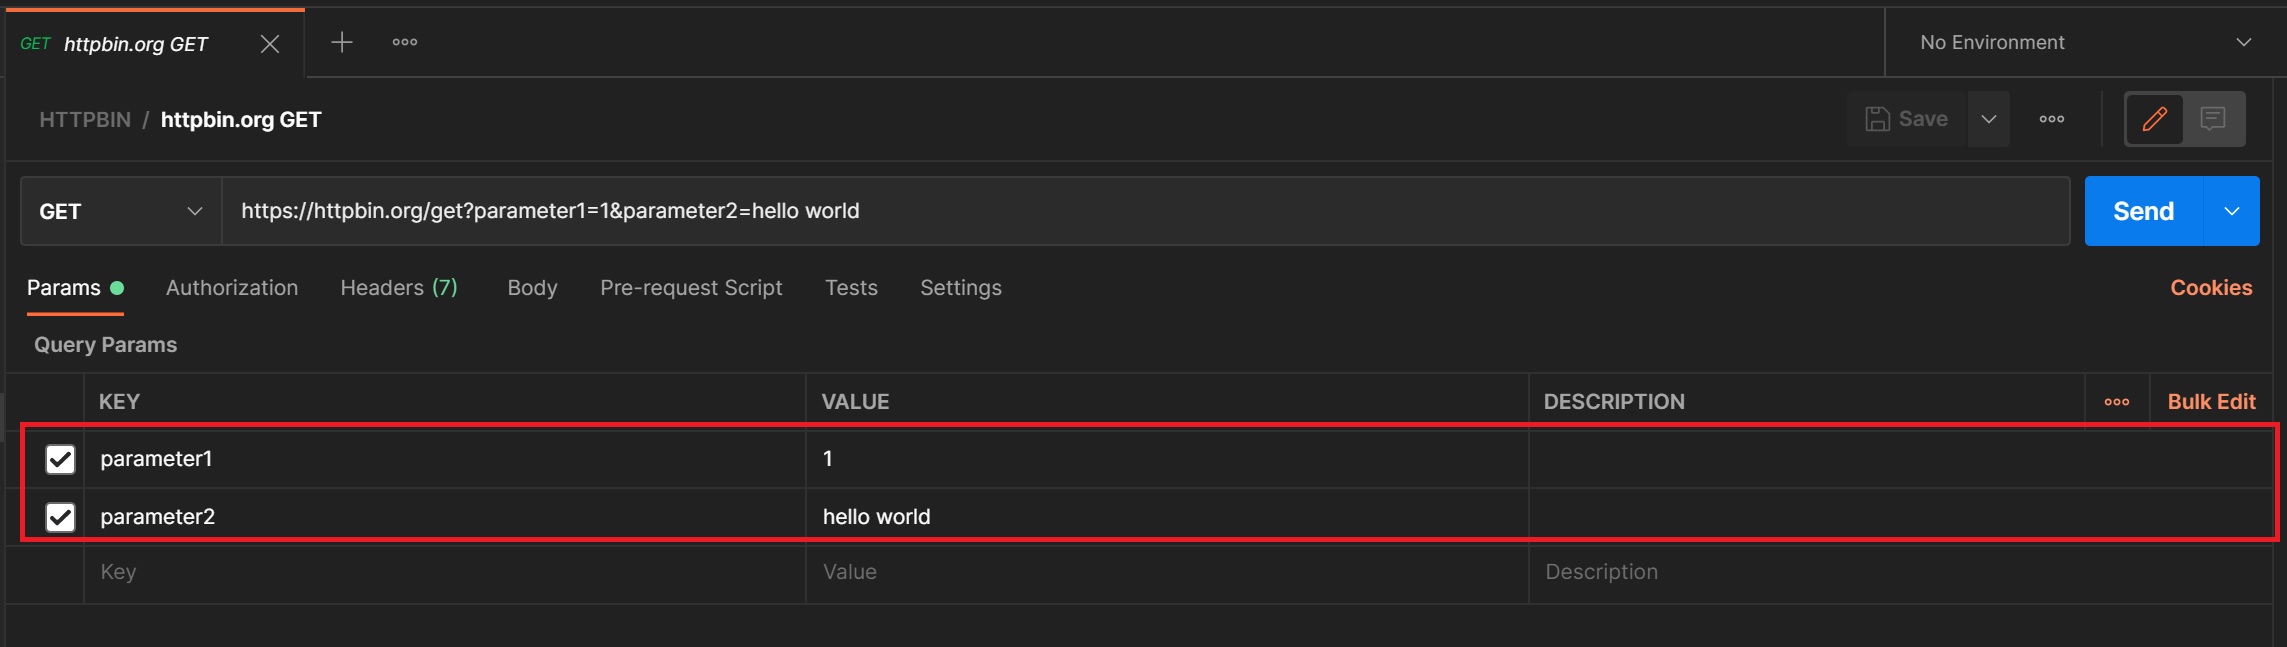
First we start with the very basic variable, as you know we can use parameters on the URL they are generally static and could be environment specific, in Postman we have the option to create global or environment specific variables.
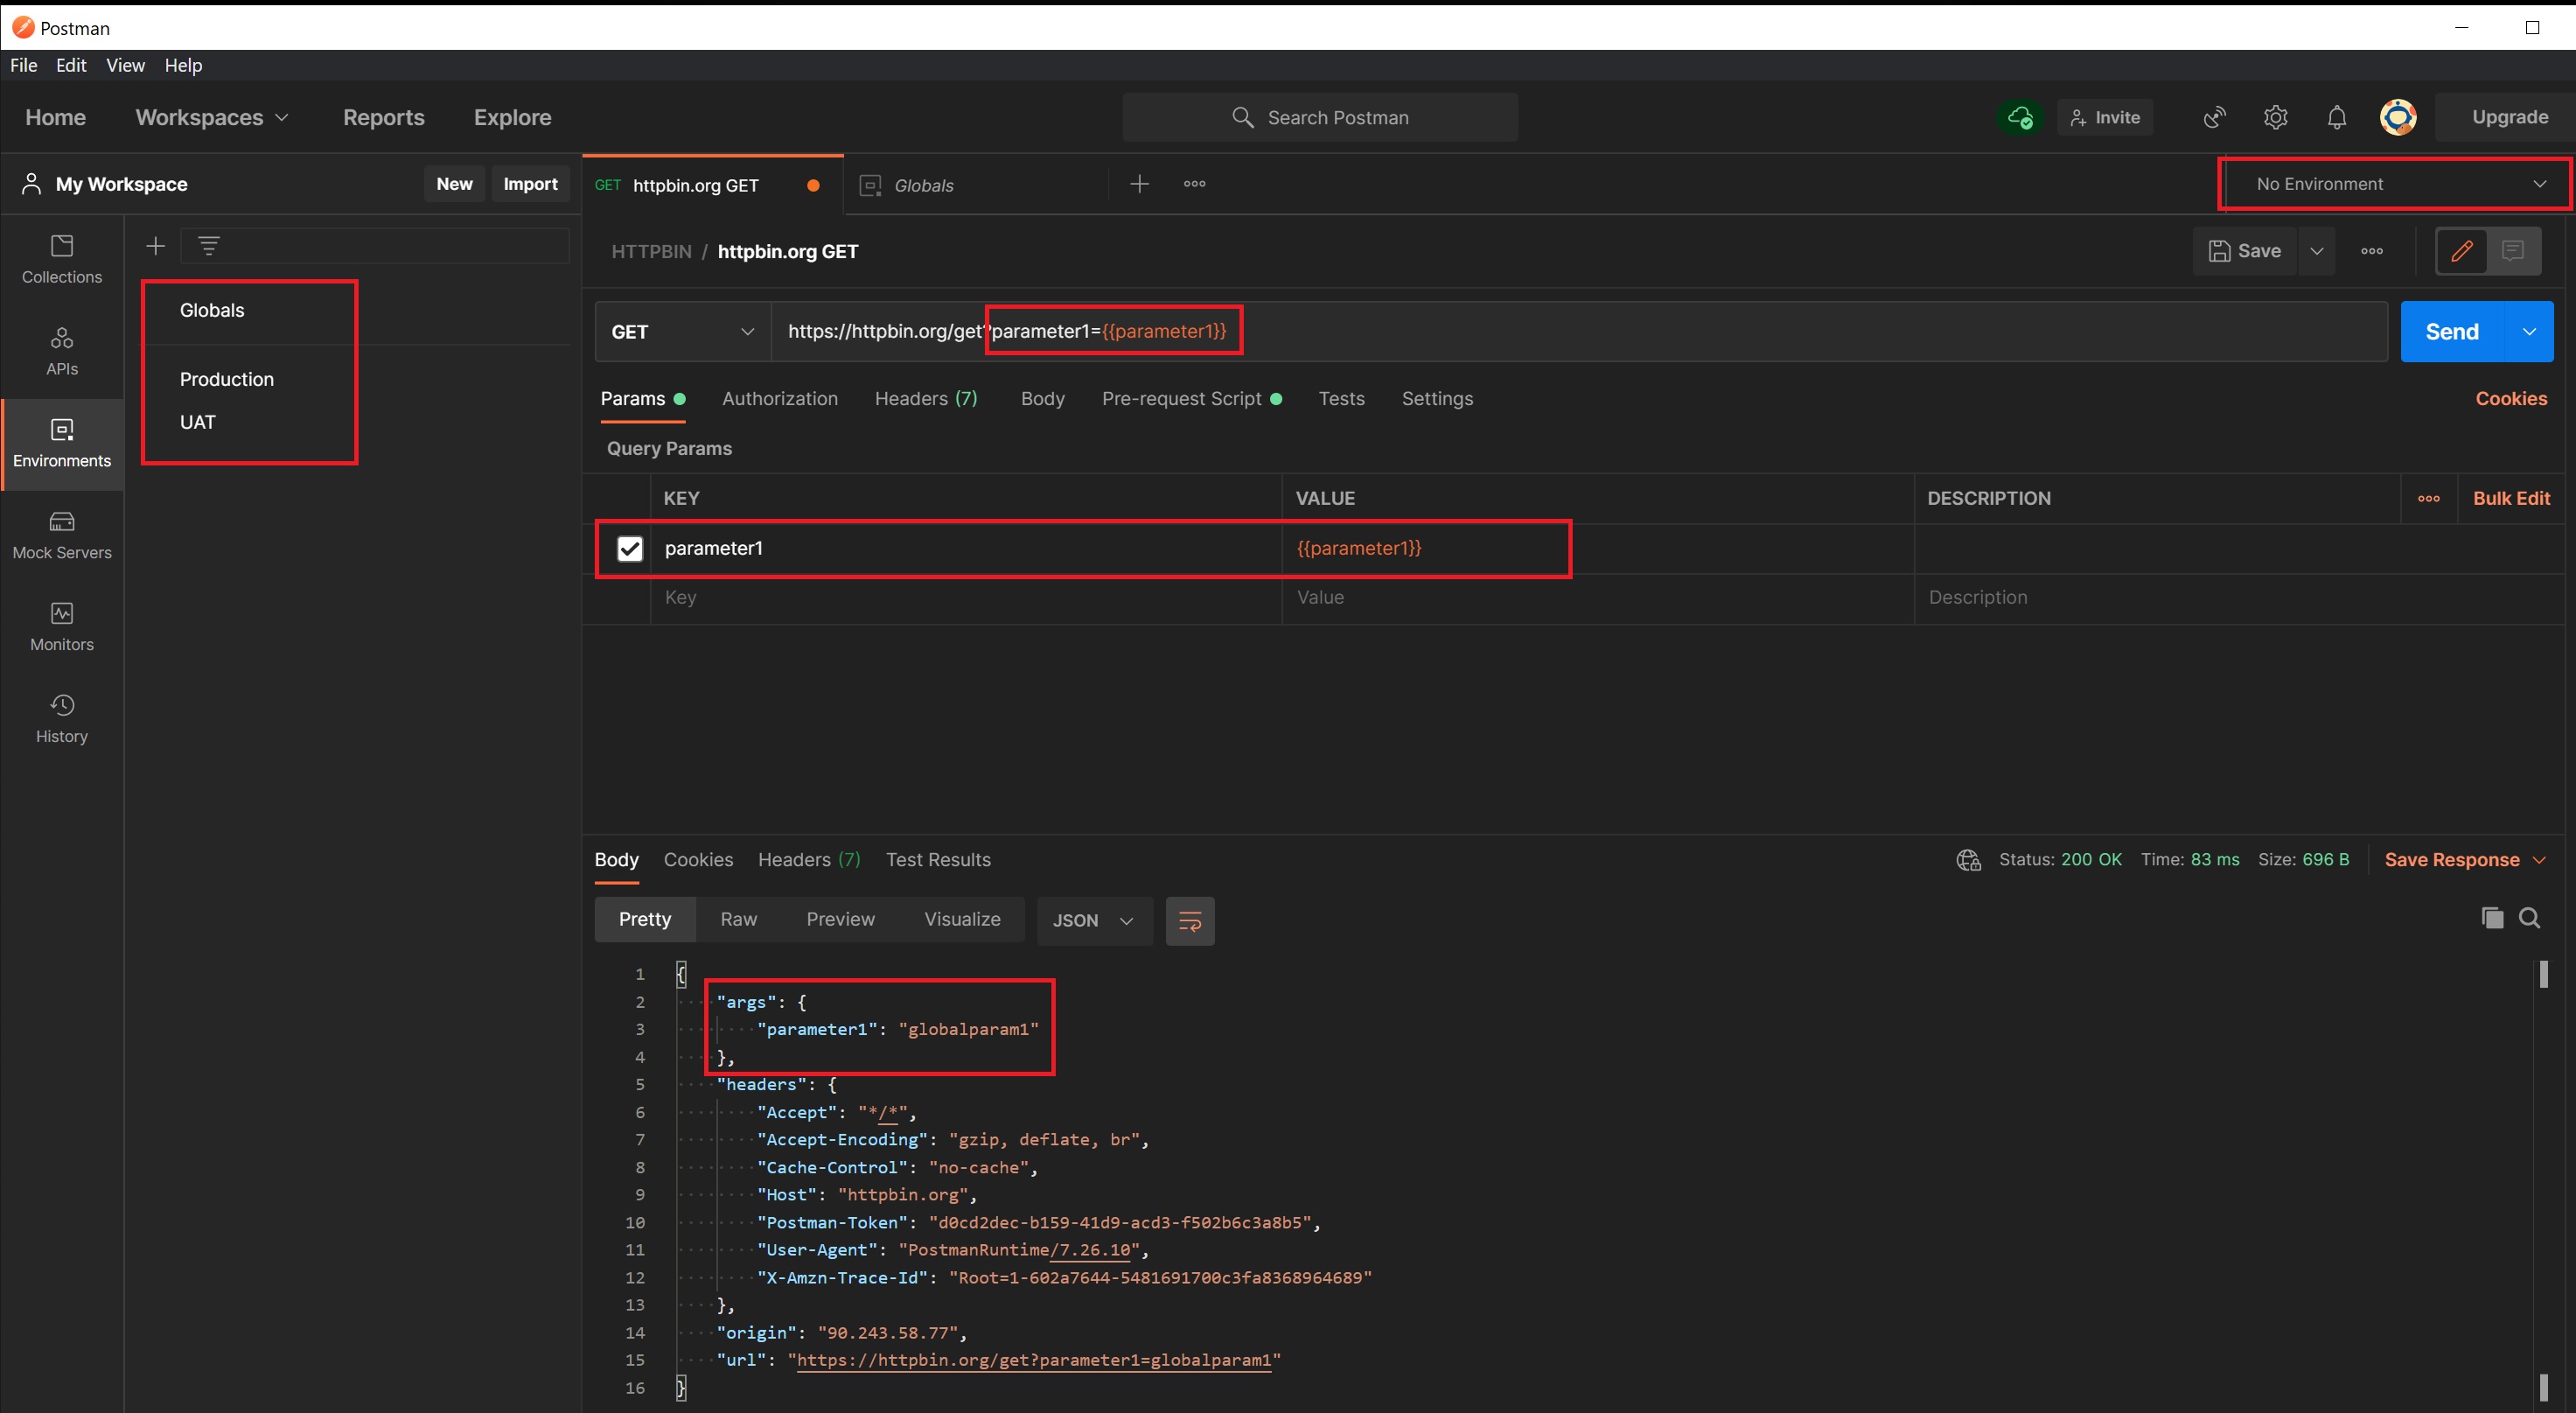
If you select the environment option on the left-hand side, initially you have only Globals folder created, you can also then add you own environments, for example production, UAT, etc. To create a variable in an environment you select the folder and in the right-hand side panel you add a variable name and an initial value which could change as we will see later.

Here you can see that I have created a Production environment with very specific variables, note that you need to click the save button to save the variables otherwise you will lose them

Now to use a variable we use double curly brackets {{}}, note in the top right-hand corner is the environment setting, basically the environment that you are running in and thus what environment variables you will be using, No Environment means you will be using the Globals enviroment we mentioned above. In the test below we use No Environment and as you can see in the results the parameter1 parameter has the value globalparam1 which was retrieved from the Globals environment.
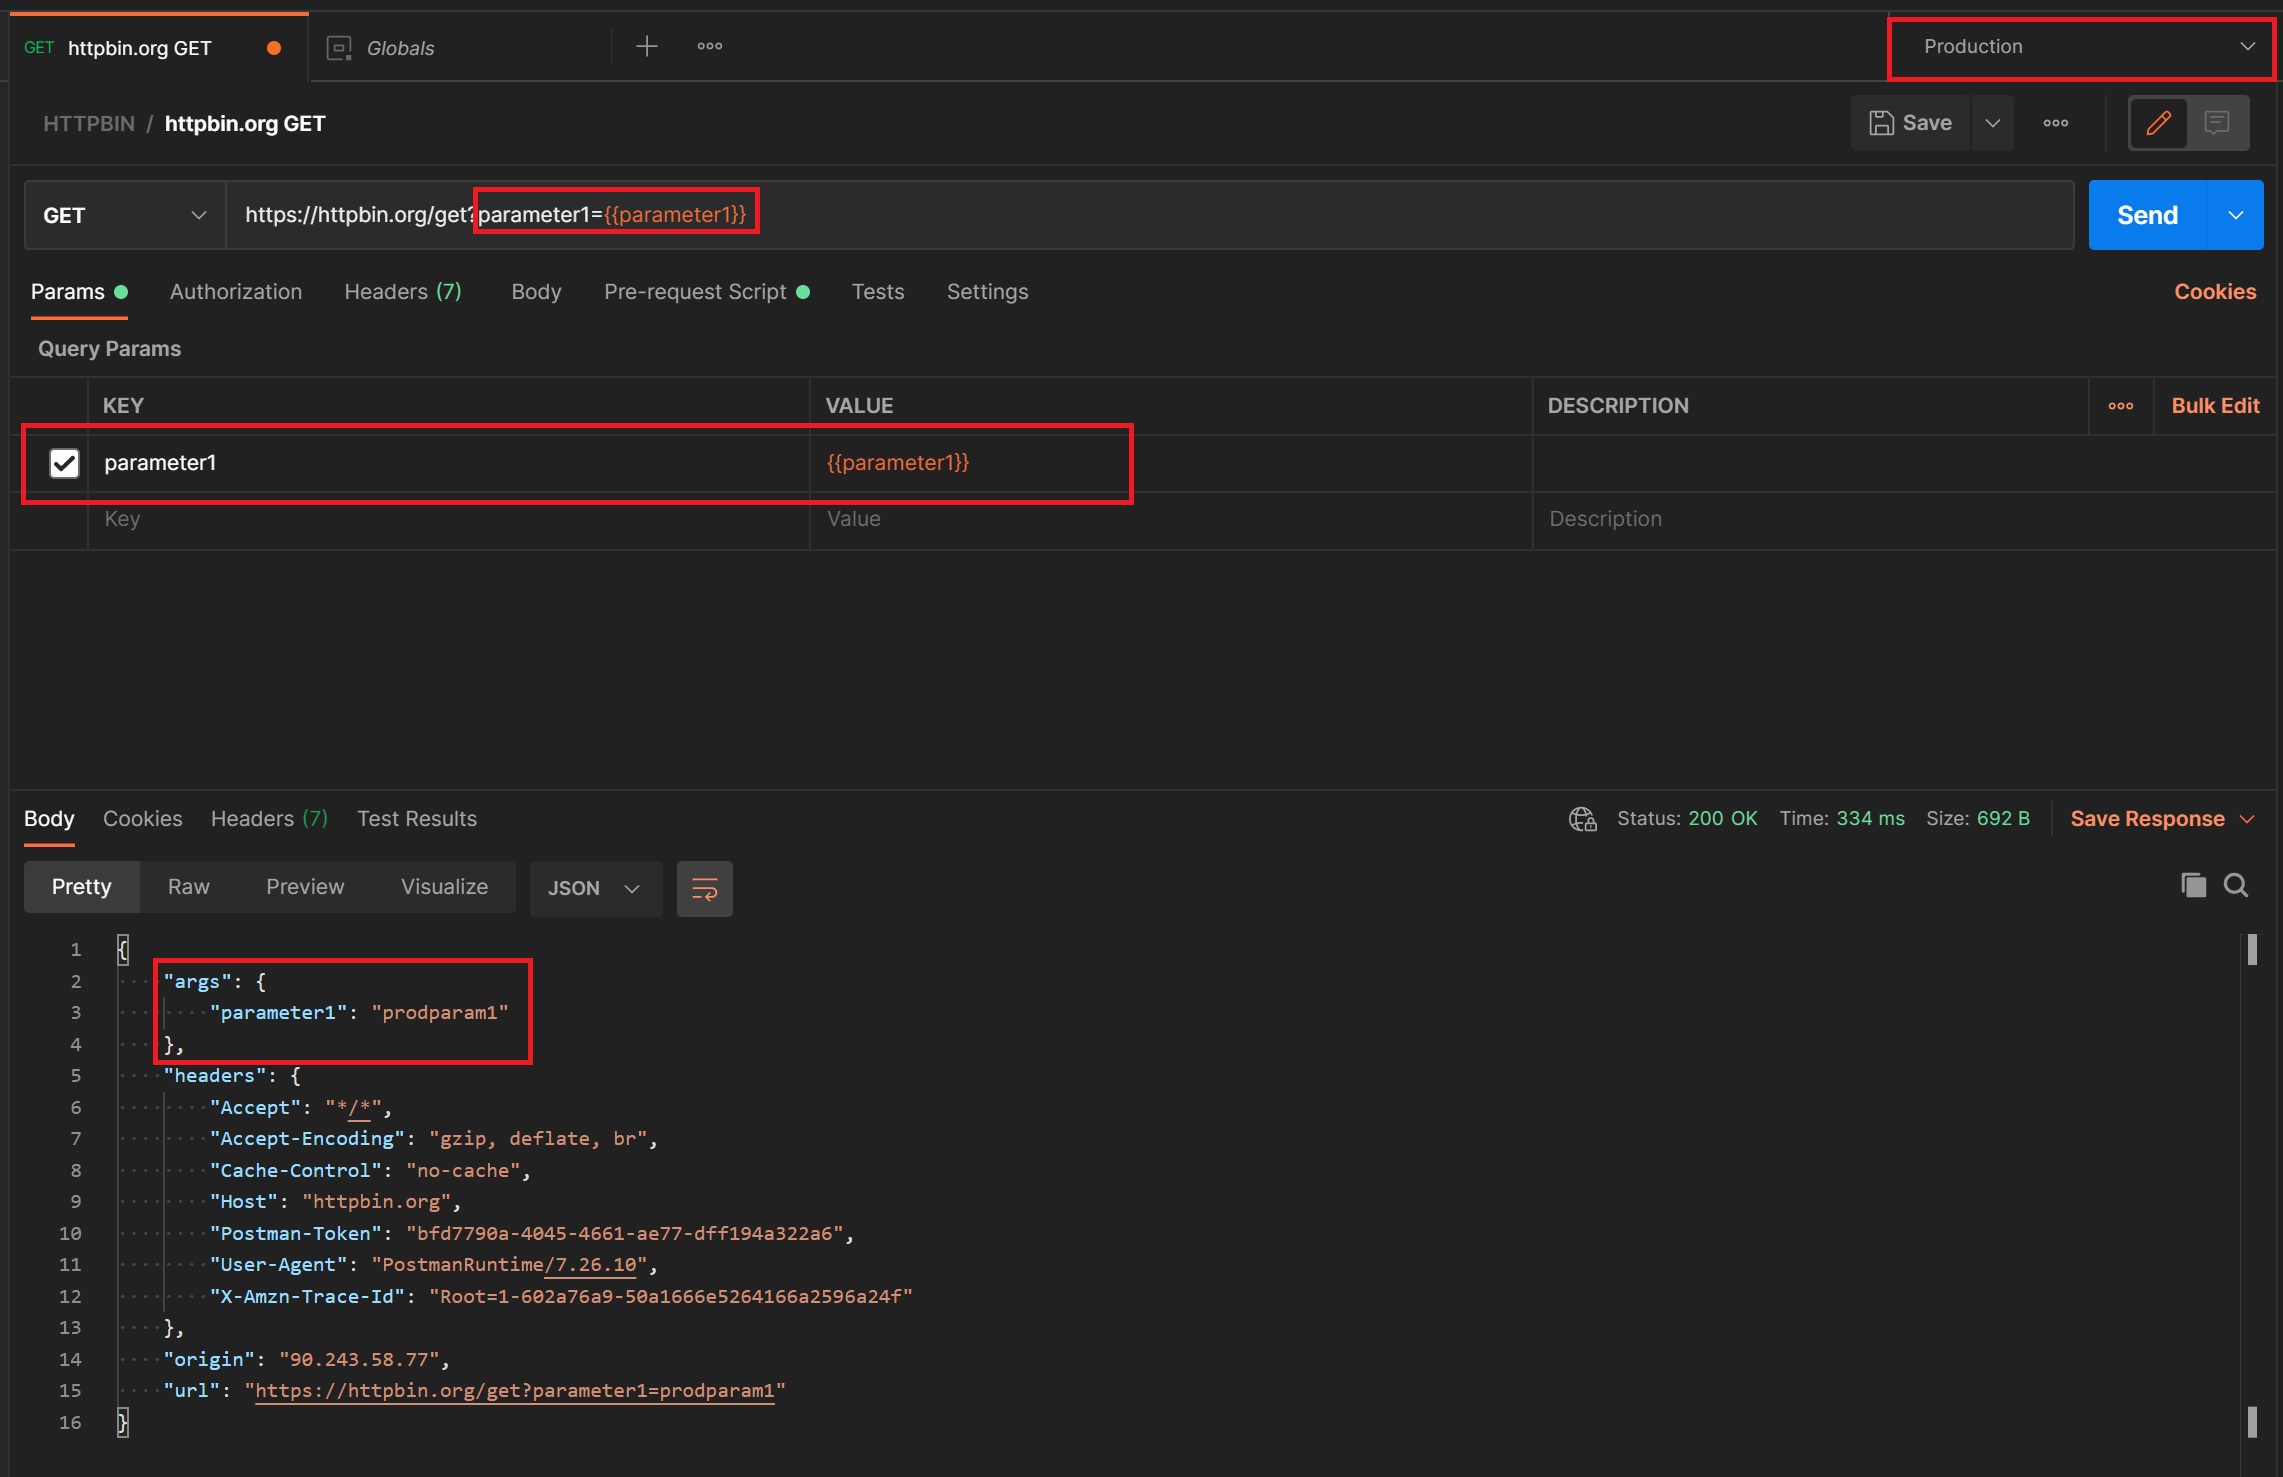
Now we switch to the production environment and rerun and as you can see we now pickup the production variable prodparam1.
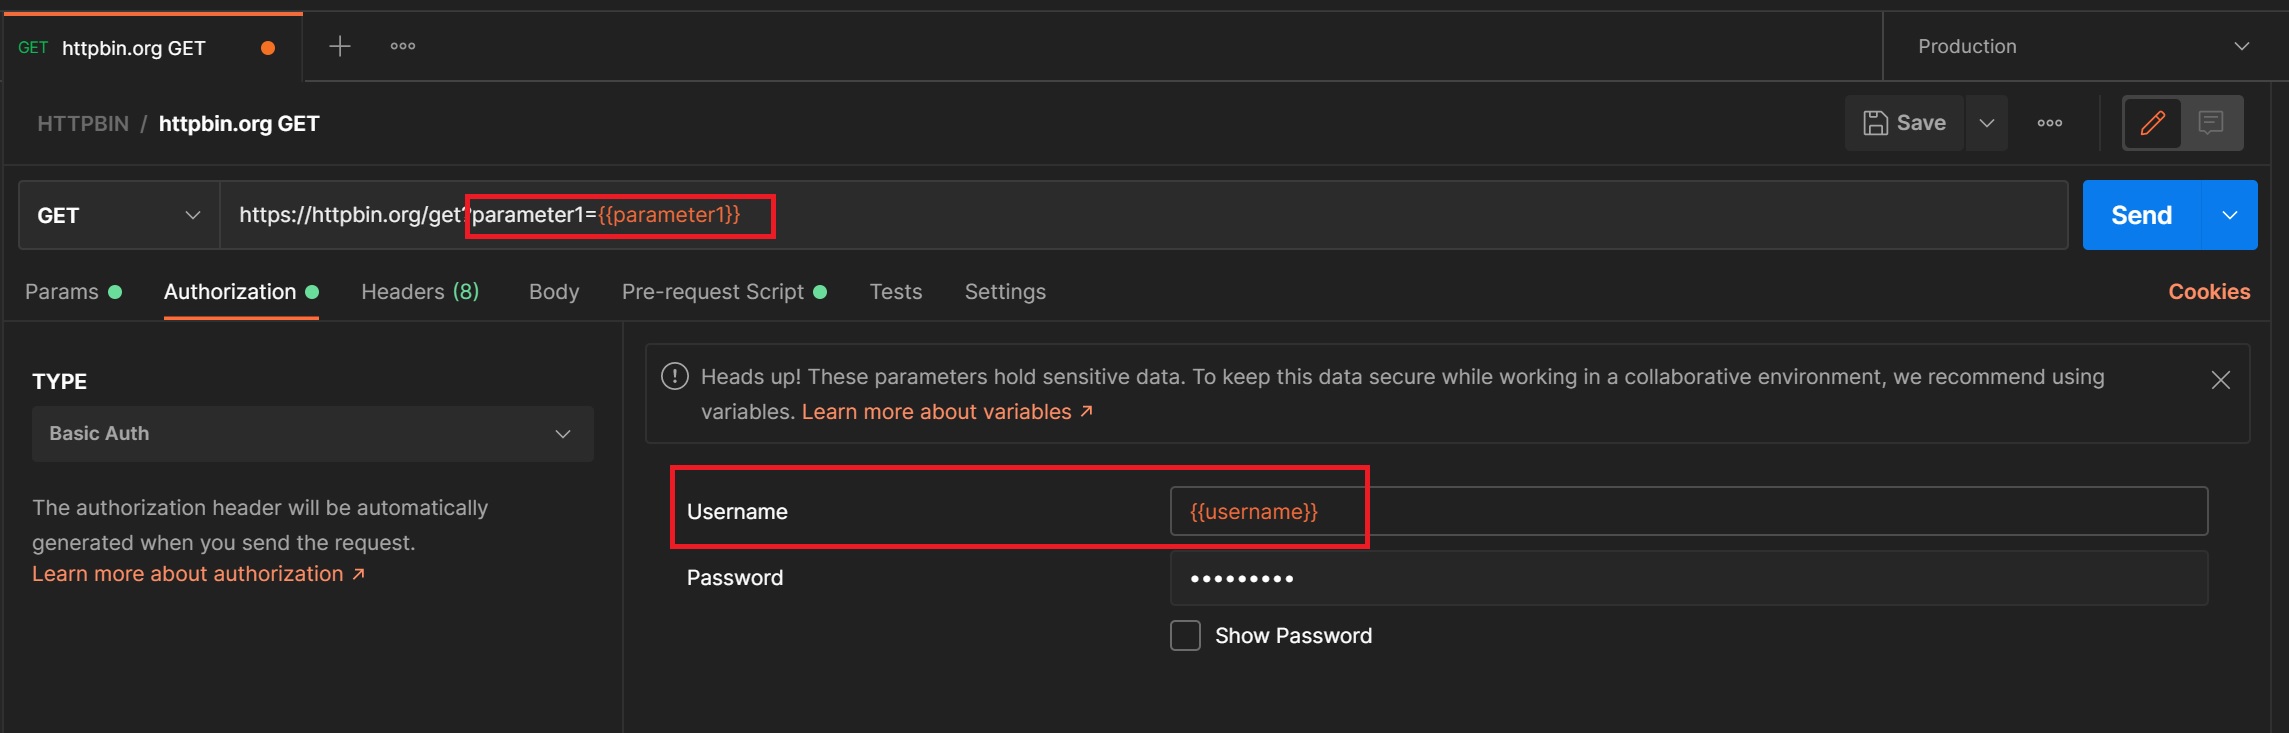
You can also use variables in other areas within Postman, for example in the below screenshot I am using it in the authorization section as a username, this is where those different environments come in handy.
You can also set a variable when we run a request, in the below example I retrieve a uuid by running a request, the retrieved response contains the uuid which is extracted out and then the global uuid variable is set. Notice that on the very right-hand side you have pre-written scripts that if you select are imbedded into your tests screen, you can then adapt to your requirements.
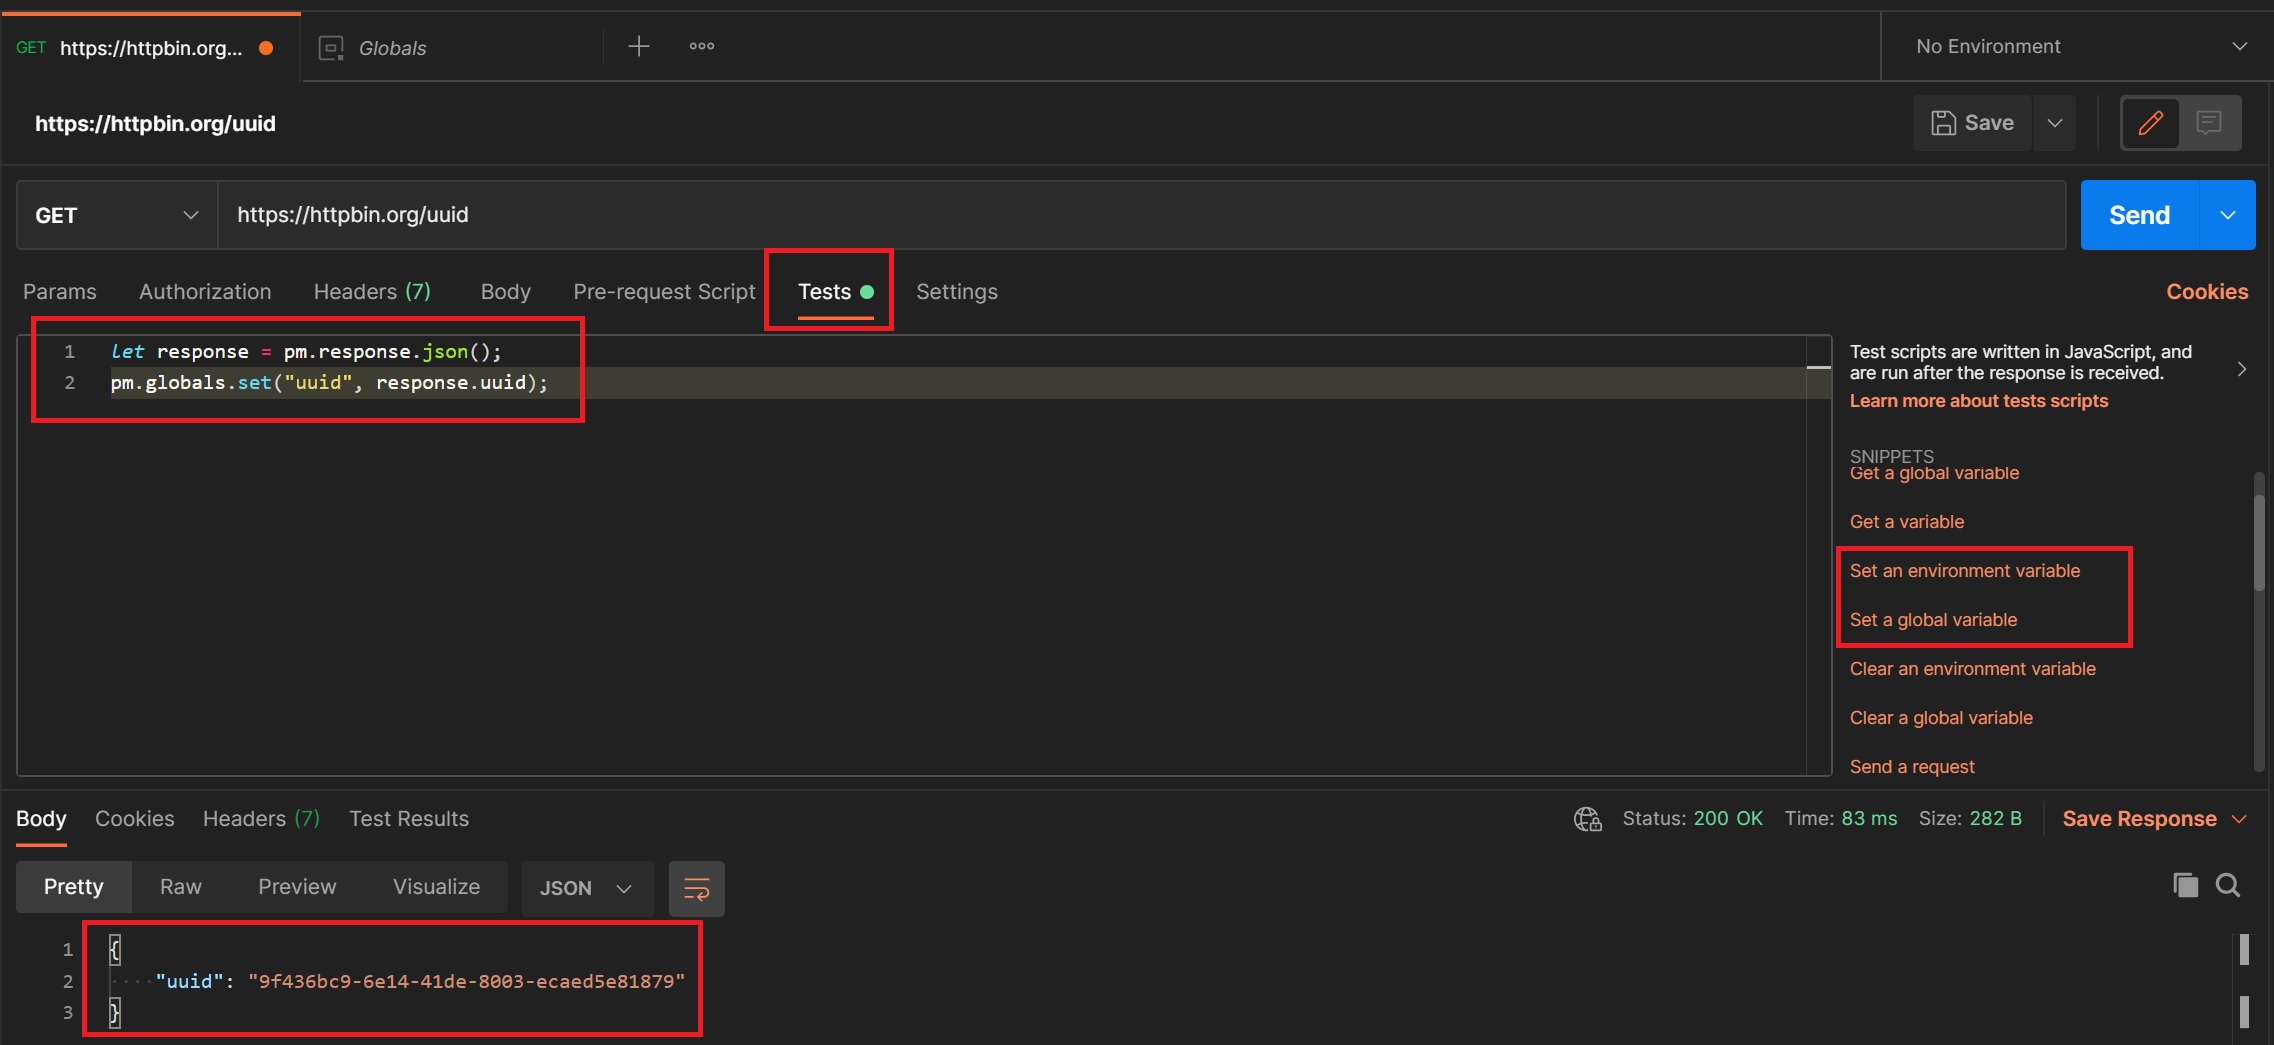
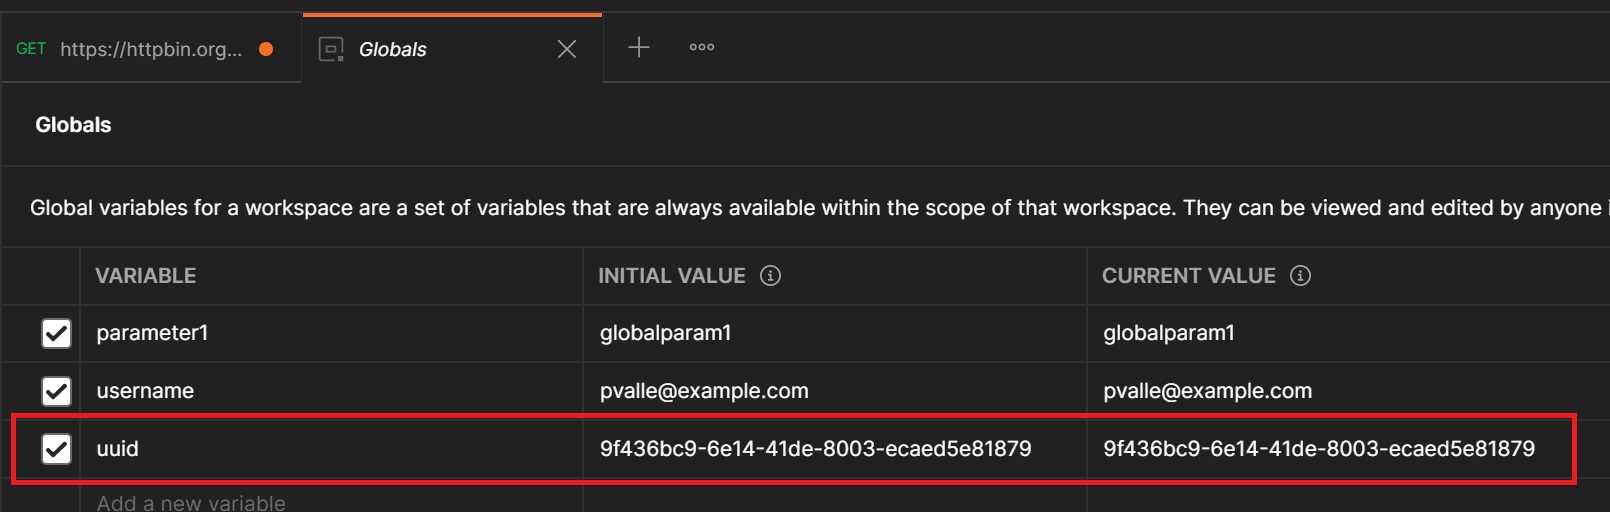
If we return the globals variables you will notice that the uuid variable has now been updated. In later sections we will use the collector runner where we can run multiple saved requests which can be a combination of retrieving data, setting variables and then later scripts use those updated variables.
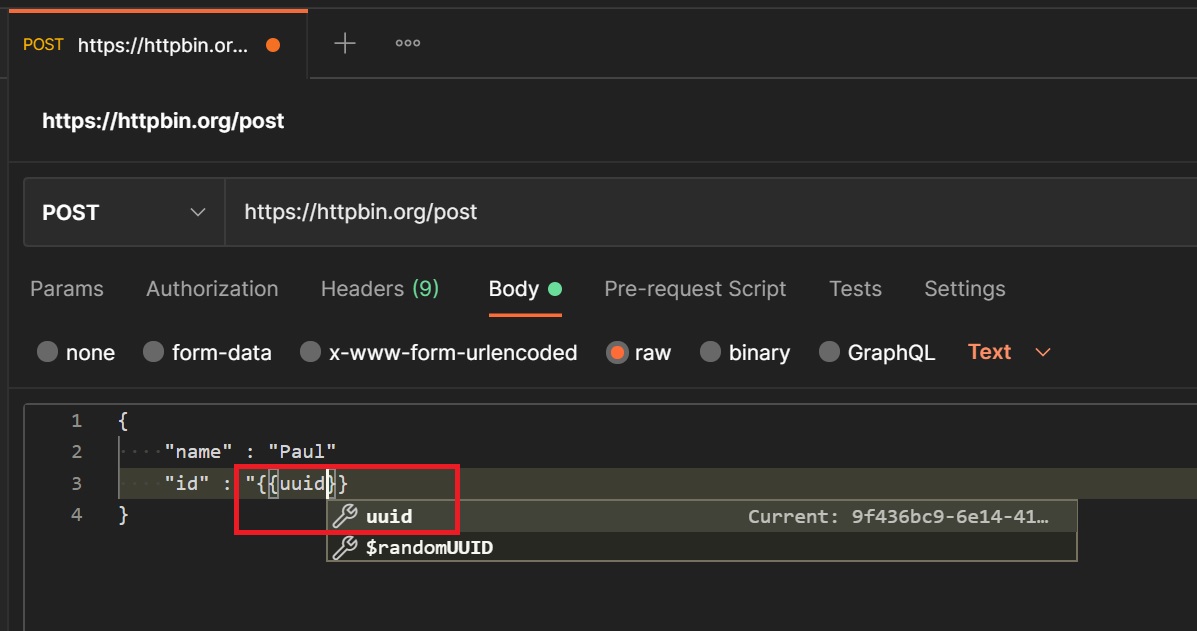
You can also use your variables in things like the body of a post request as per below, notice that postman also have a autofill feature to help you choose what you are trying to do, in my case is has picked up the uuid variable, this goes for variables, scripts, etc.
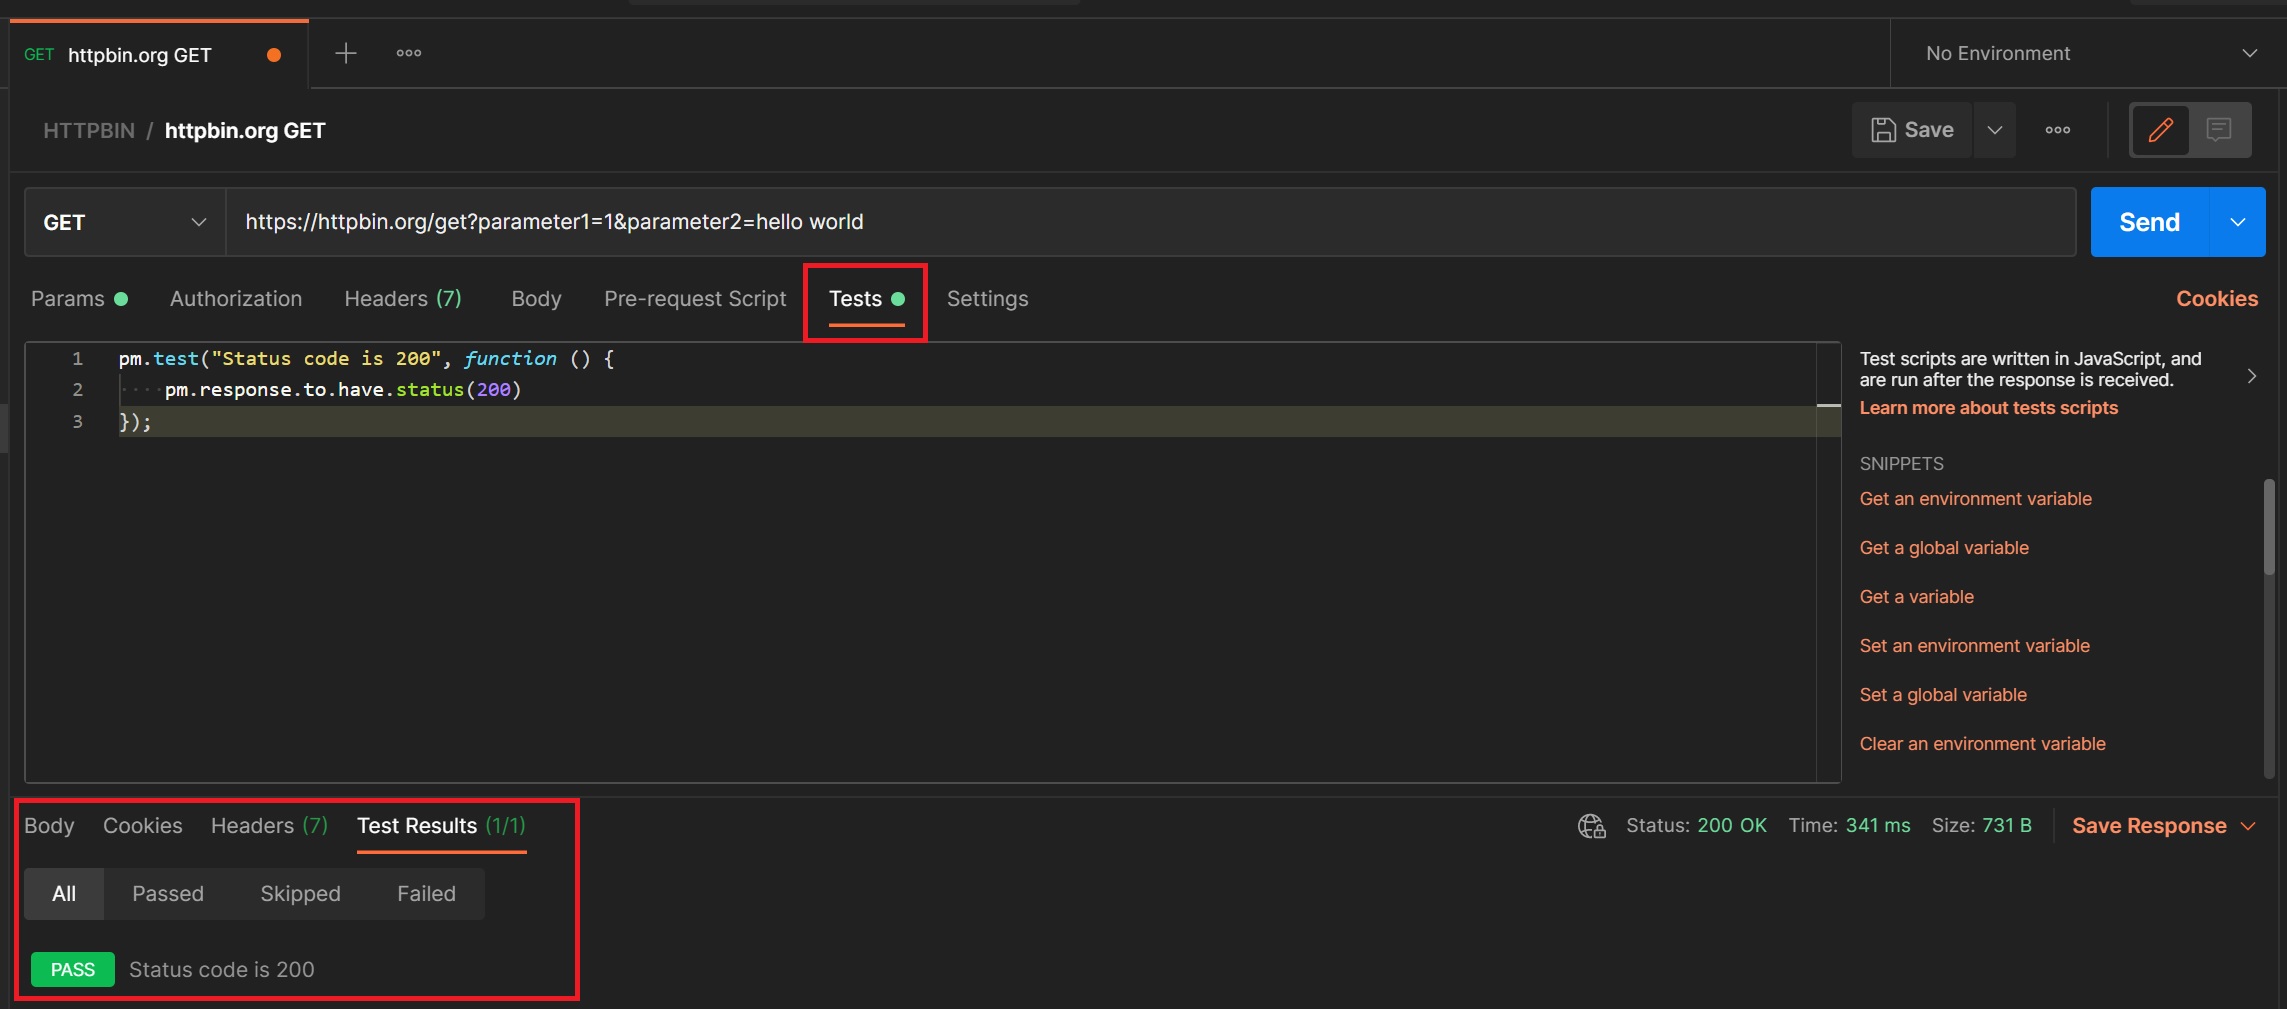
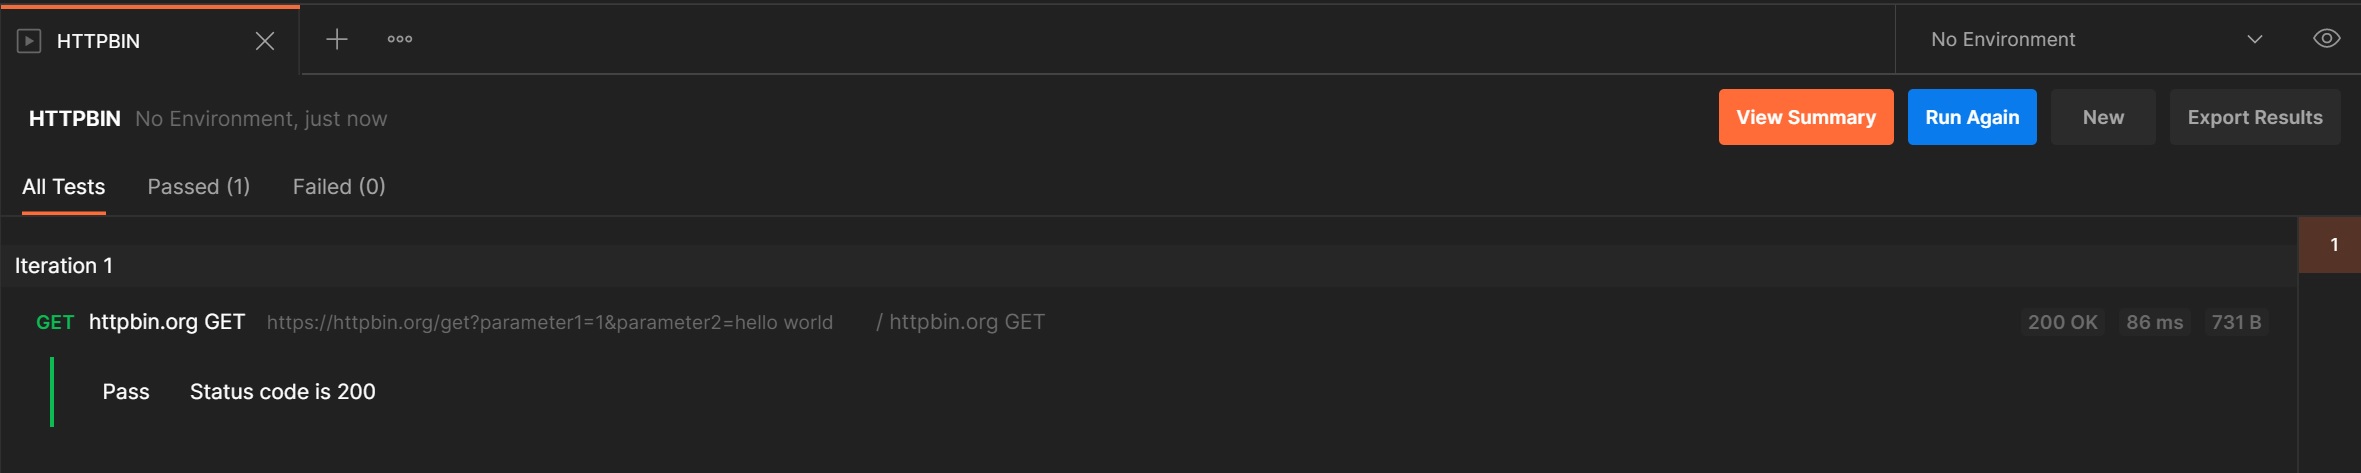
You have the option to include a test in your request, this could be a simple status check, the results are in the Test Results panel at the bottom
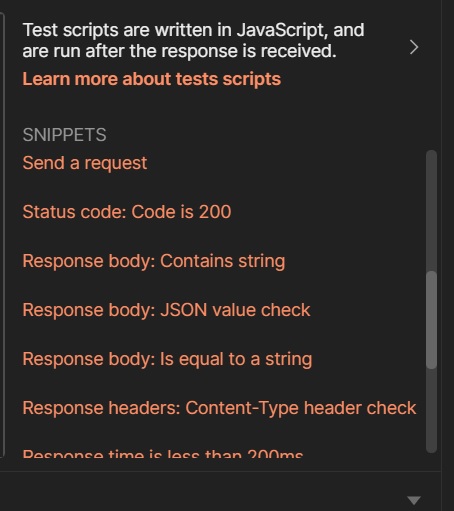
If you notice in the right-hand side there are many test scripts already available for you to use, simply select one and it will be copied into the tests scripts panel for you to use as is or adapt it.
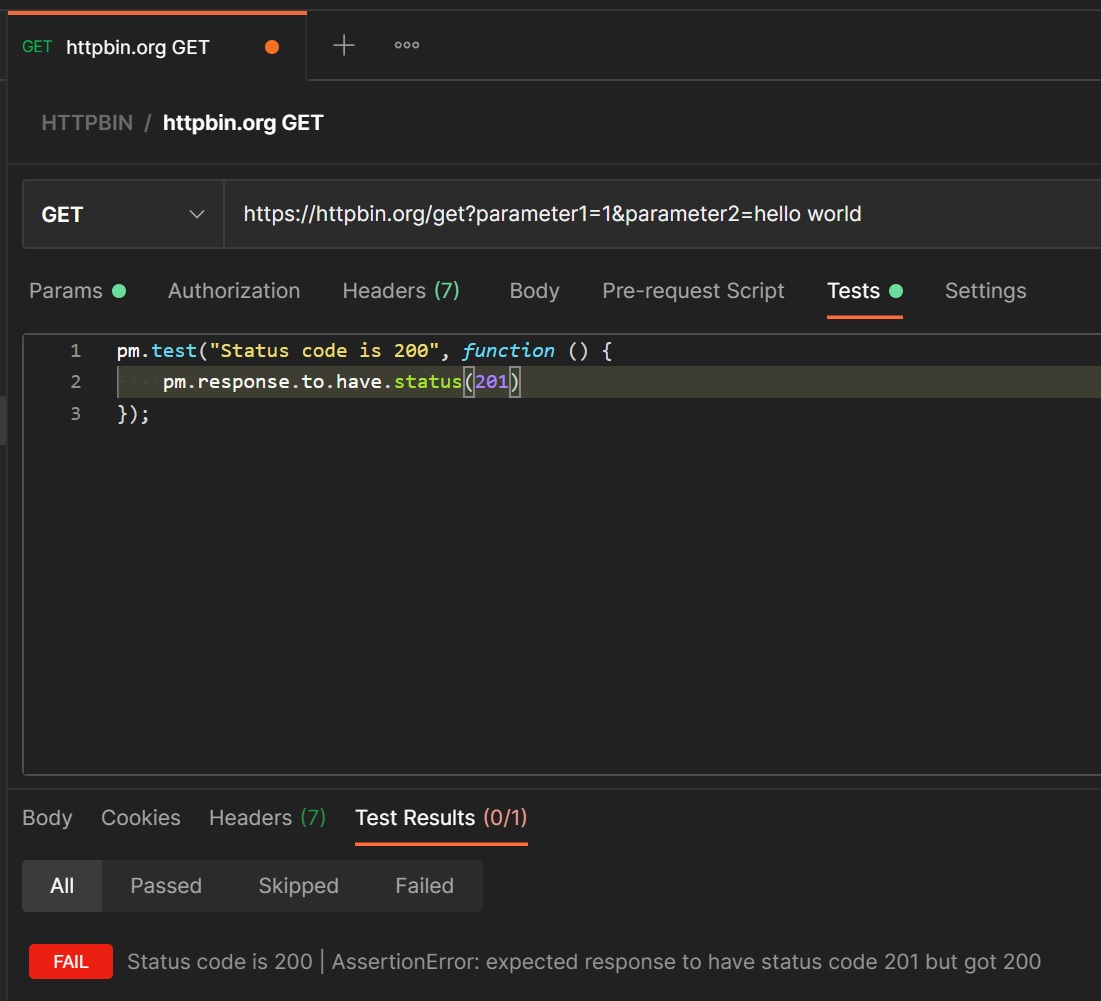
You can even get failed tests as well, as per below.
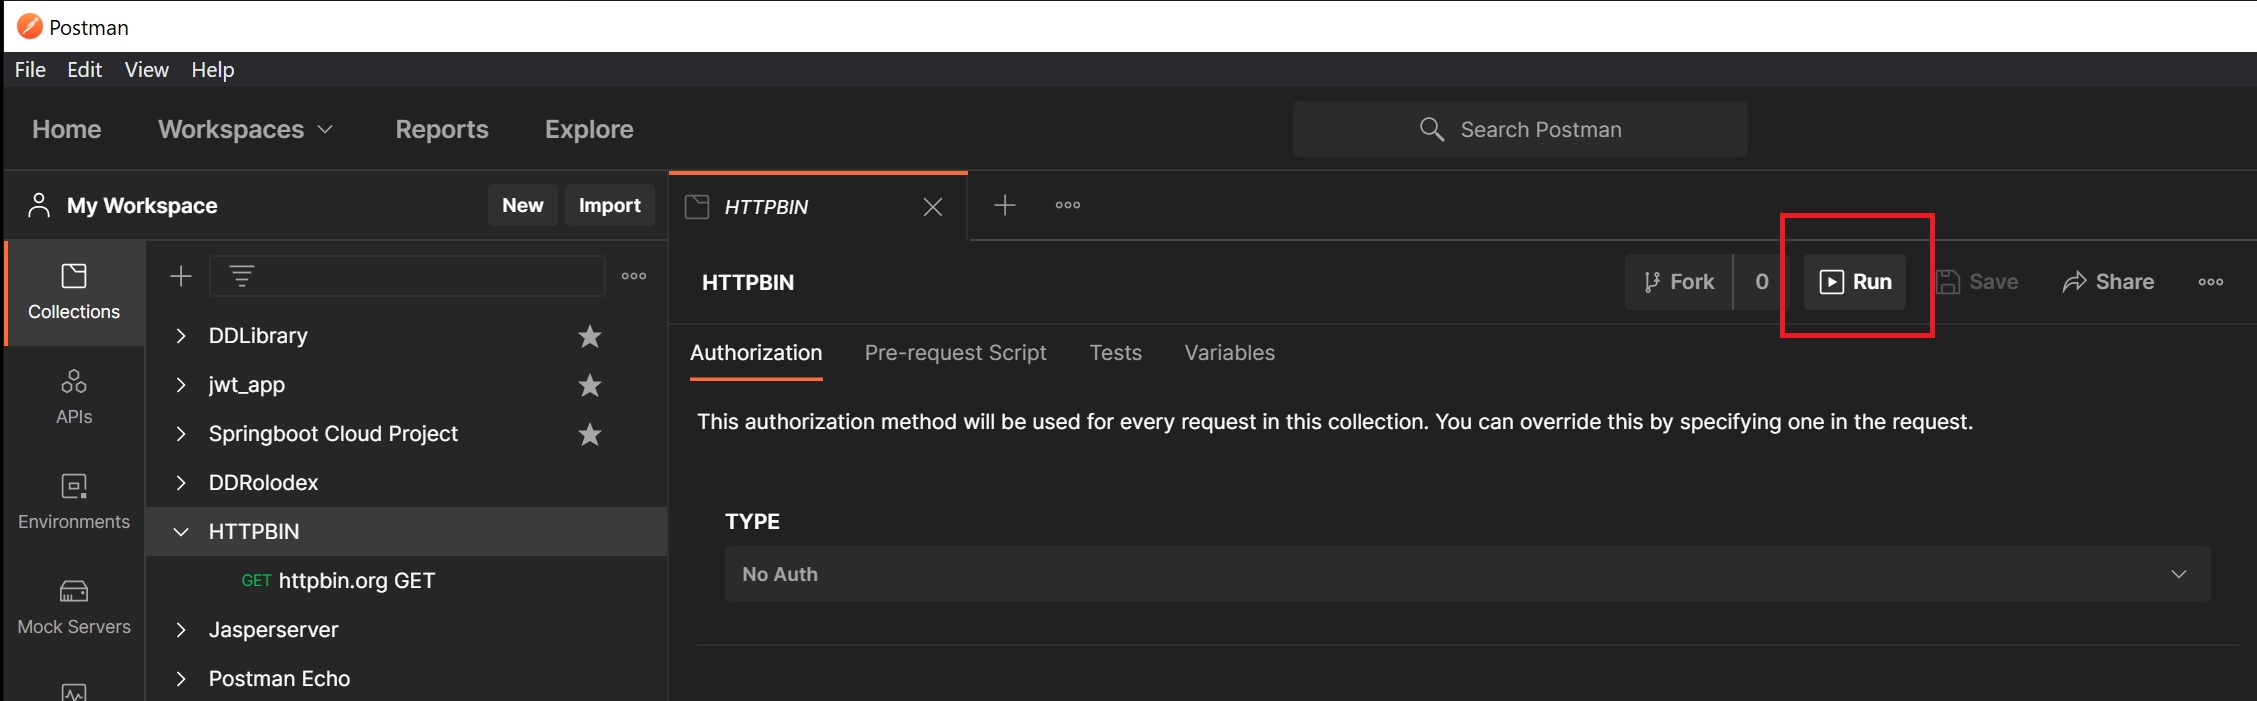
The collections runner allows you to run all saved requests within a colelction, here I select the HTTPBIN collection, you will notice a run button, by sekecting this you are taken to the runner screen
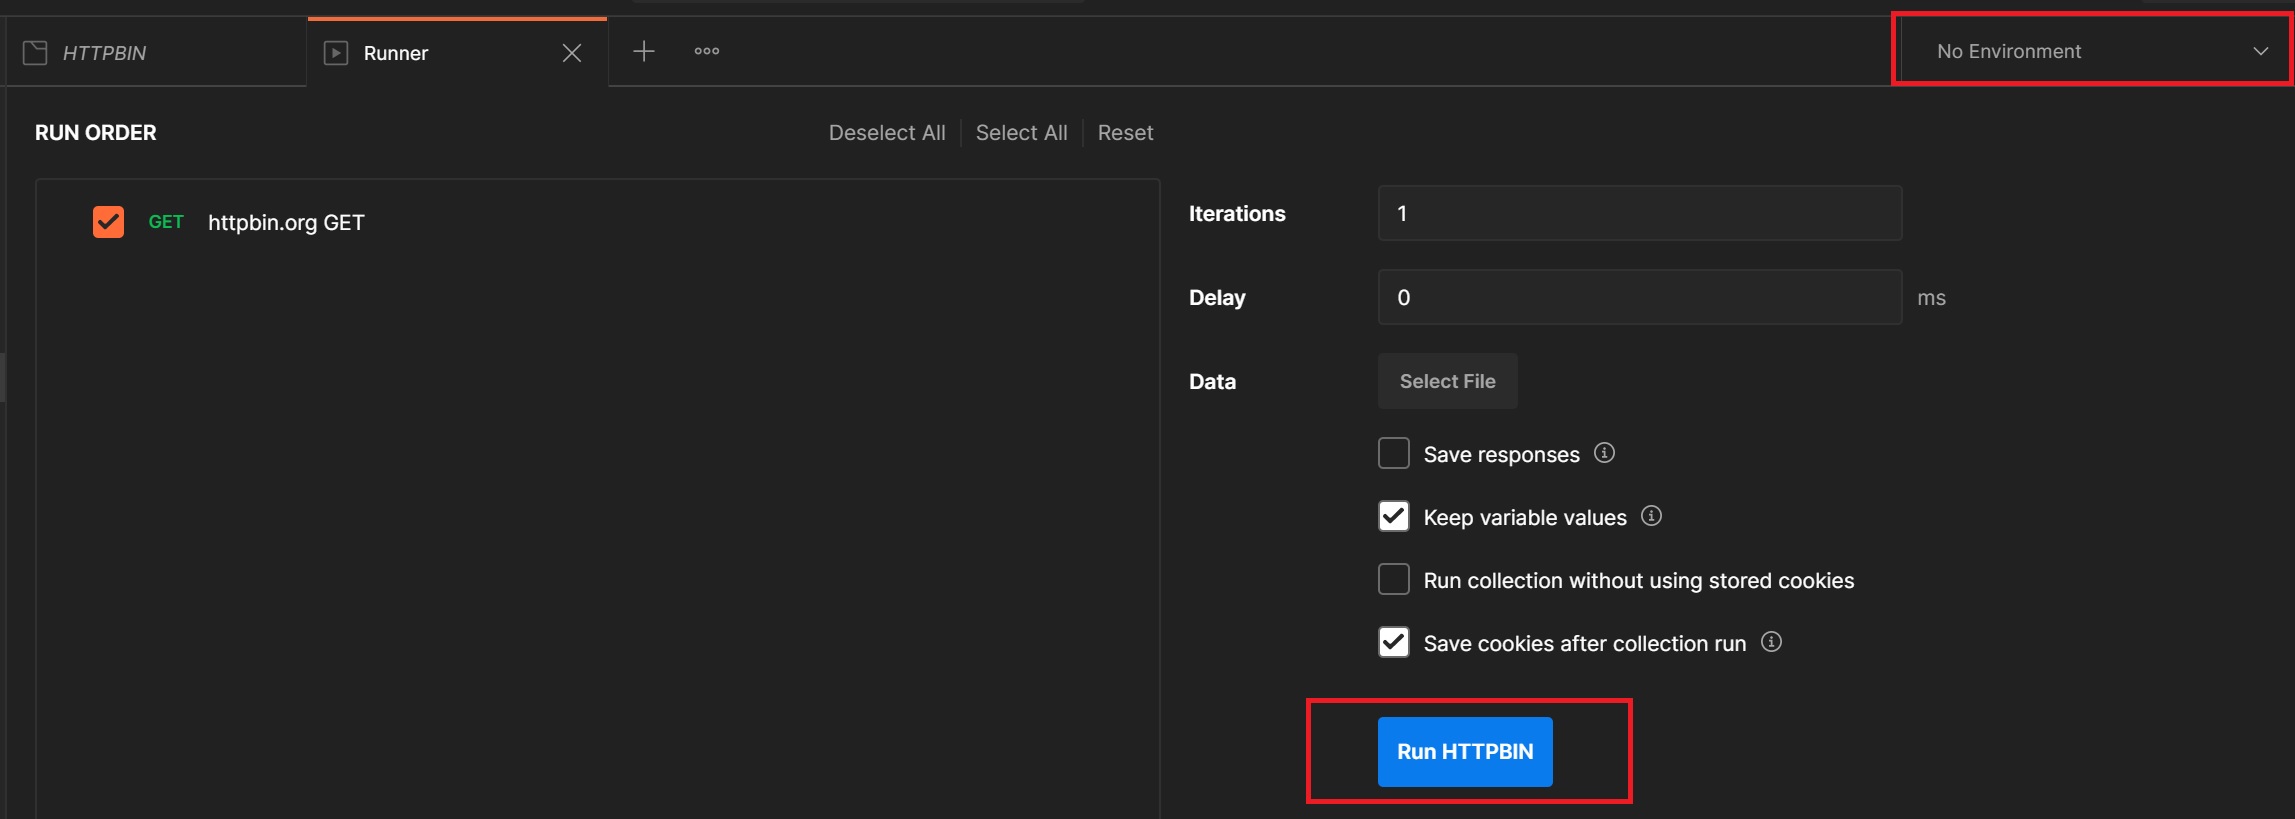
The runner screen has several options which I will leave you to play around with, if we select the Run HTTPBIN each request within the collection will be executedand any tests will then be displayed
Once run we are taken back to the collection folder, here you can see the results of any tests, you have the option to rerun or view the summary results when you have many requests in a collection.
The summary results screen is not that much different from the previous screen
