Virtual SAN (vSAN)
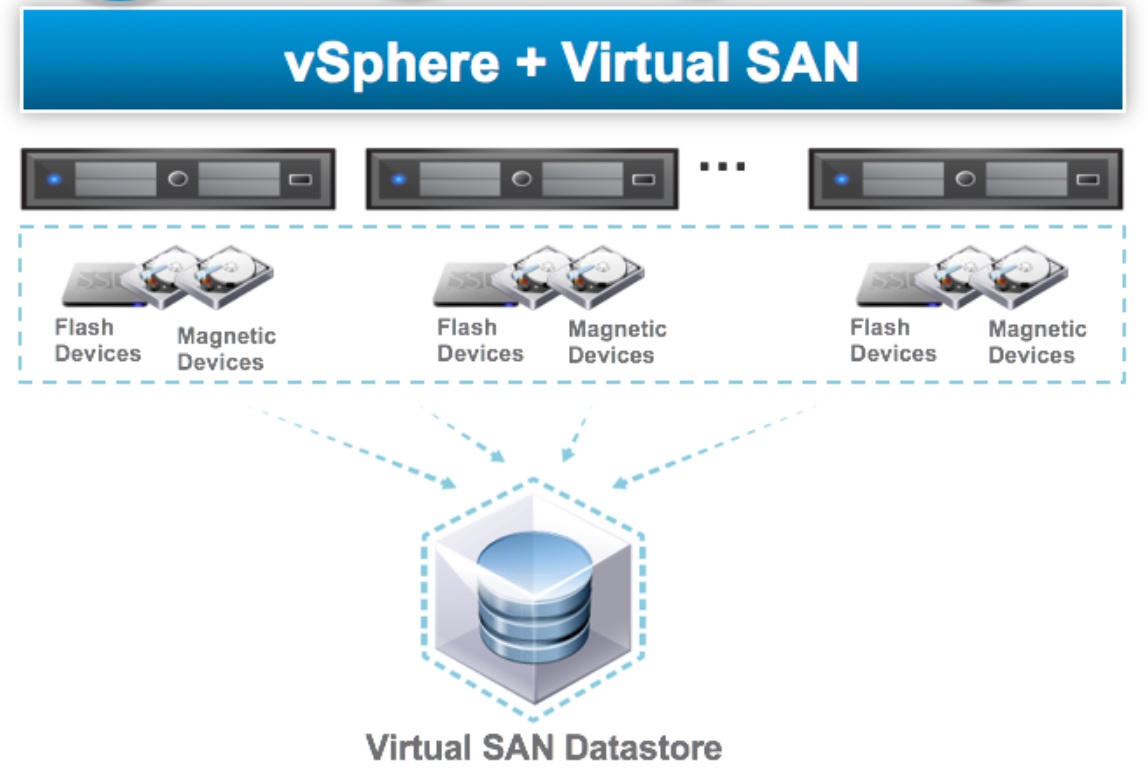
VMware vSAN is a software-defined, enterprise storage solution that supports hyper-converged infrastructure (HCI) systems. vSAN is fully integrated with VMware vSphere, as a distributed layer of software within the ESXi hypervisor. vSAN aggregates local or direct-attached data storage devices, to create a single storage pool shared across all hosts in a vSAN cluster. A hybrid vSAN cluster uses flash devices for the cache tier and normal drives for the capacity tier. An all-flash vSAN cluster uses flash devices for both the cache tier and the capacity tier. This architecture creates a flash-optimized, resilient shared datastore designed for the software-defined data center (SDDC). vSAN eliminates the need for external shared storage (dedicated SAN), and simplifies storage configuration through Storage Policy-Based Management (SPBM). Using virtual machine (VM) storage policies, you can define storage requirements and capabilities.
Before we start setting up a vSAN cluster I am using a physical DELL R620 server with ESXi 7 installed, then I have created a vSAN environment using 3 x ESXi nested servers (esxi5, esxi6 and esxi7) and a vCenter (vcenter3), for your information I am using a Synology SAN and NFS (version 4.1) as a datastore to store all the below servers.

Each ESXi server has 3 hard disks, a 50GB disk for the ESXi O/S, a 100GB disk for the vSAN capacity drive and a 10GB for the vSAN cache tier drive. Each server has 4 physical NIC's connected, one will be used for the management network and two will be used for vMotion and vSAN services.

I have created a Production Datacenter and added all 3 ESXi servers, I have not configured any dswitches, port groups as we will do that later during the vSAN cluster installation.

Before we start if you take a look each ESXi storage device you will see the 3 drives configured, notice that the 100GB and 10GB are of drive type HDD, we need to make them flash disks, highlight each drive and click on the Mark as Flash Disk, a confirmation popup will appear, just agree. Remember although vSAN can use normal HDD disk for capacity it needs flash (SSD) drives for the cache, bear in mind my disks are really NFS disks.

Once you have change the drive types you should have a screen looking like below

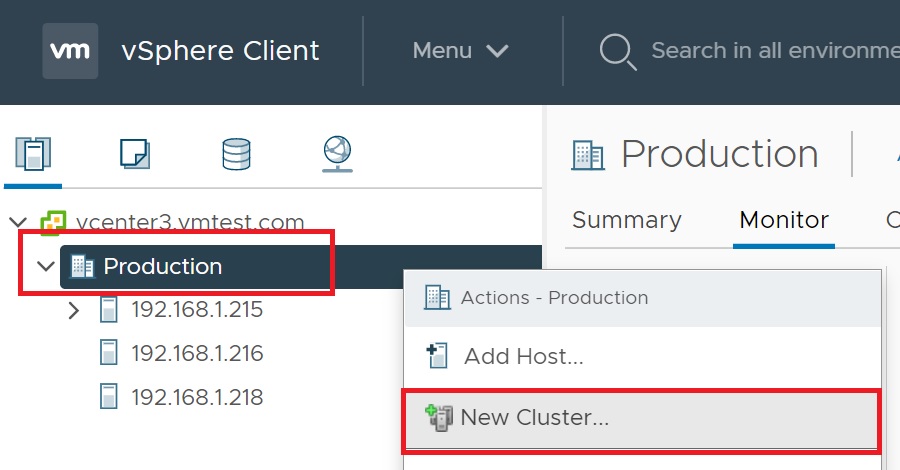
We start by creating a new cluster, right-click on the Production datacenter -> New Cluster, we will now go through a number of setup screens
The first setup screen we enter the name of the cluster and slide vSAN to green, I am not going to bother with baseline images but you can see my vSphere LifeCycle Manager for futher information. If you already have a cluster setup and want to add vSAN to it, then disable HA prior to setting up vSAN, once setup you can then re-enable HA.

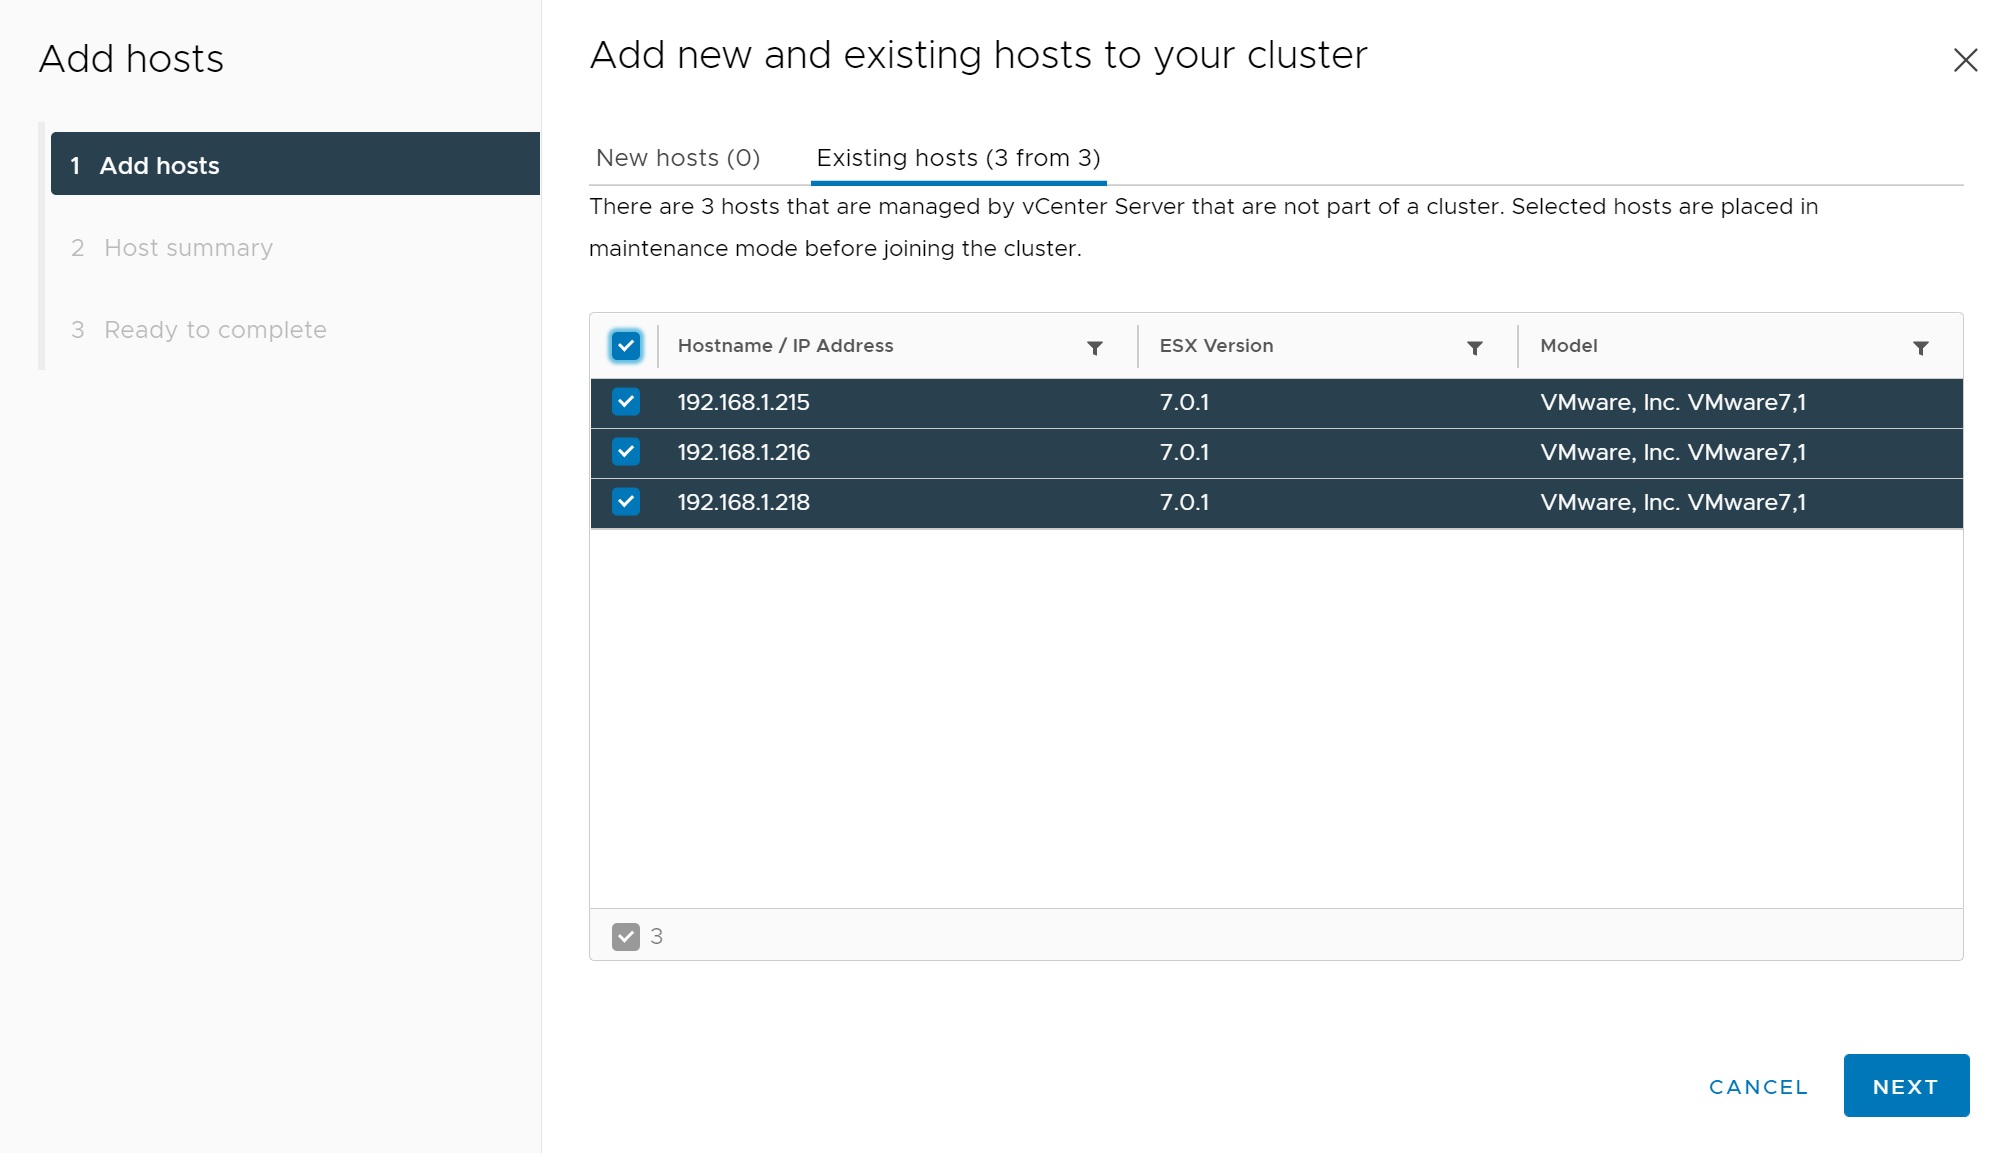
We are then returned to the cluster quickstart screen, the first step is complete, now we move onto adding the ESXi servers to the cluster

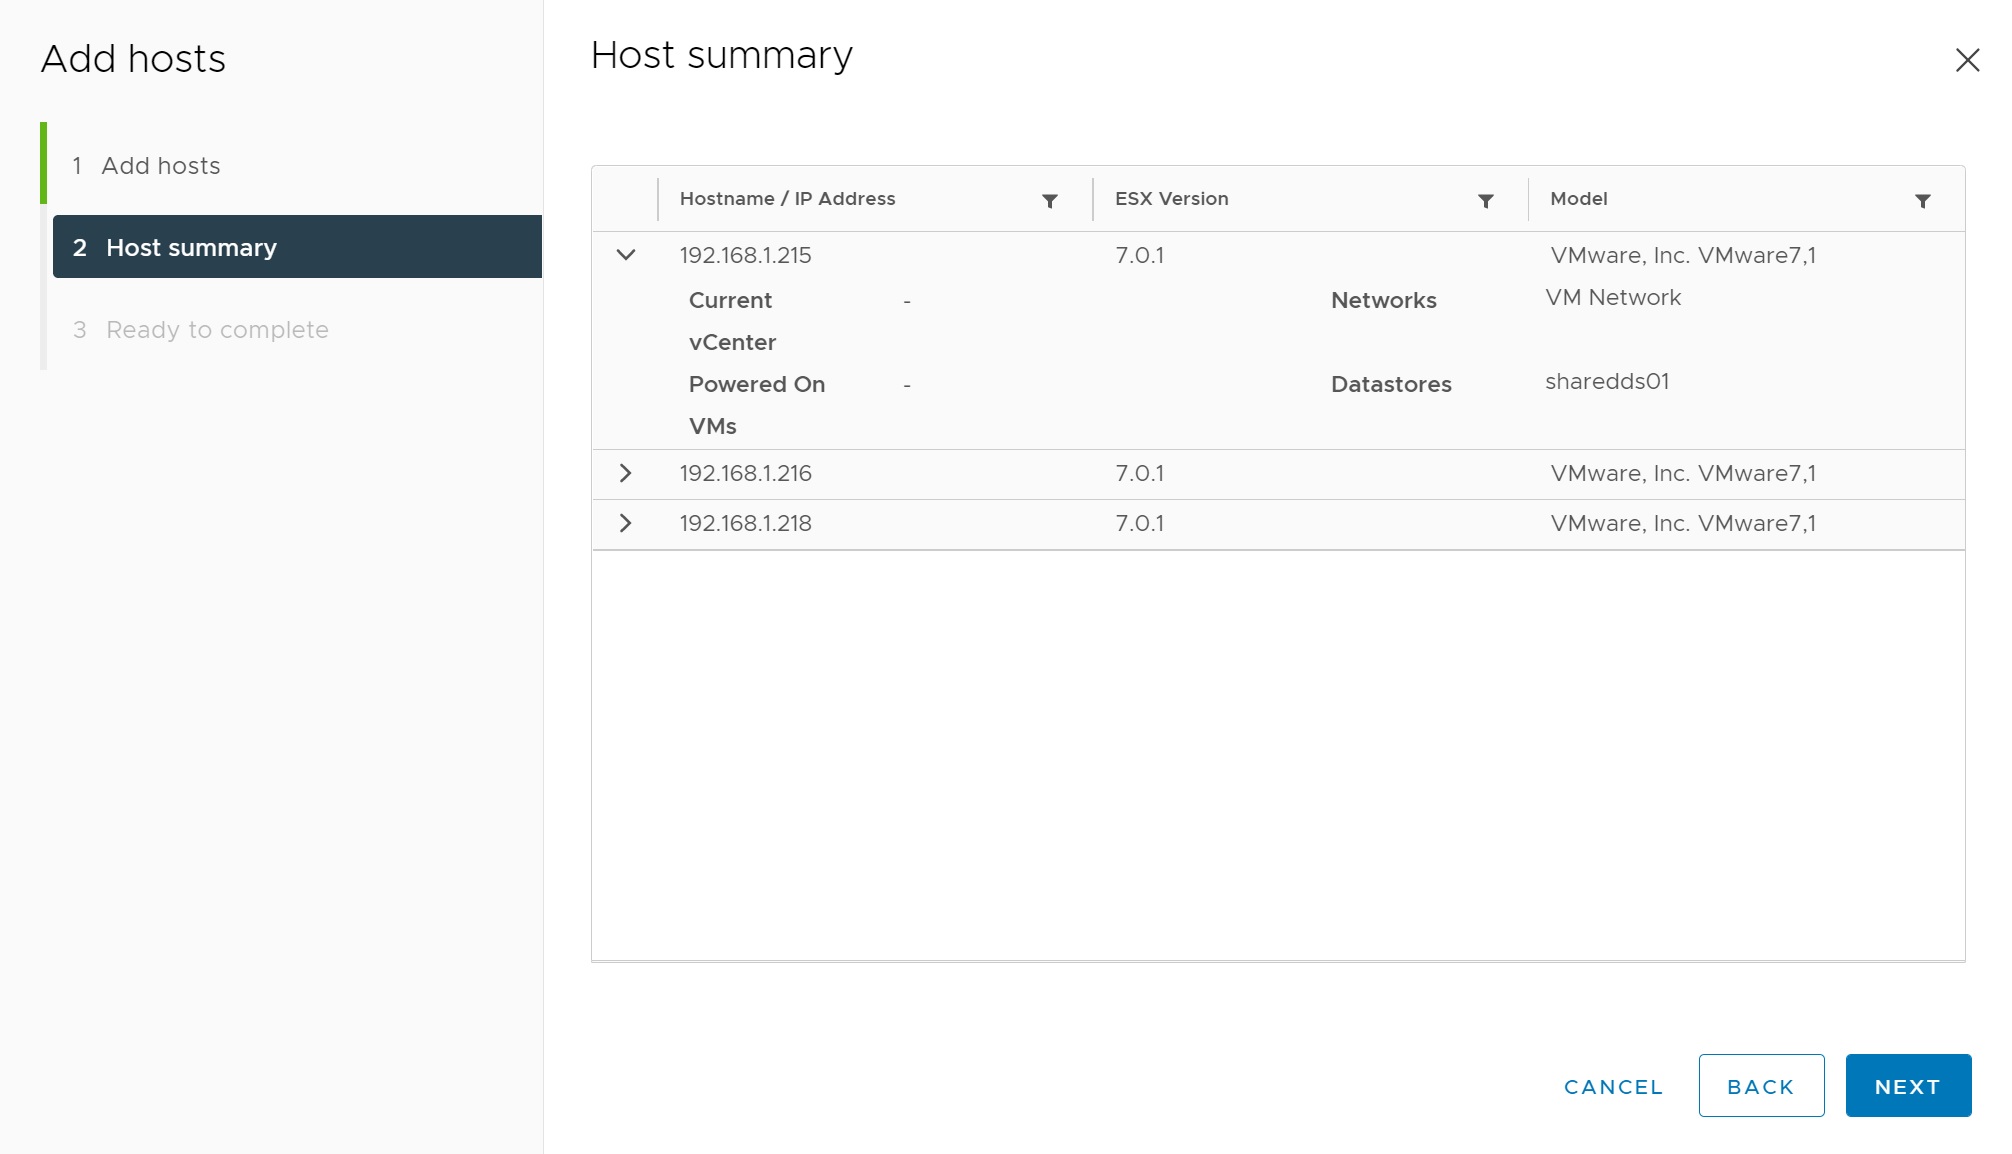
I will select all 3 ESXi servers, this allows for the failure of a ESXi server which you will see me doing later.
We are taken to a summary screen
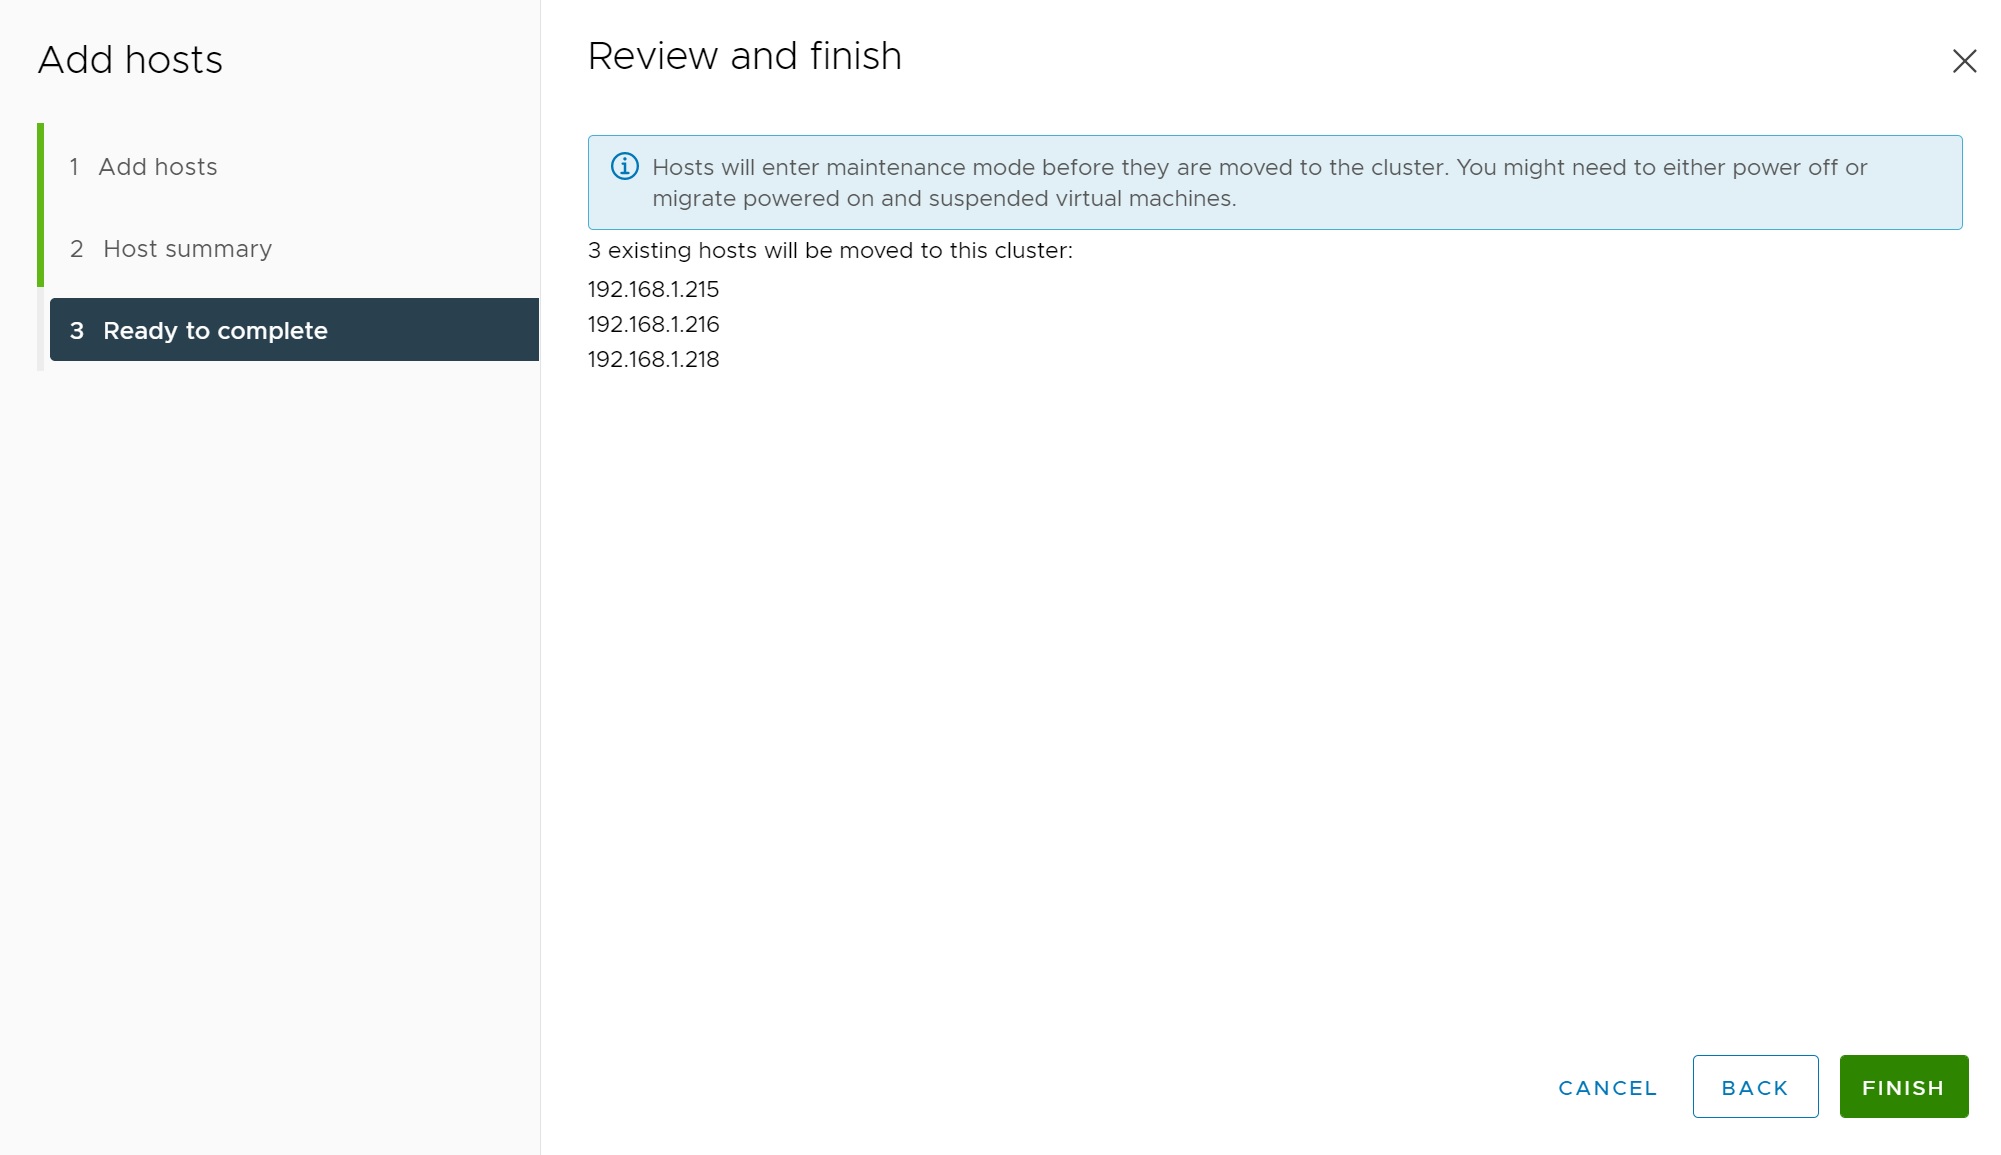
Finally we get to a review screen, click FINISH to add the ESXi servers to the vSAN cluster.
Again we are returned to the quickstart screen, you may or may not get any warnings or errors, warnings can be ignore but try and correct them if possible, any errors must be dealt with.
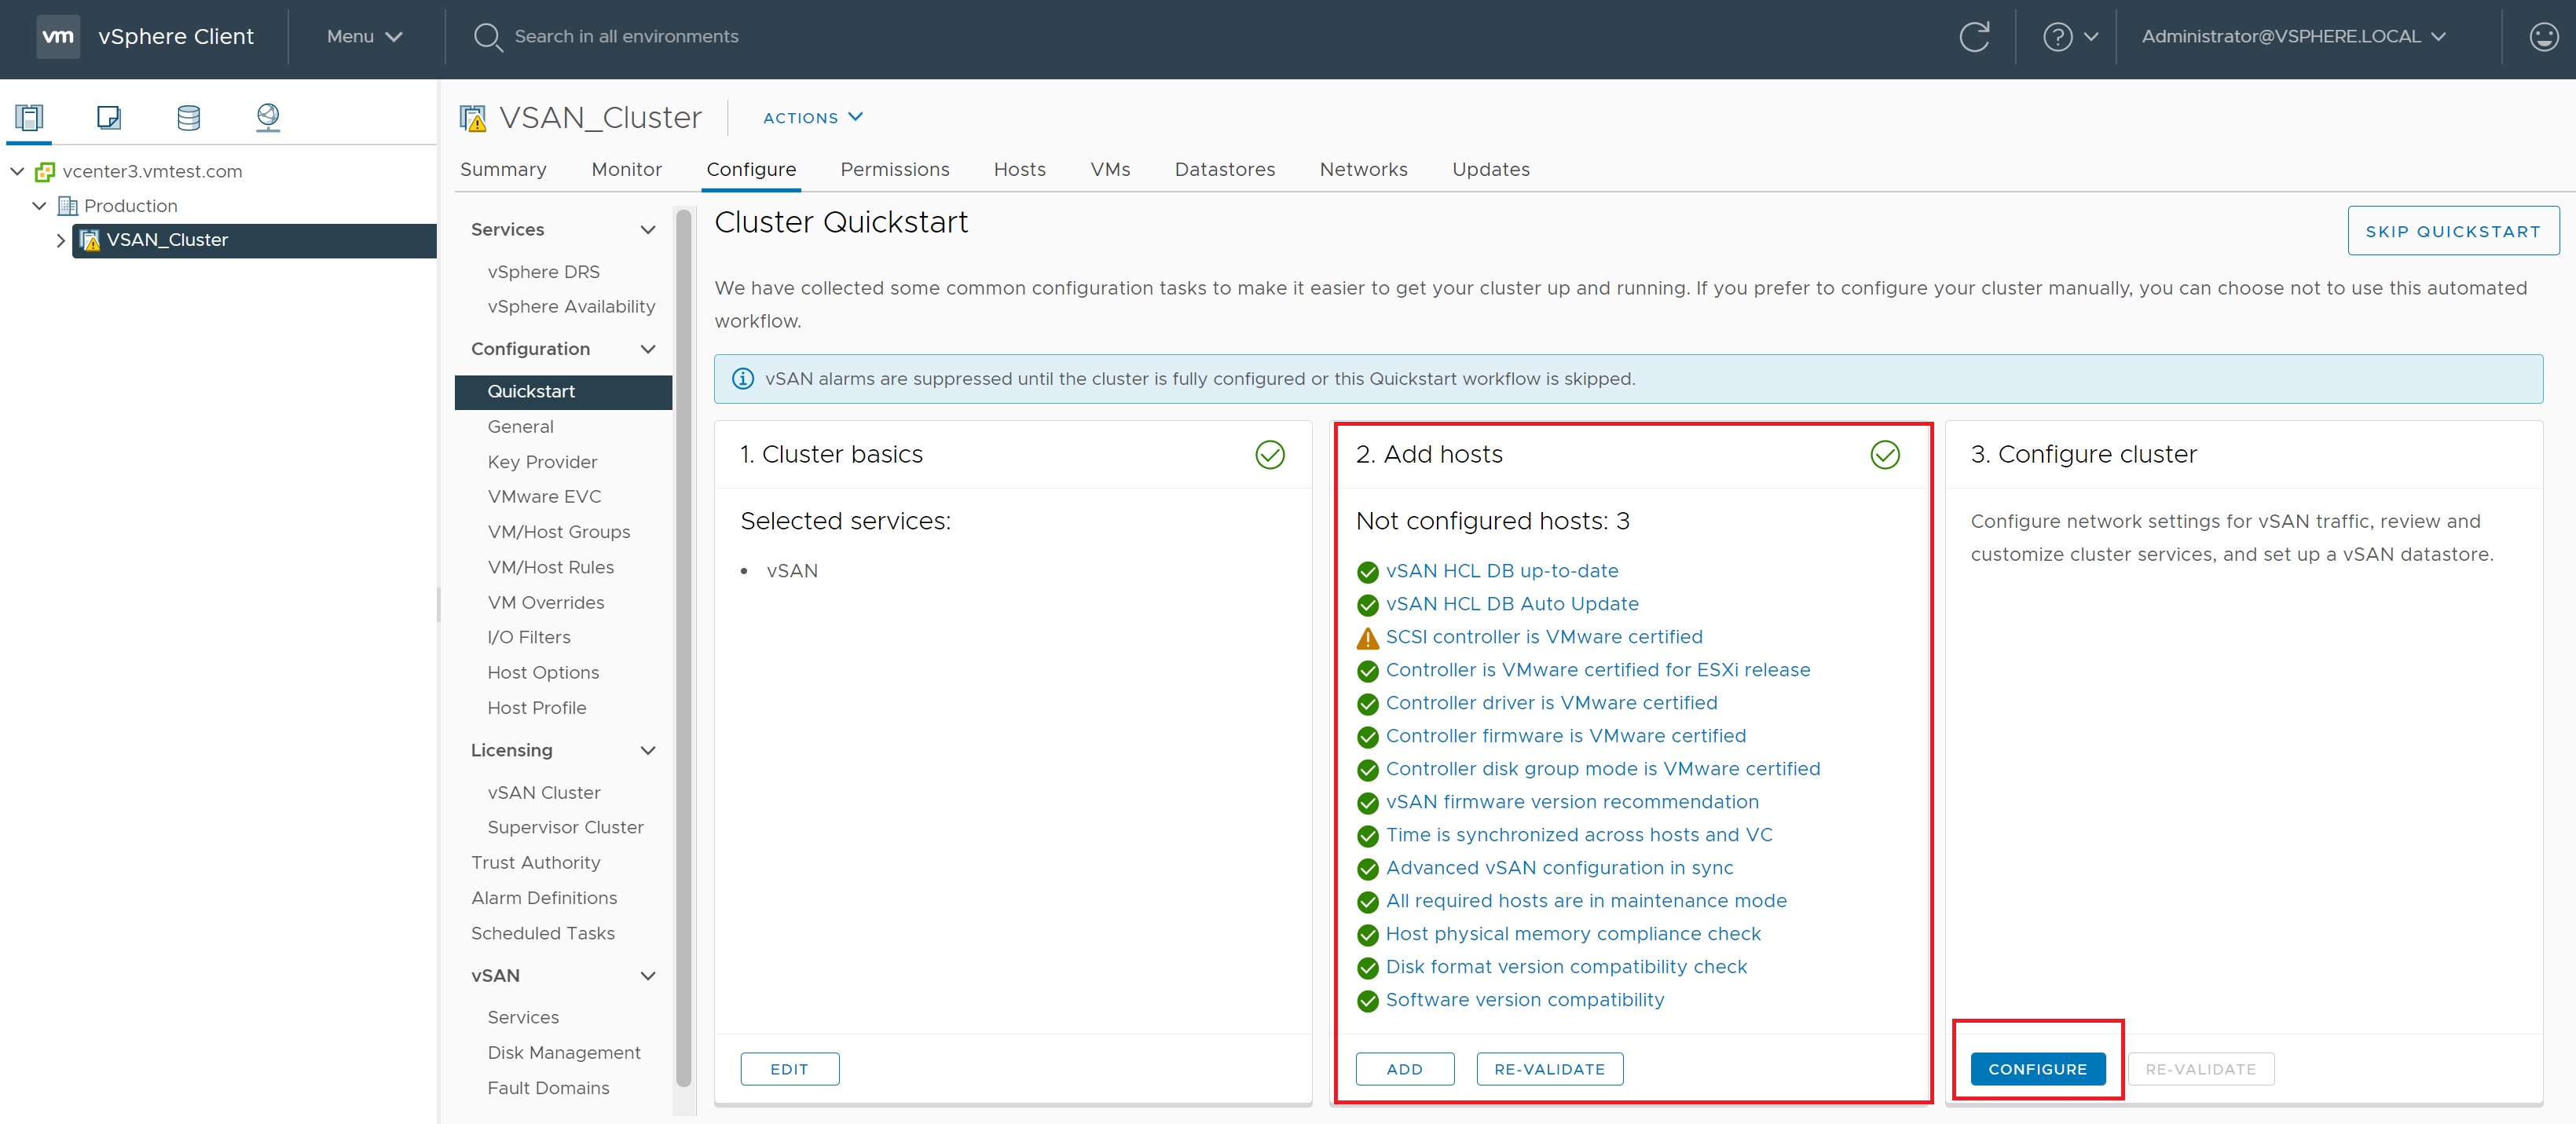
If you click on a warning you can get more details and thus you can try and fix it

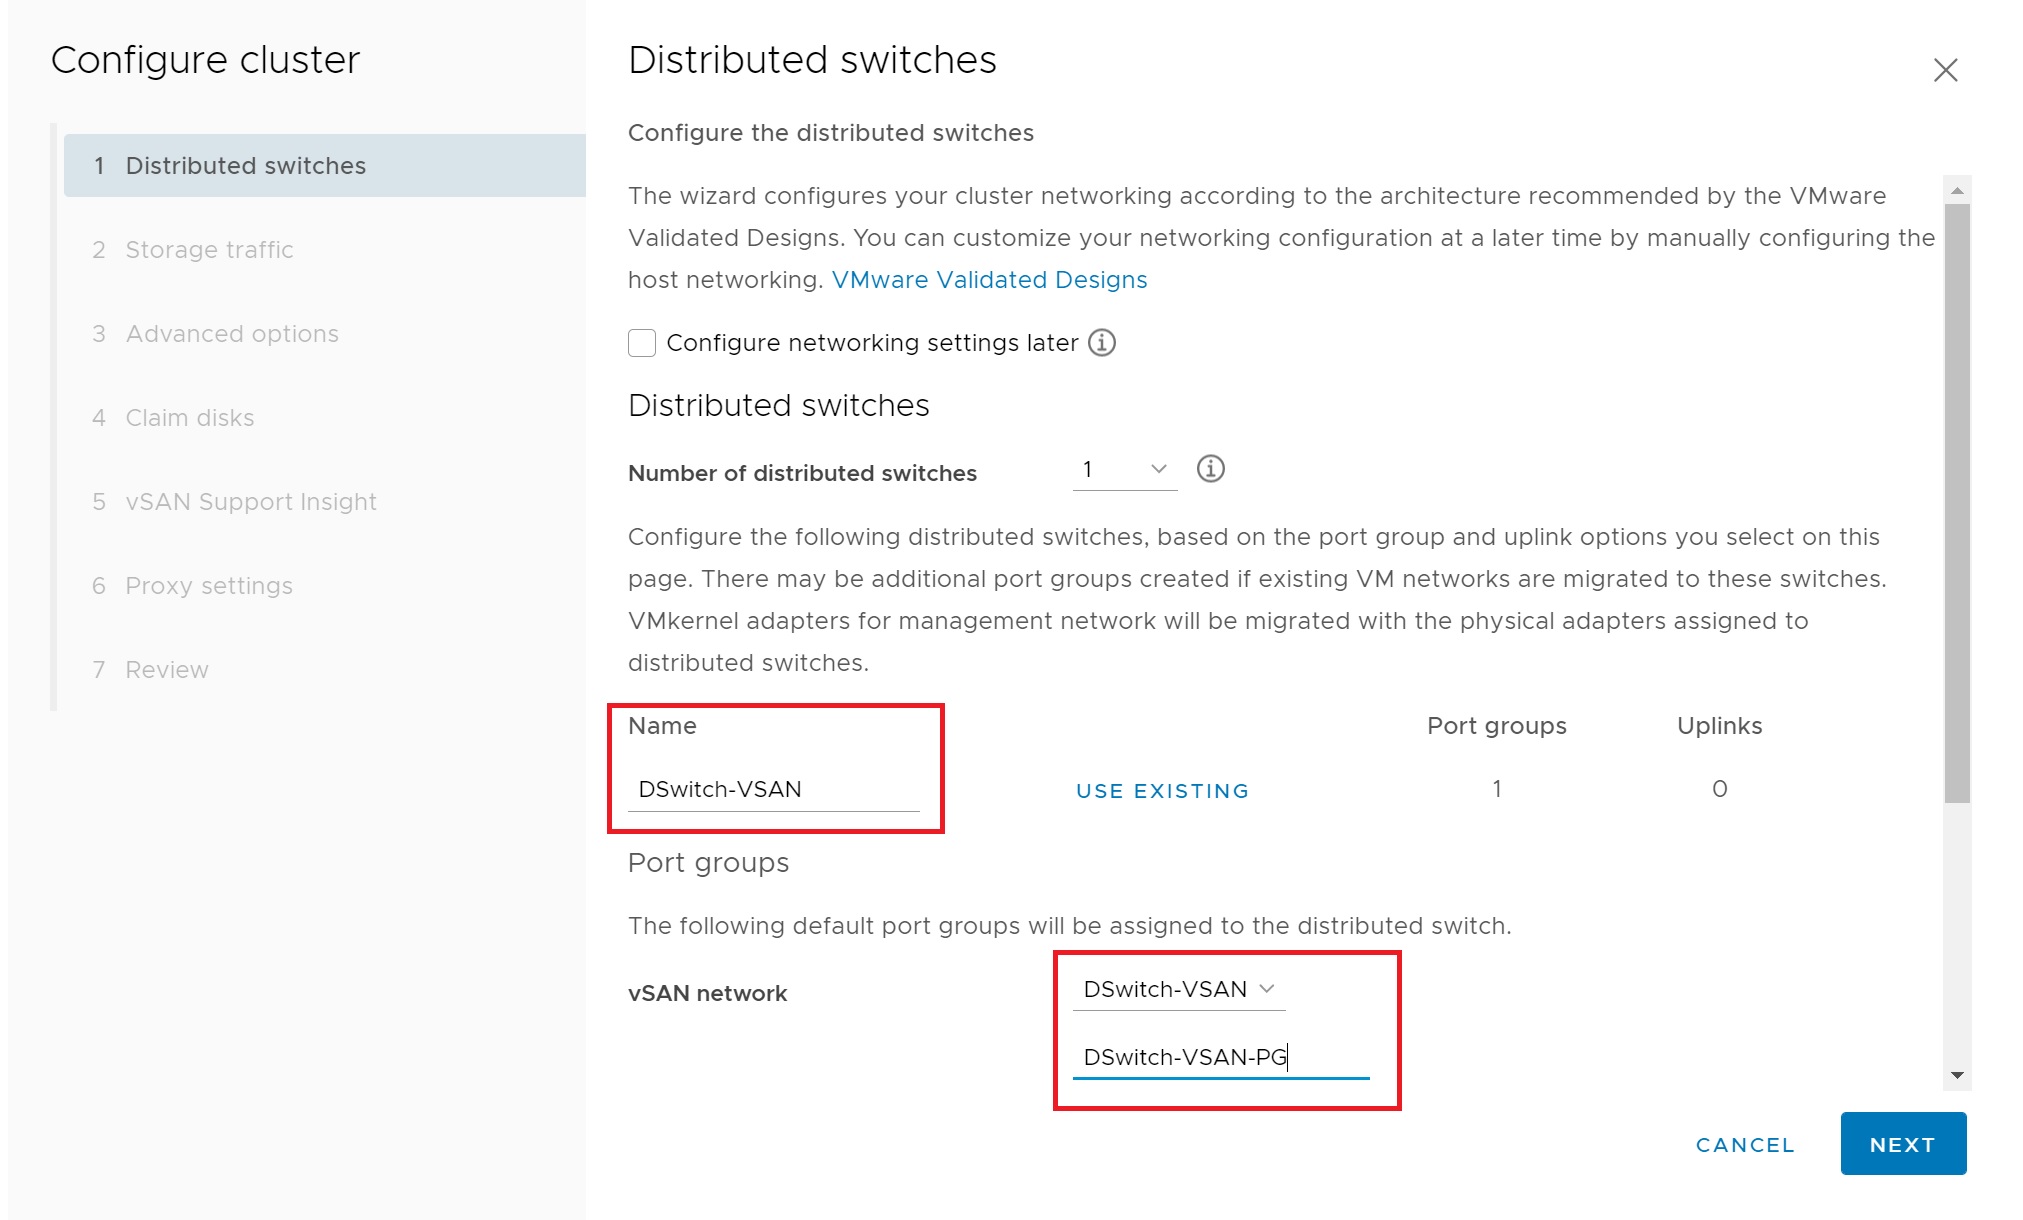
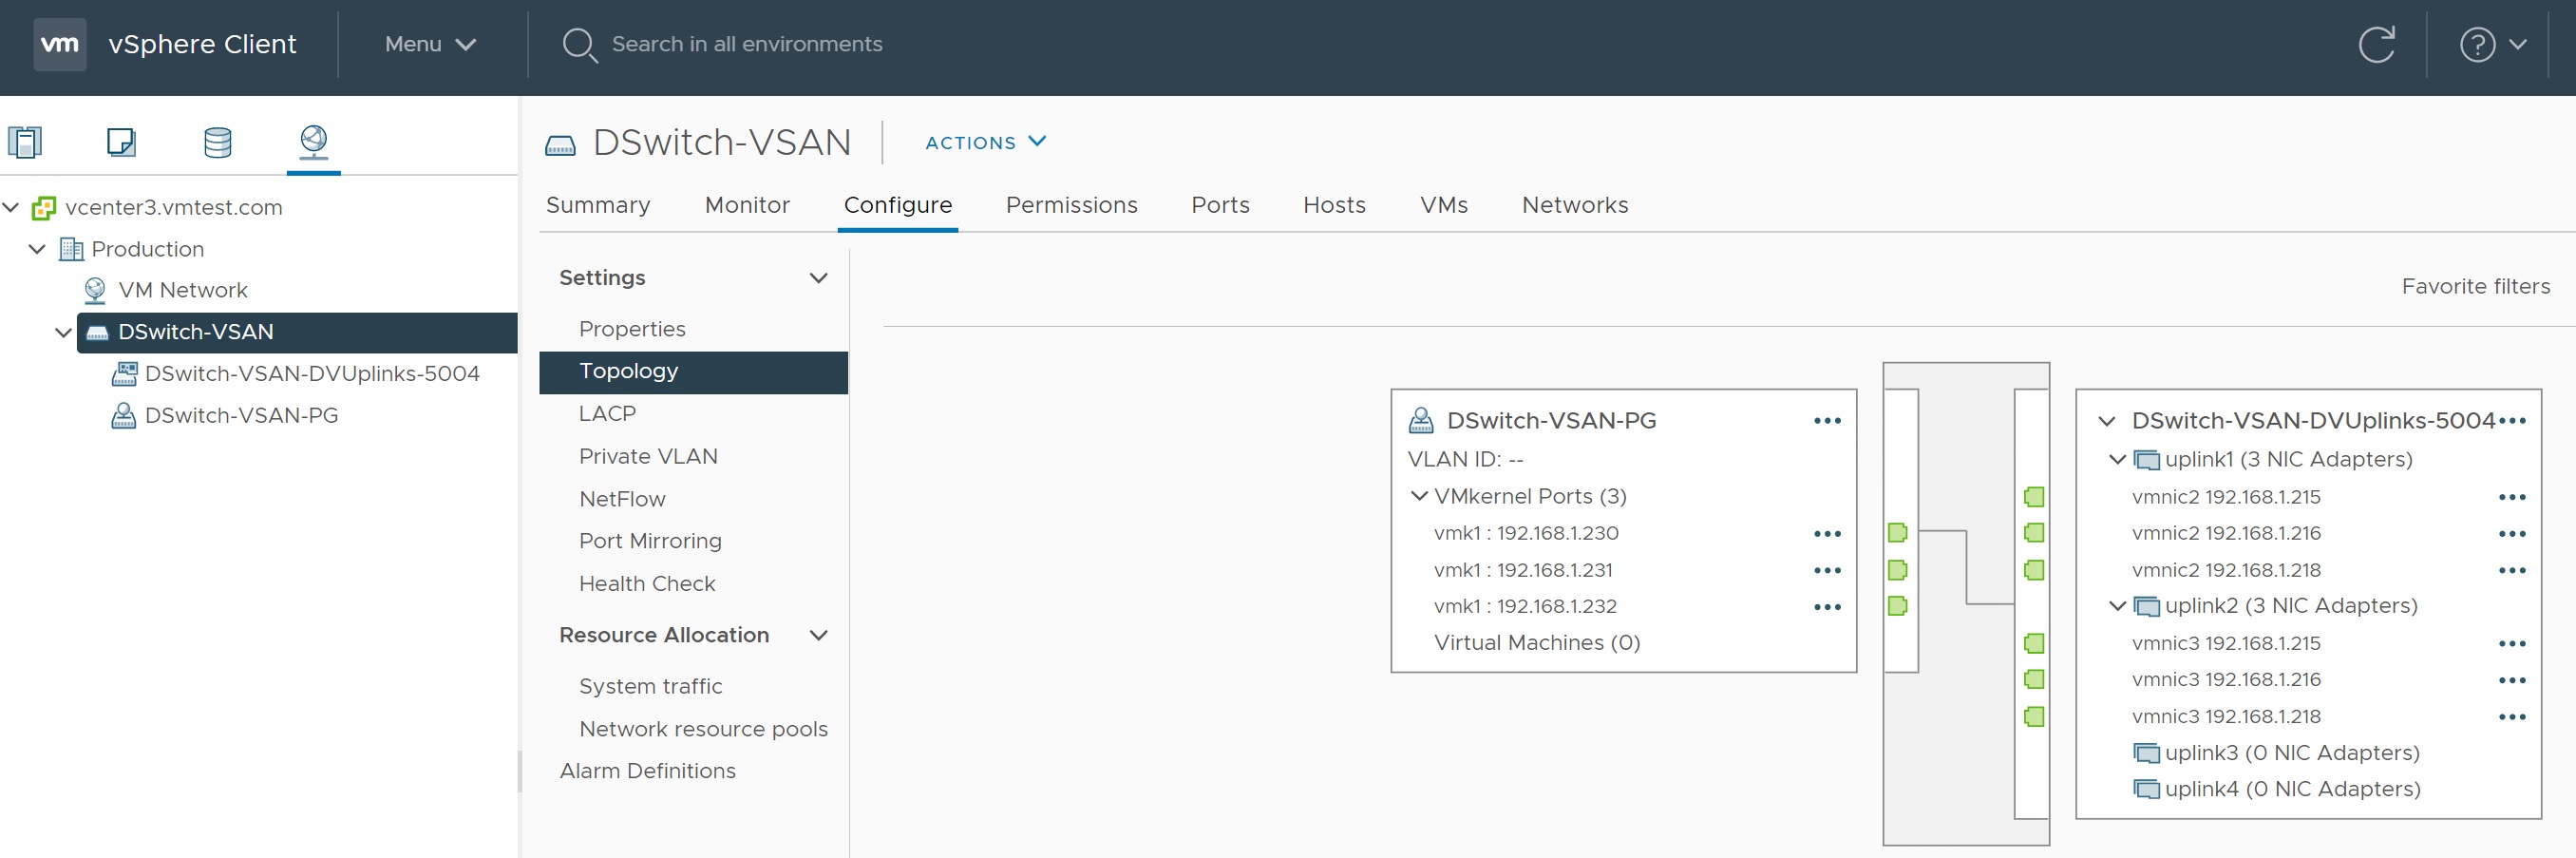
We now move on to configuring the cluster, the first screen is very familar if you have configured a distributed switch , I have changed the distributed switch name to DSwitch-VSAN and the port group name to DSwitch-VSAN-PG to make this obvious.
I have selected 2 physical adapters for redundancy vmnic2 and vmnic3

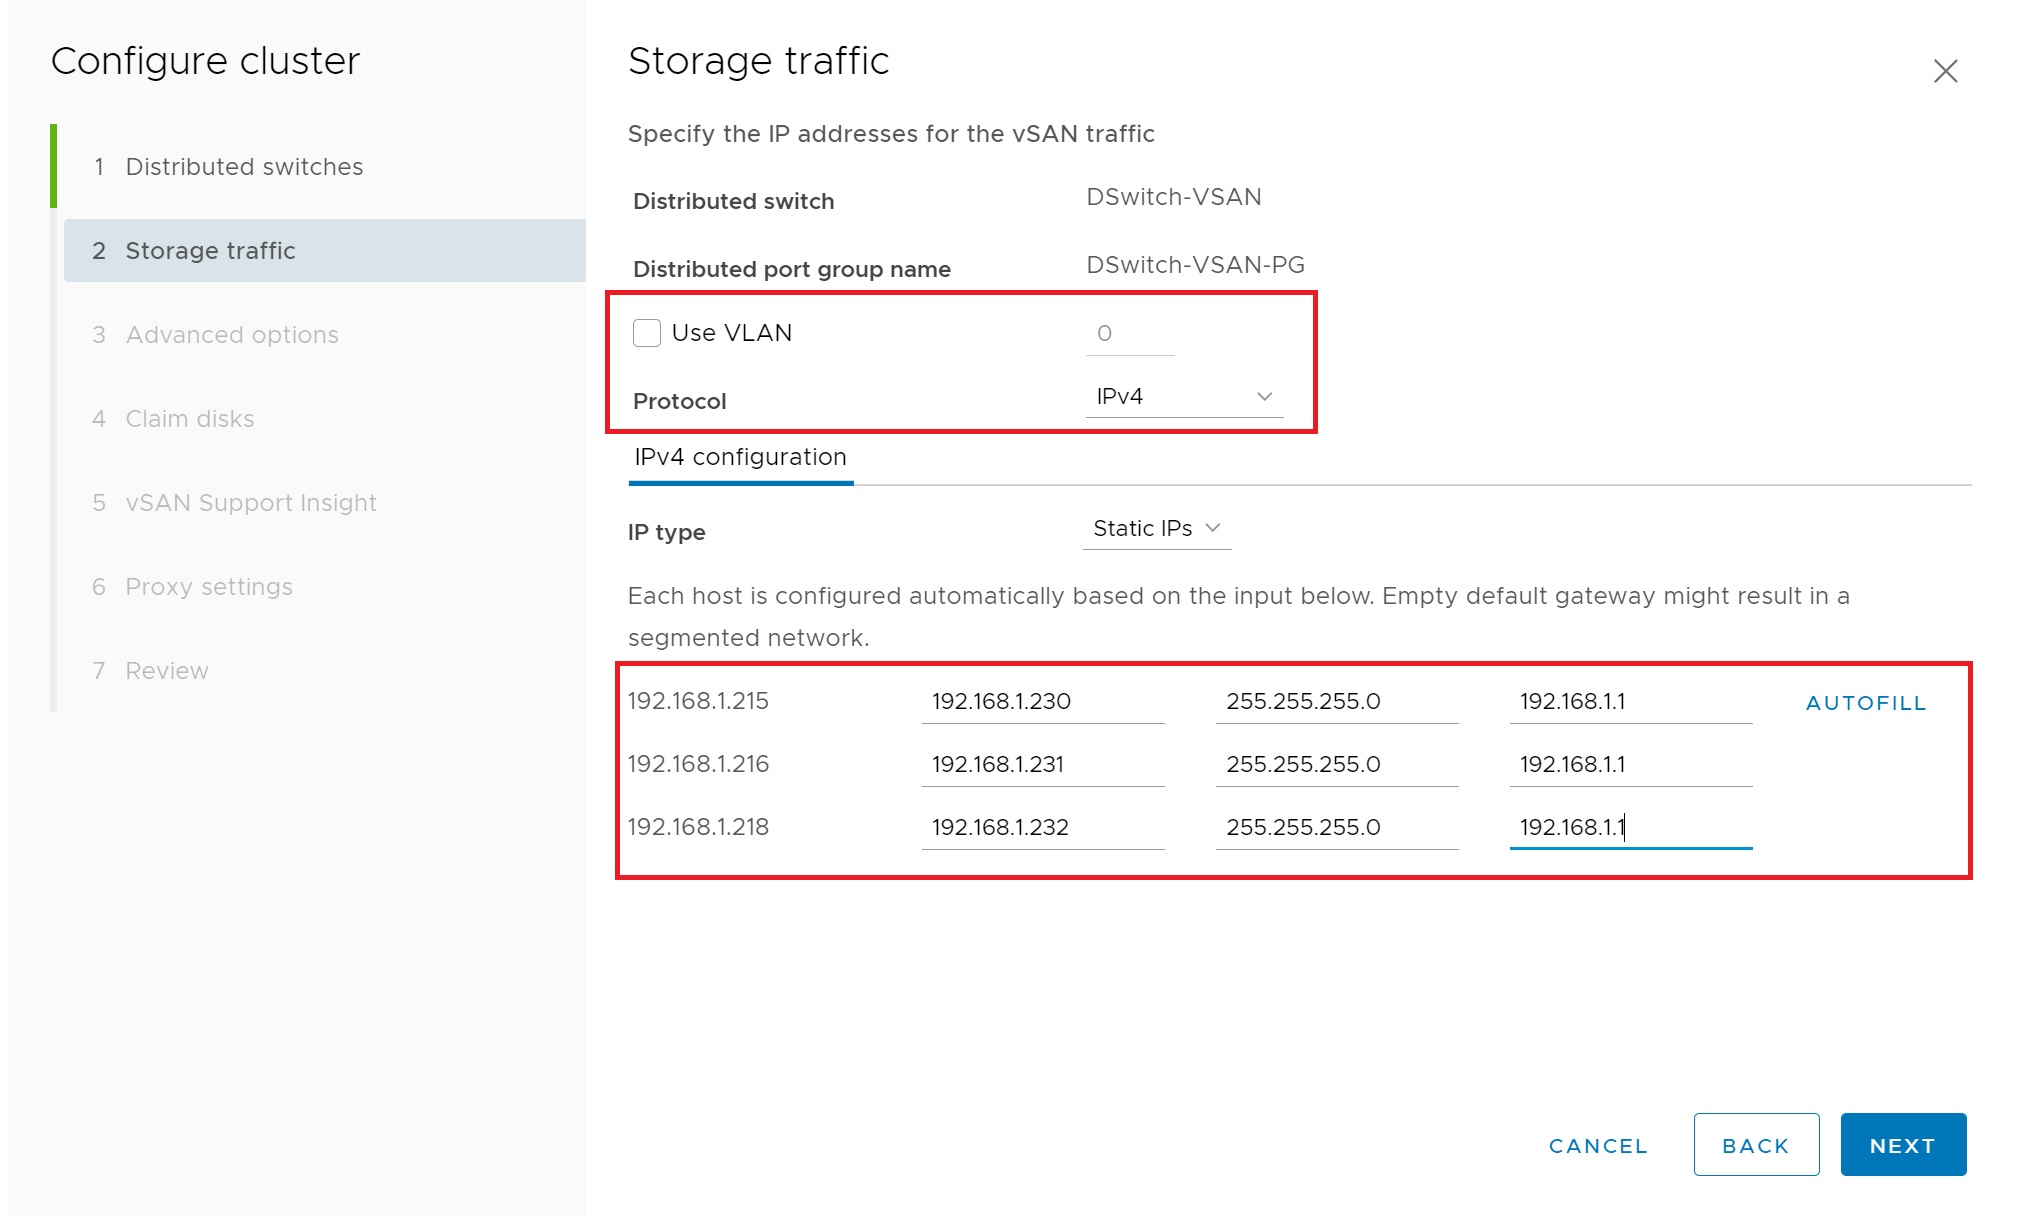
In the next screen we setup the port group, I turn off VLAN and select IPv4 as the protocol and will use static IP's, I then enter the IP addresses for each VMKernel adapter, I will show the topology of the dvSwitch later.
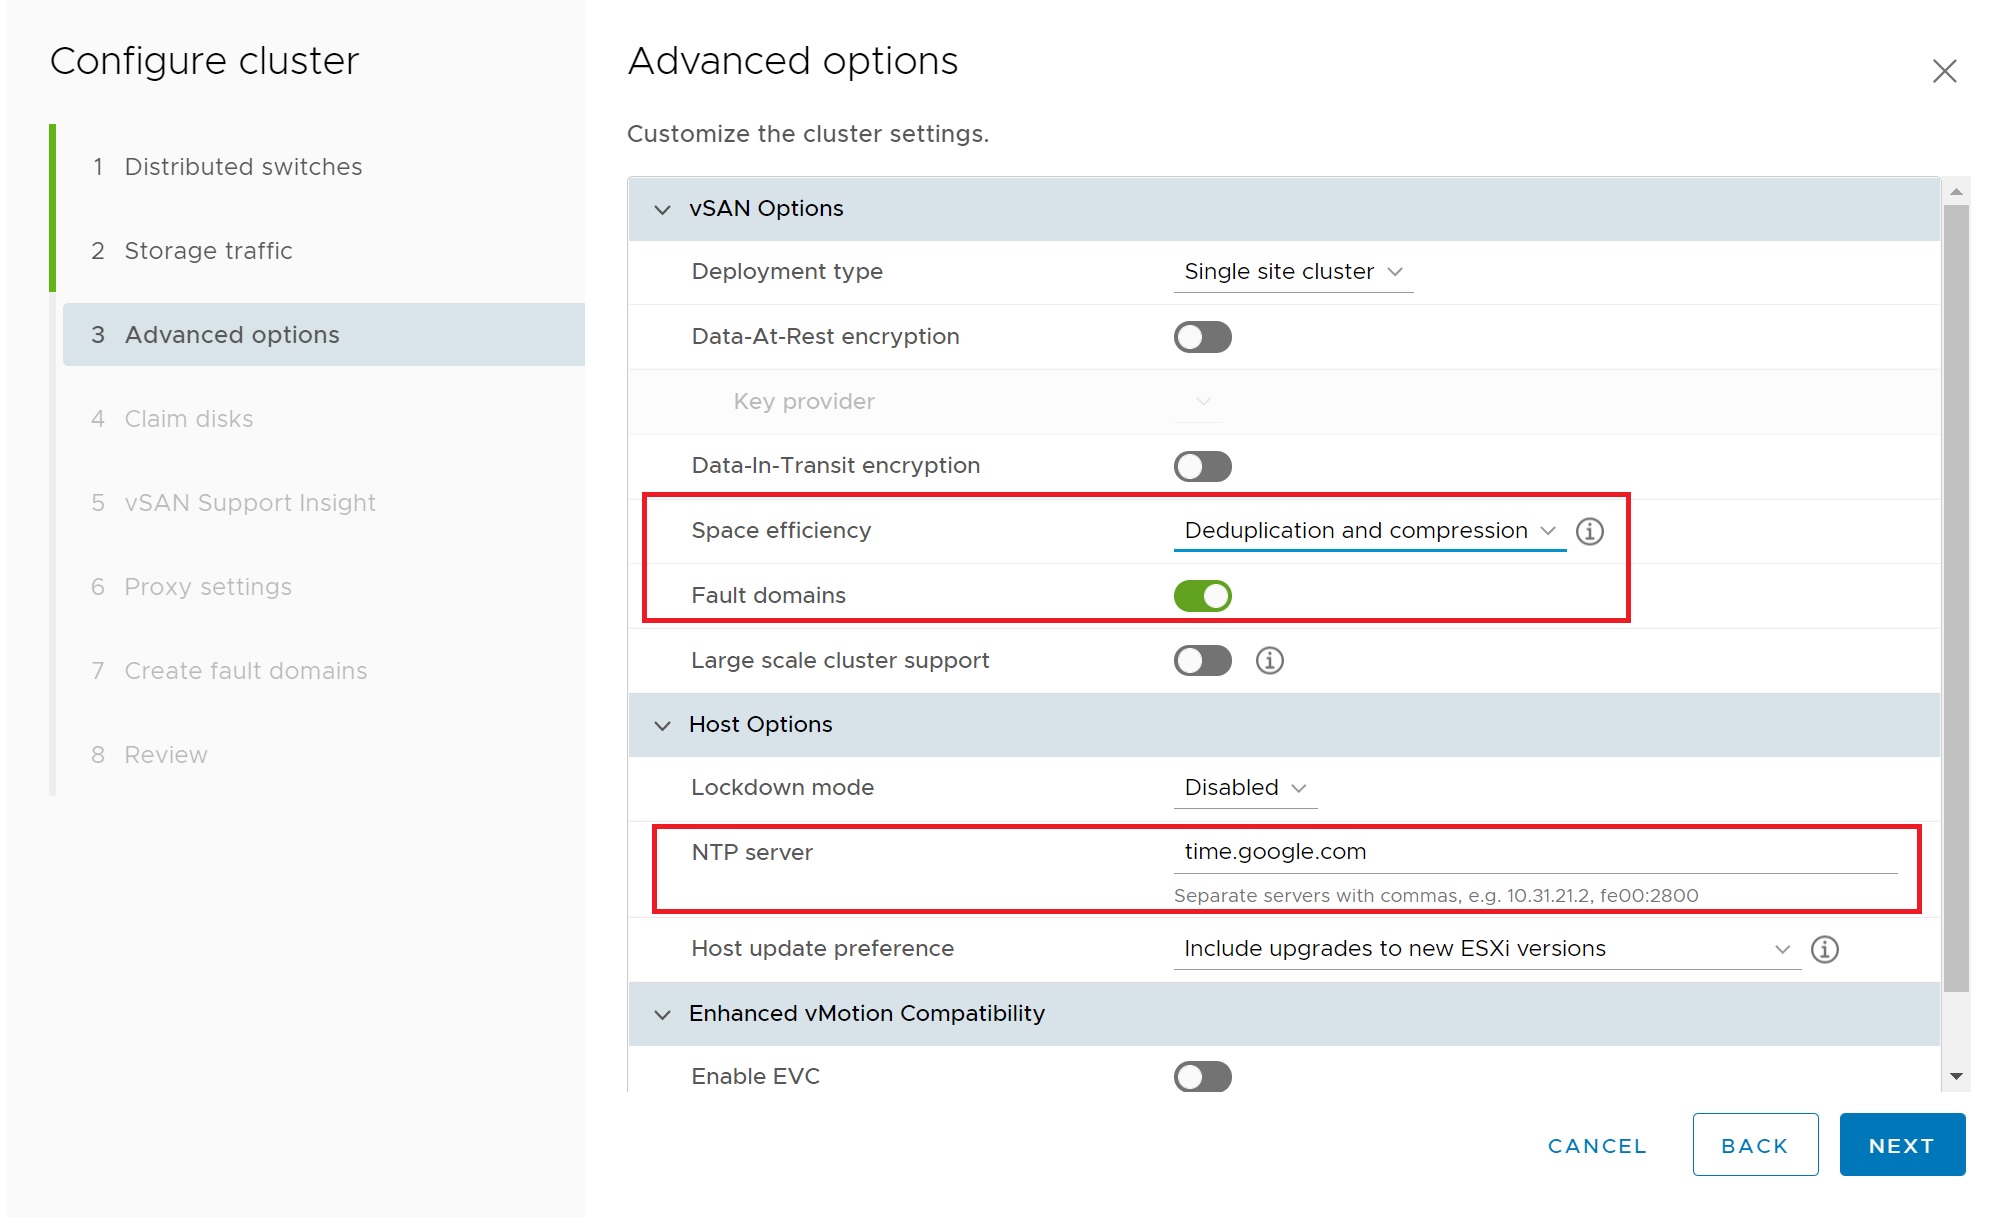
The next screen details the advanced options, I have selected to use Deduplication and compression and fault domains and enter a NTP server, the remaining options have been left as there default values. There a number of different types of cluster deployments.
| Standard vSAN Cluster | A standard vSAN cluster consists of a minimum of three hosts. Typically, all hosts in a standard vSAN cluster reside at the same location, and are connected on the same Layer 2 network. All-flash configurations require 10 Gb network connections, and this also is recommended for hybrid configurations. |
| Two Host vSAN Cluster | Two host vSAN clusters are often used for remote office/branch office environments, typically running a small number of workloads that require high availability. A two host vSAN cluster consists of two hosts at the same location, connected to the same network switch or directly connected. You can configure a two host vSAN cluster that uses a third host as a witness, which can be located remotely from the branch office. Usually the witness resides at the main site, along with the vCenter Server. |
| vSAN Stretched Cluster | A vSAN stretched cluster provides resiliency against the loss of an entire site. The hosts in a stretched cluster are distributed evenly across two sites. The two sites must have a network latency of no more than five milliseconds (5 ms). A vSAN witness host resides at a third site to provide the witness function. The witness also acts as tie-breaker in scenarios where a network partition occurs between the two data sites. Only metadata such as witness components is stored on the witness. |
Next we setup the claim disks, When you enable vSAN on a cluster, the vSAN organizes the devices into groups. You organize cache and capacity devices into disk groups. Each disk group contains one flash cache device (SSD) and one or more capacity devices (HDD or SSD). The cache device acts as a read cache and write buffer, this dramatically improves the performance of the I/O while (when using HDD disk for capacity) allowing for scale-out based on low-cost SATA or SAS disk drives. In all-flash setups the capacity disks are also flash, there is no need to move blocks between flash devices. For this reason, vSAN dedicates 100% of the device to write buffering. The setup screen makes a good choice in selecting what disk can be used for cache and which ones can be used for capacity, here I did nothing in regards to setting up the disks, it was all done for me automatically.

The next screen allows you to setup the support insight, for testing purposes I have disabled this.

Next we see the fault domains (as I selected to turn it on earlier), here we can see that we can tolerate one ESXi server failure, which I will prove later.

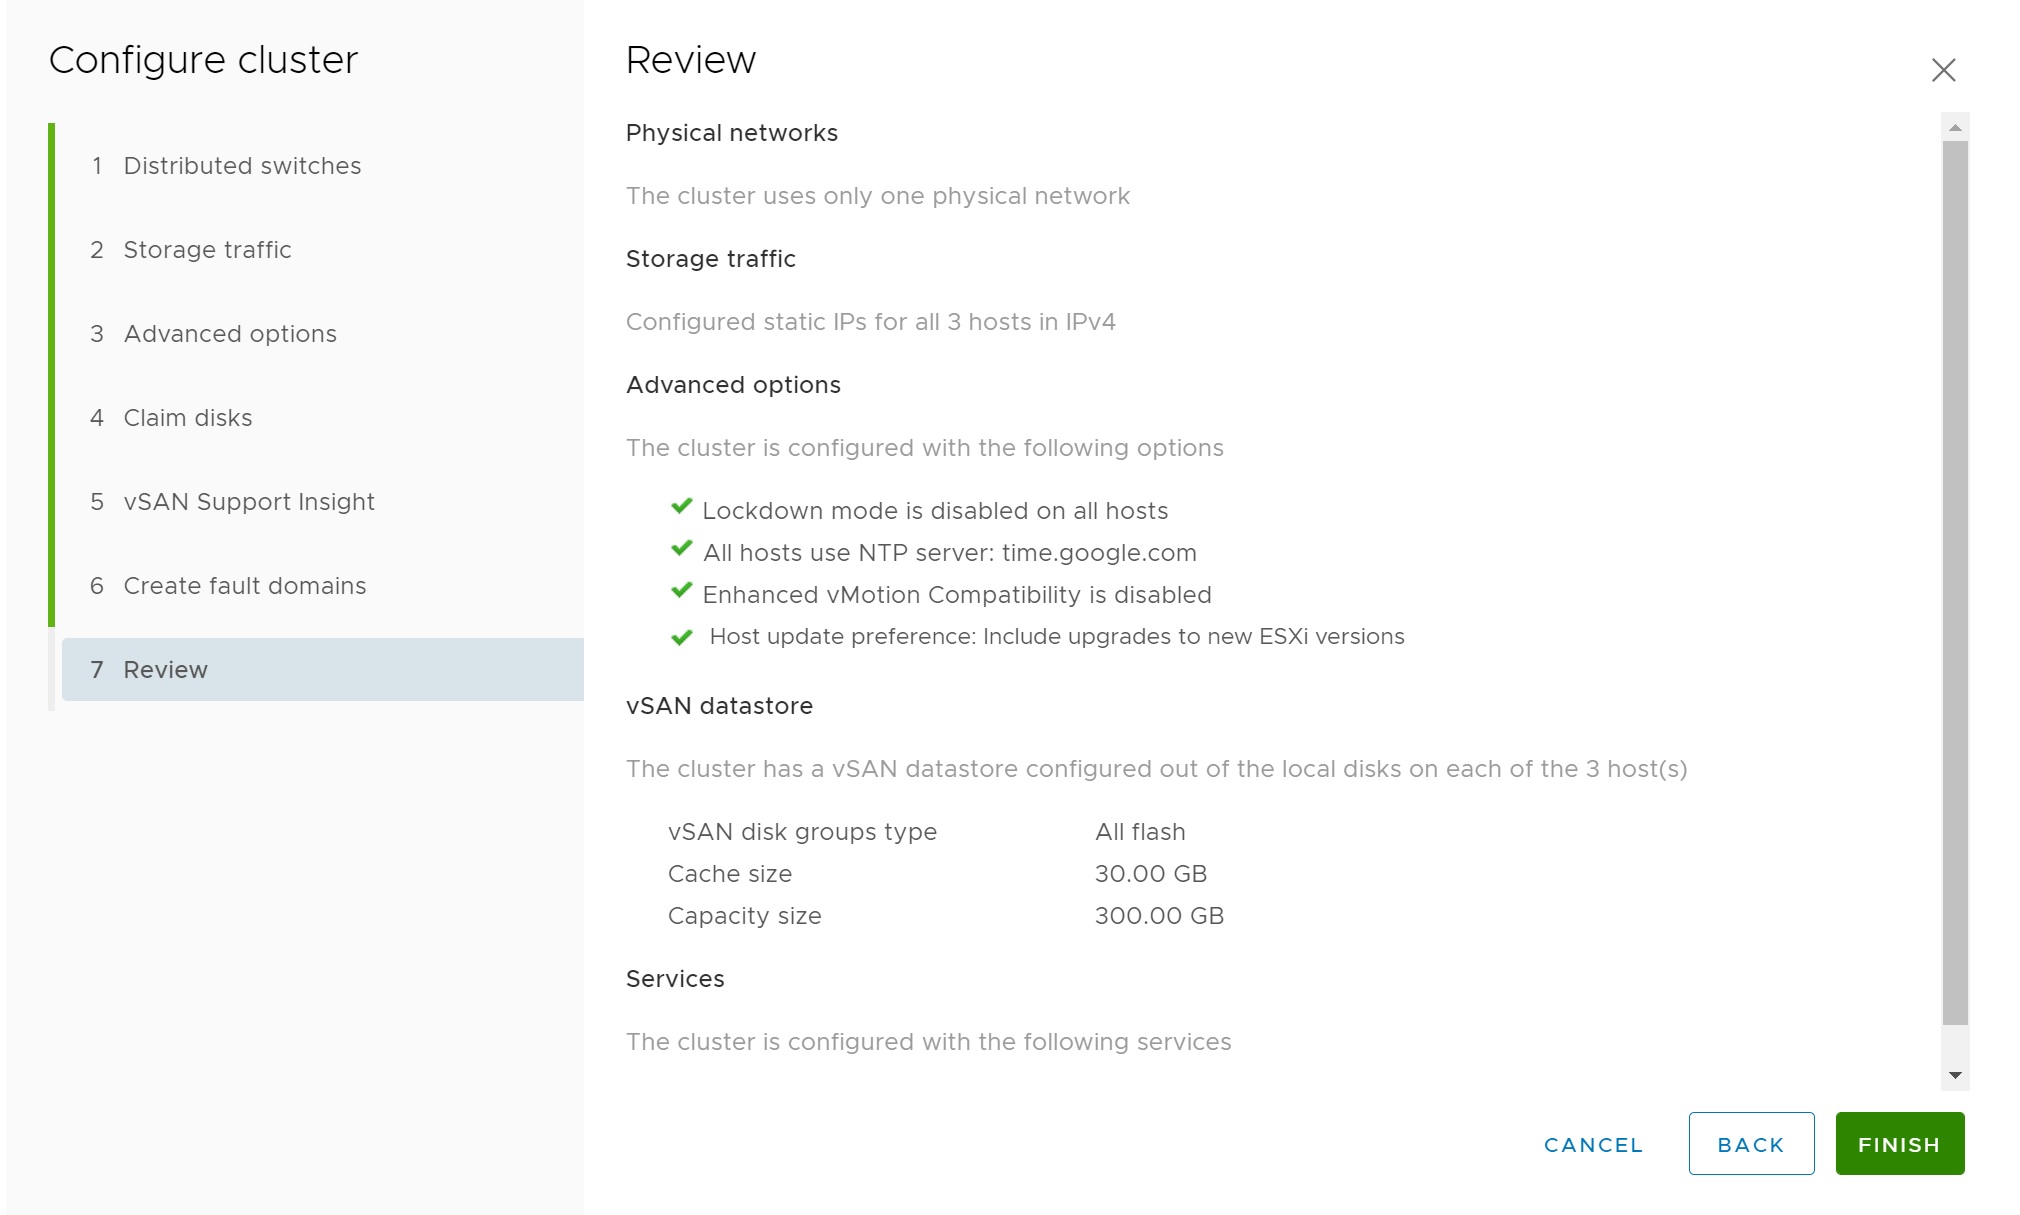
Finally we get to a review screen, click FINISH to complete setting up the vSAN cluster.
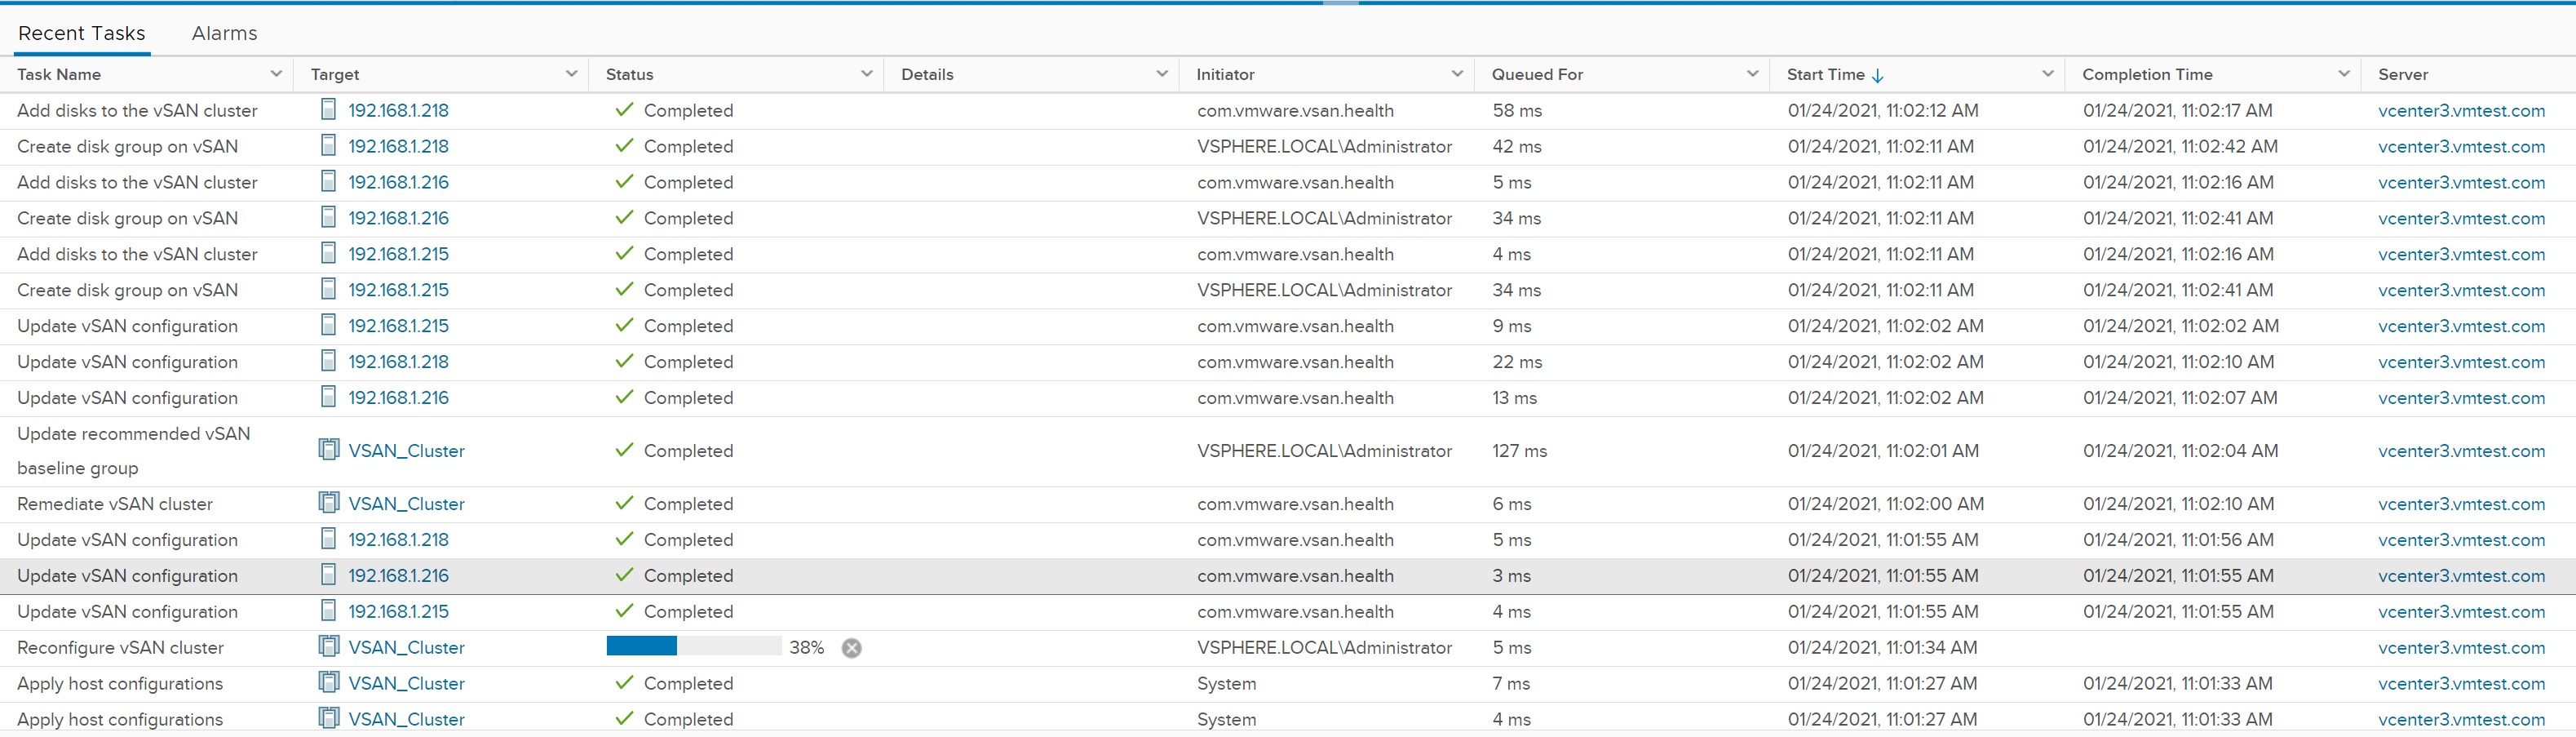
In the tasks bar at the bottom a lot will happen, the distributed switch will be configured, port group will be created, the VMKernel adapter, and the disks will be configured.
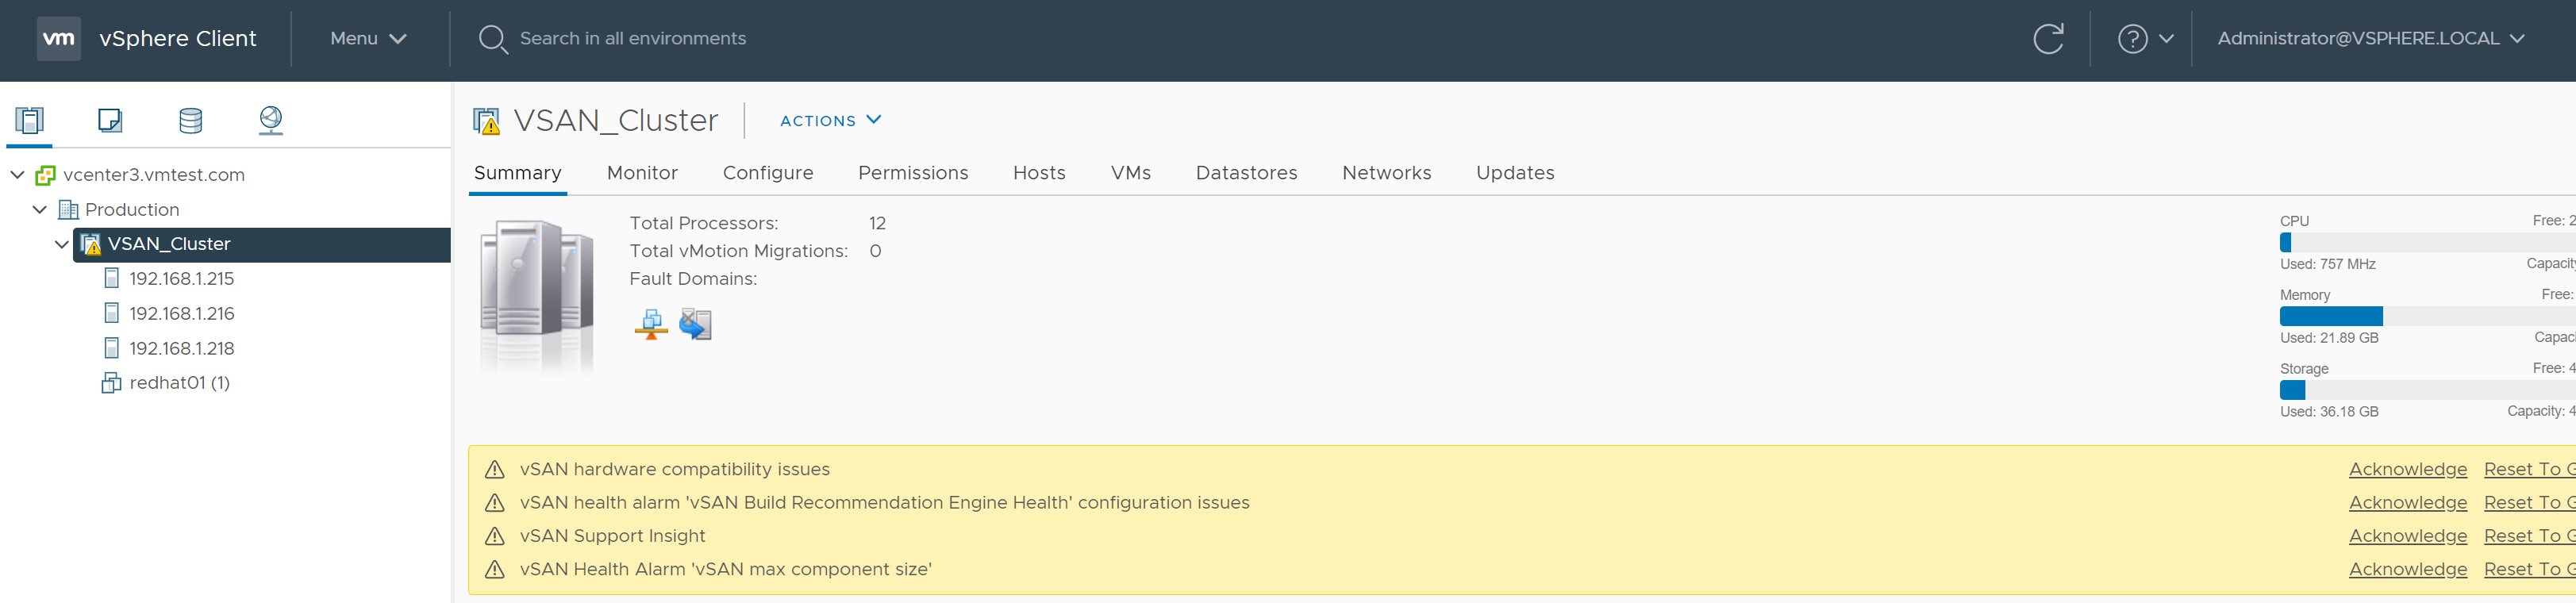
Once complete we are returnned to the quickstart cluster screen, here you can see many warnings which is not suprising as I am are using a unsupported ESXi nested configuration, however we do have a fully working vSAN cluster.
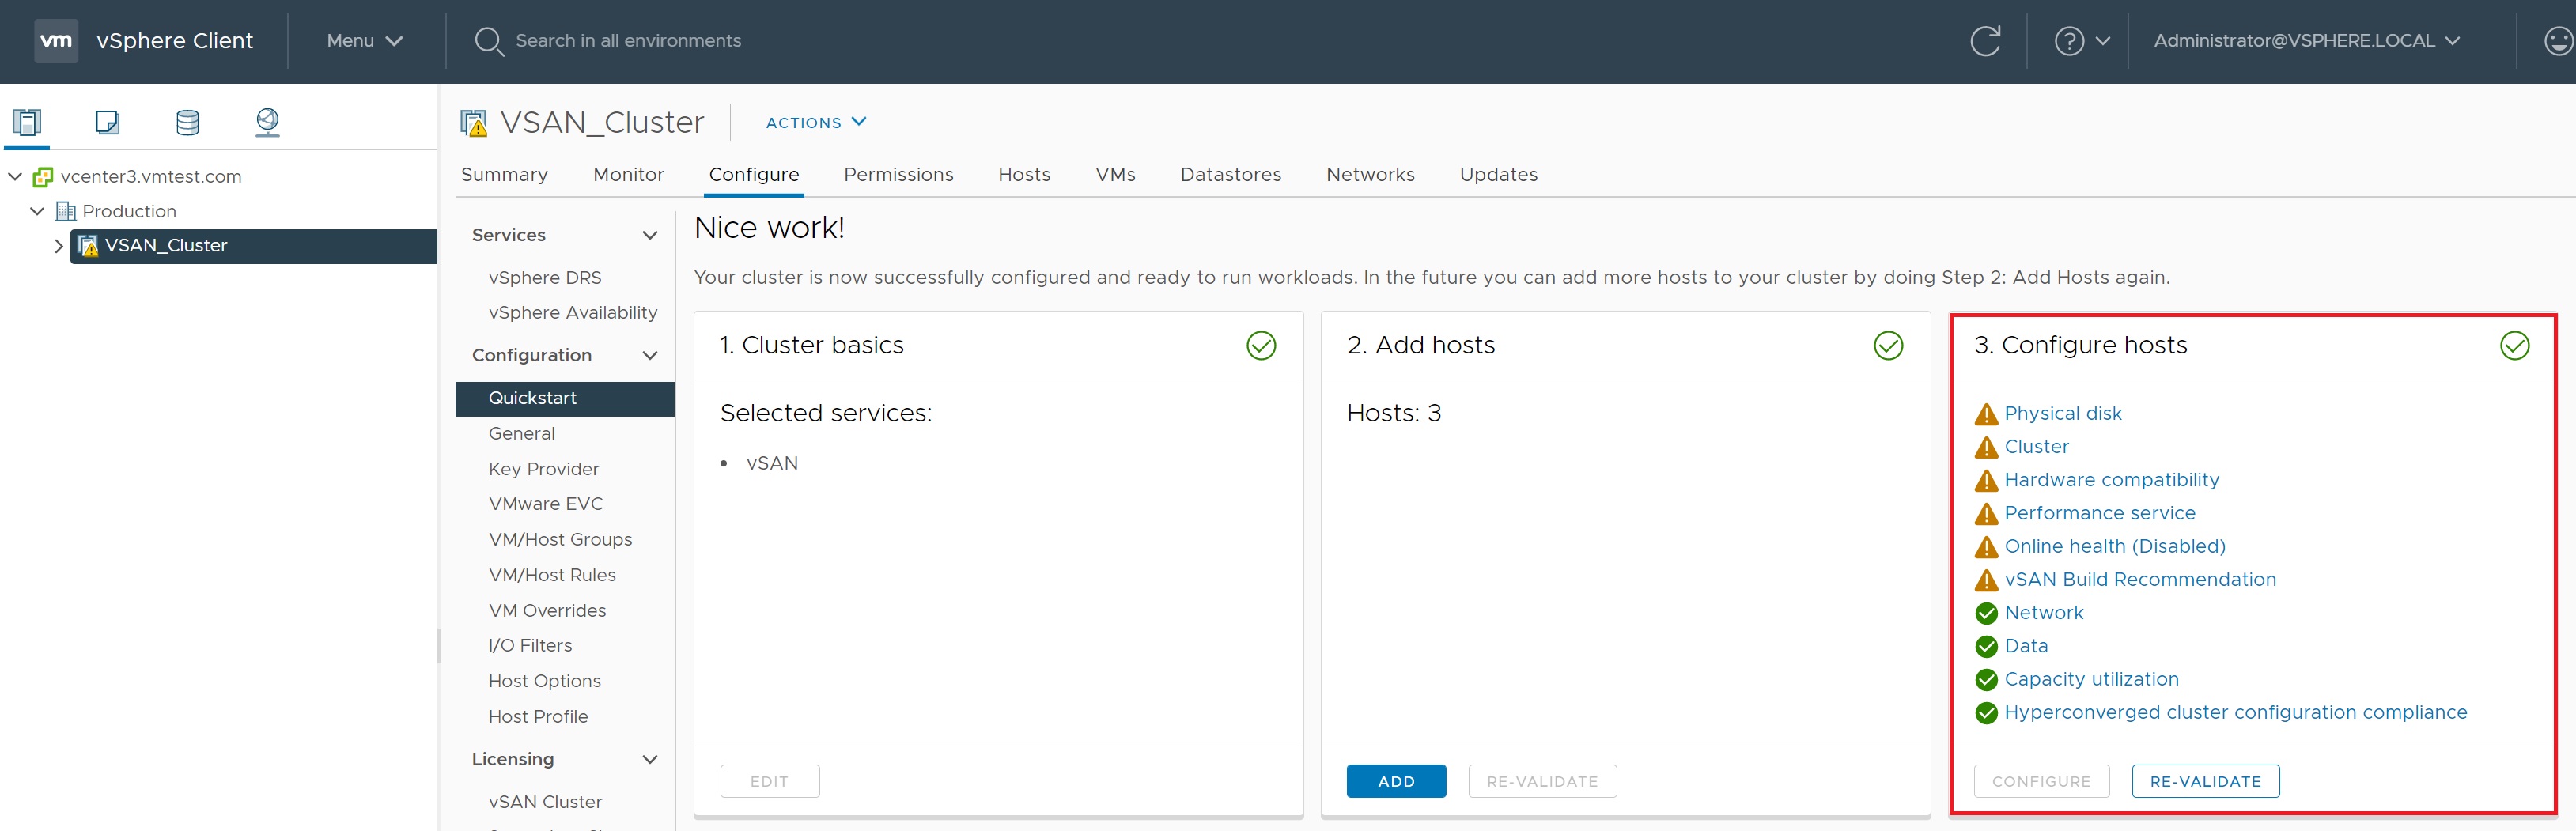
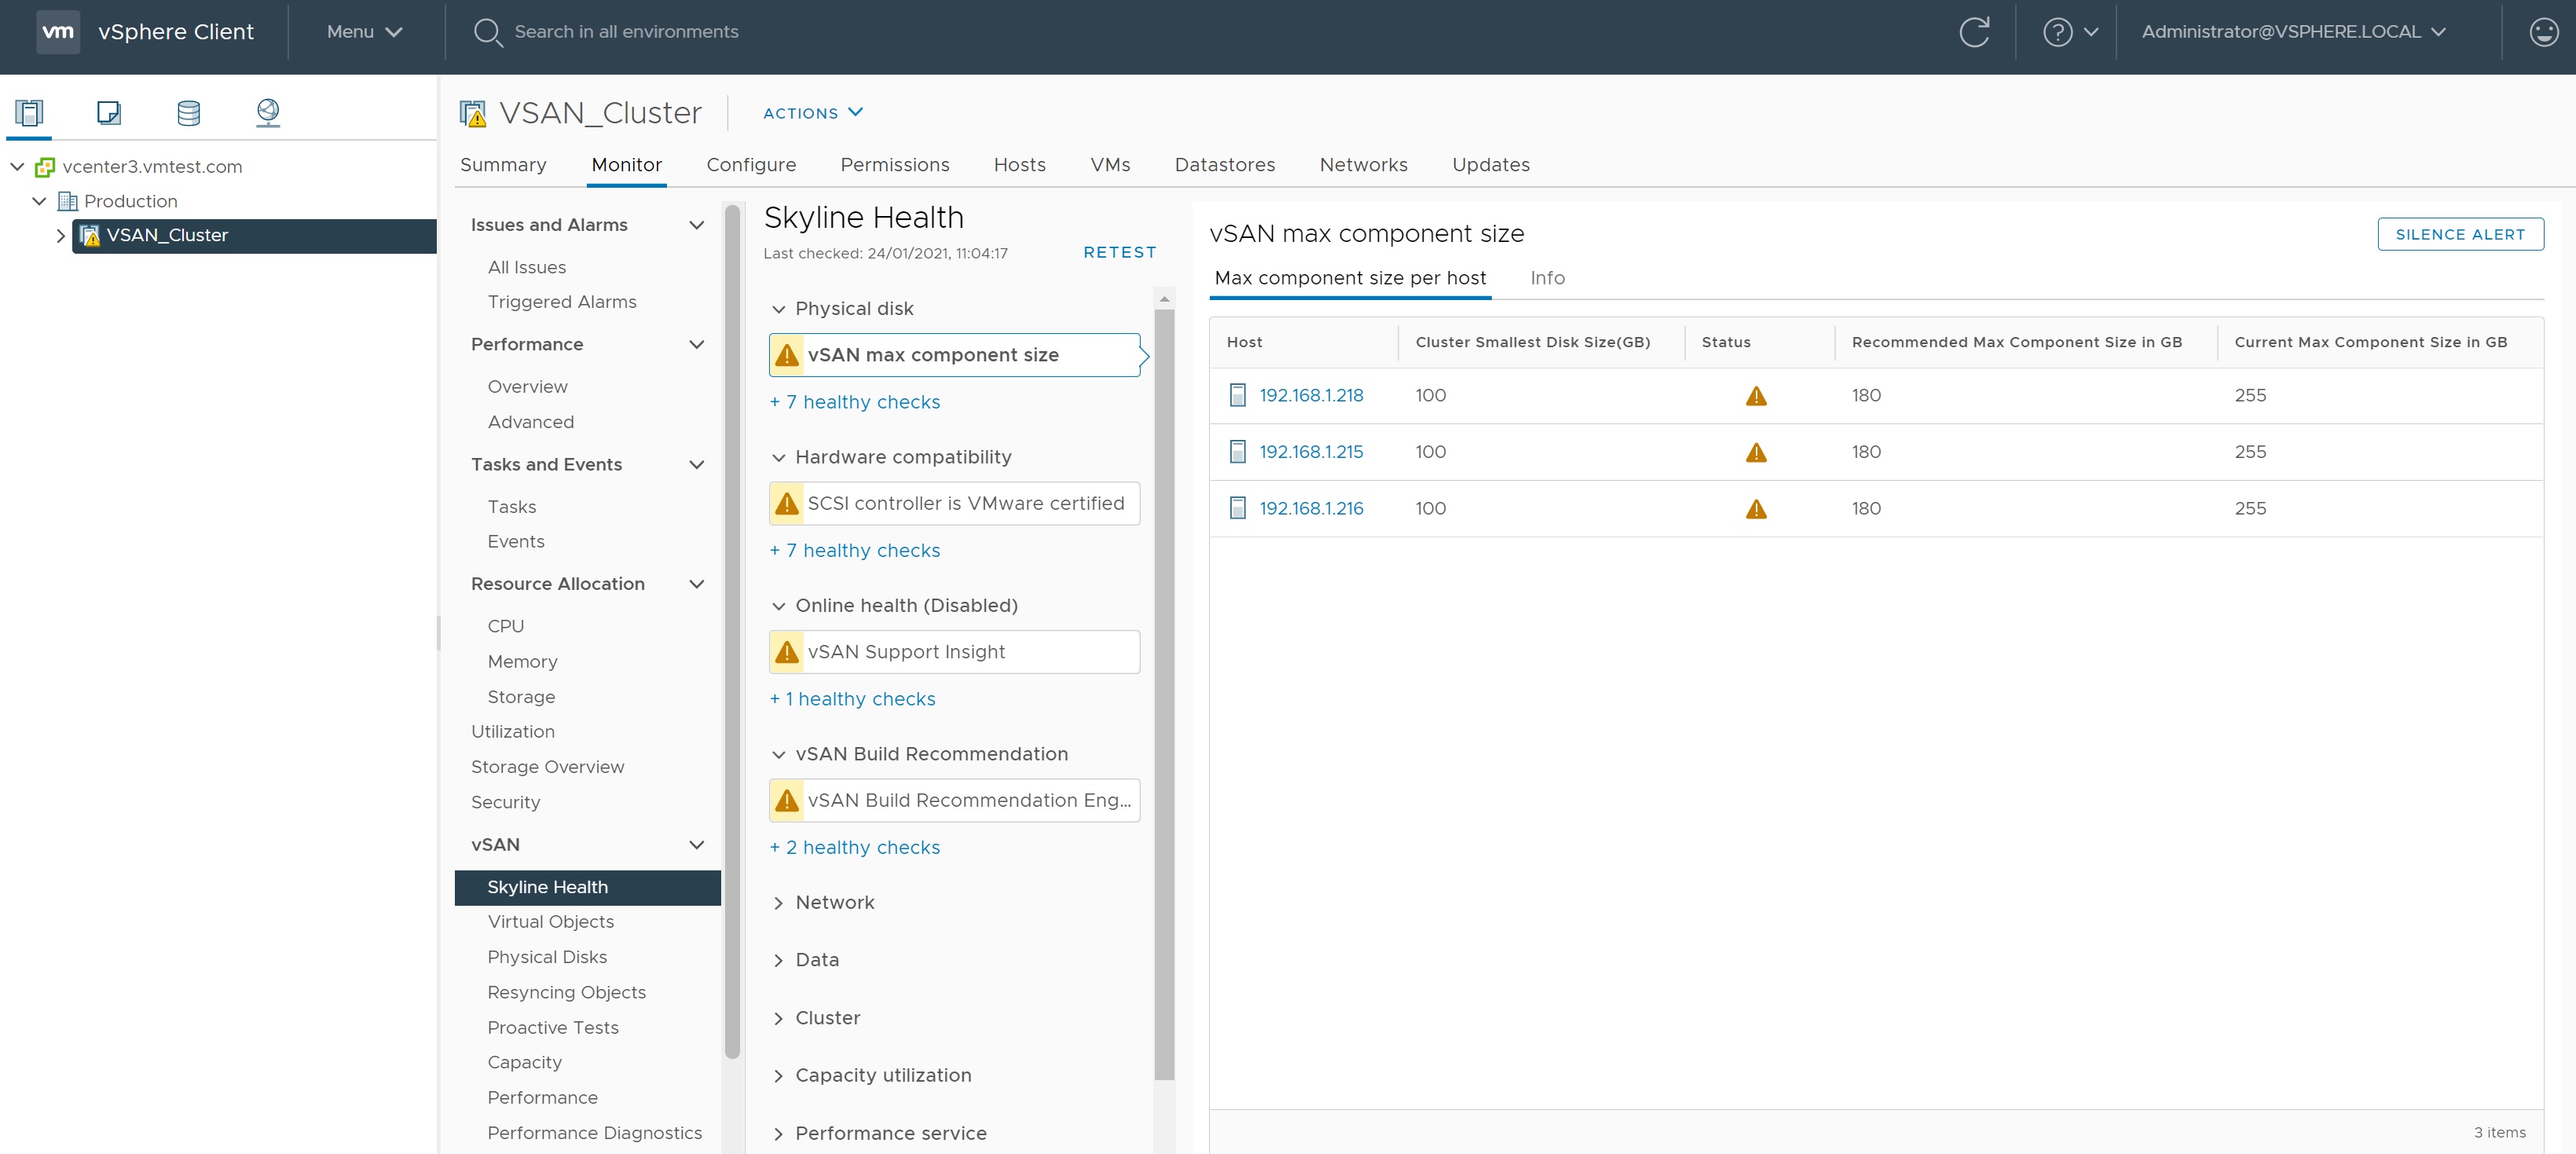
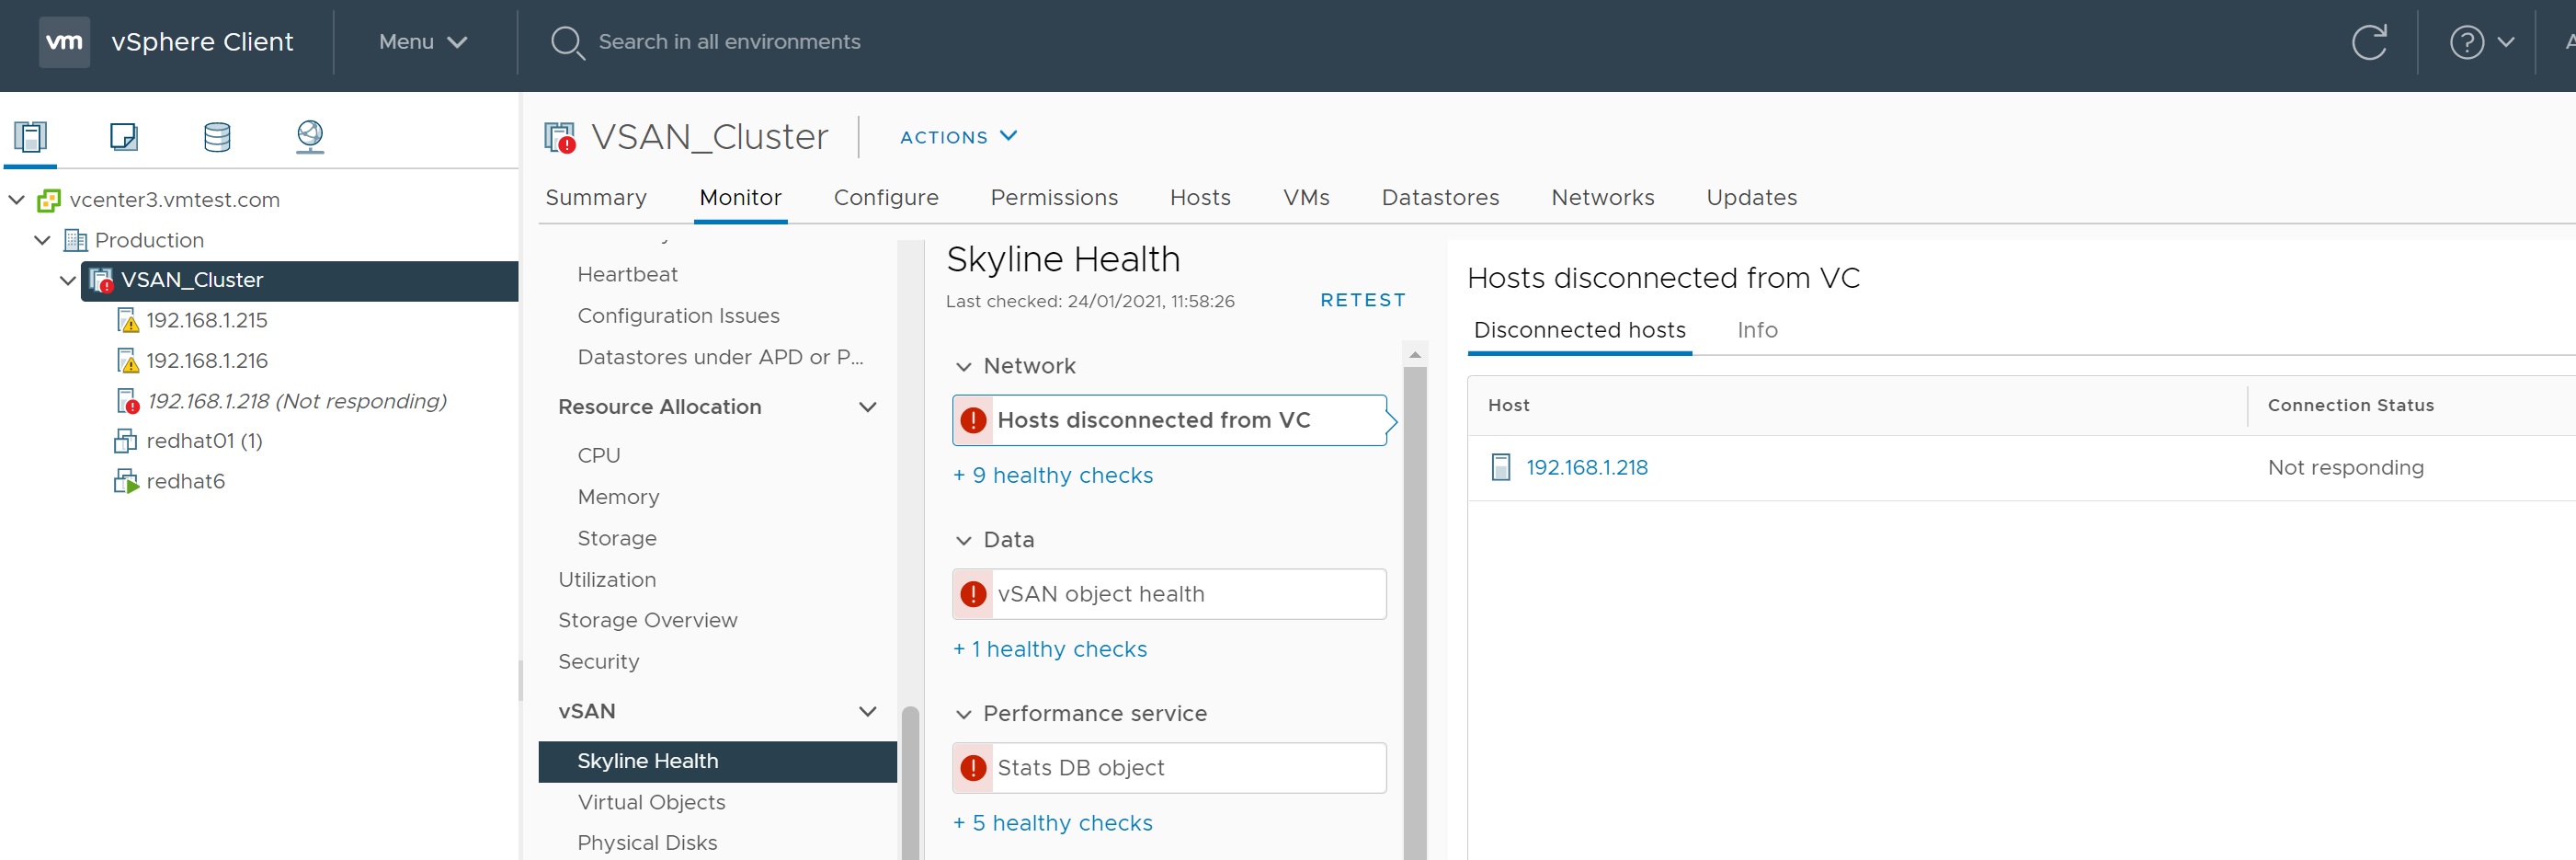
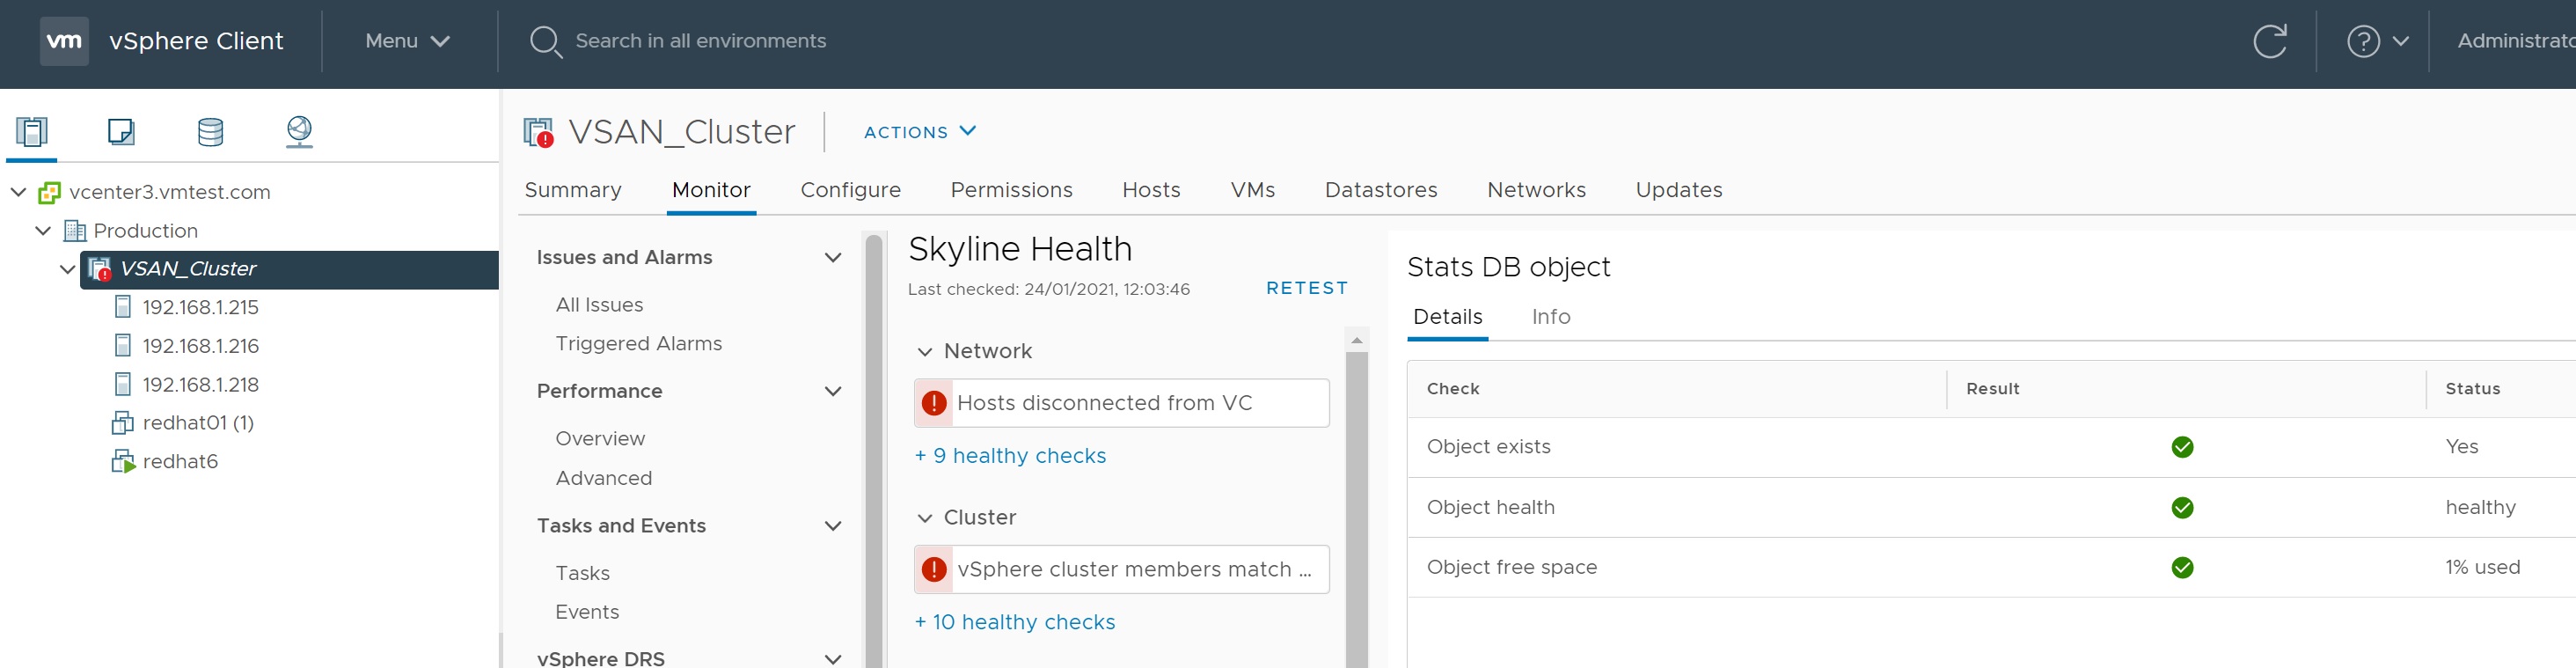
If we click on one of the warnings we are taken to the vSAN cluster Skyline Health, which details the health of the vSAN, here you can drill down further to investigate the warning.
Here we can see the distribution switch that was created, as you can see we have two physical NIC's configured.
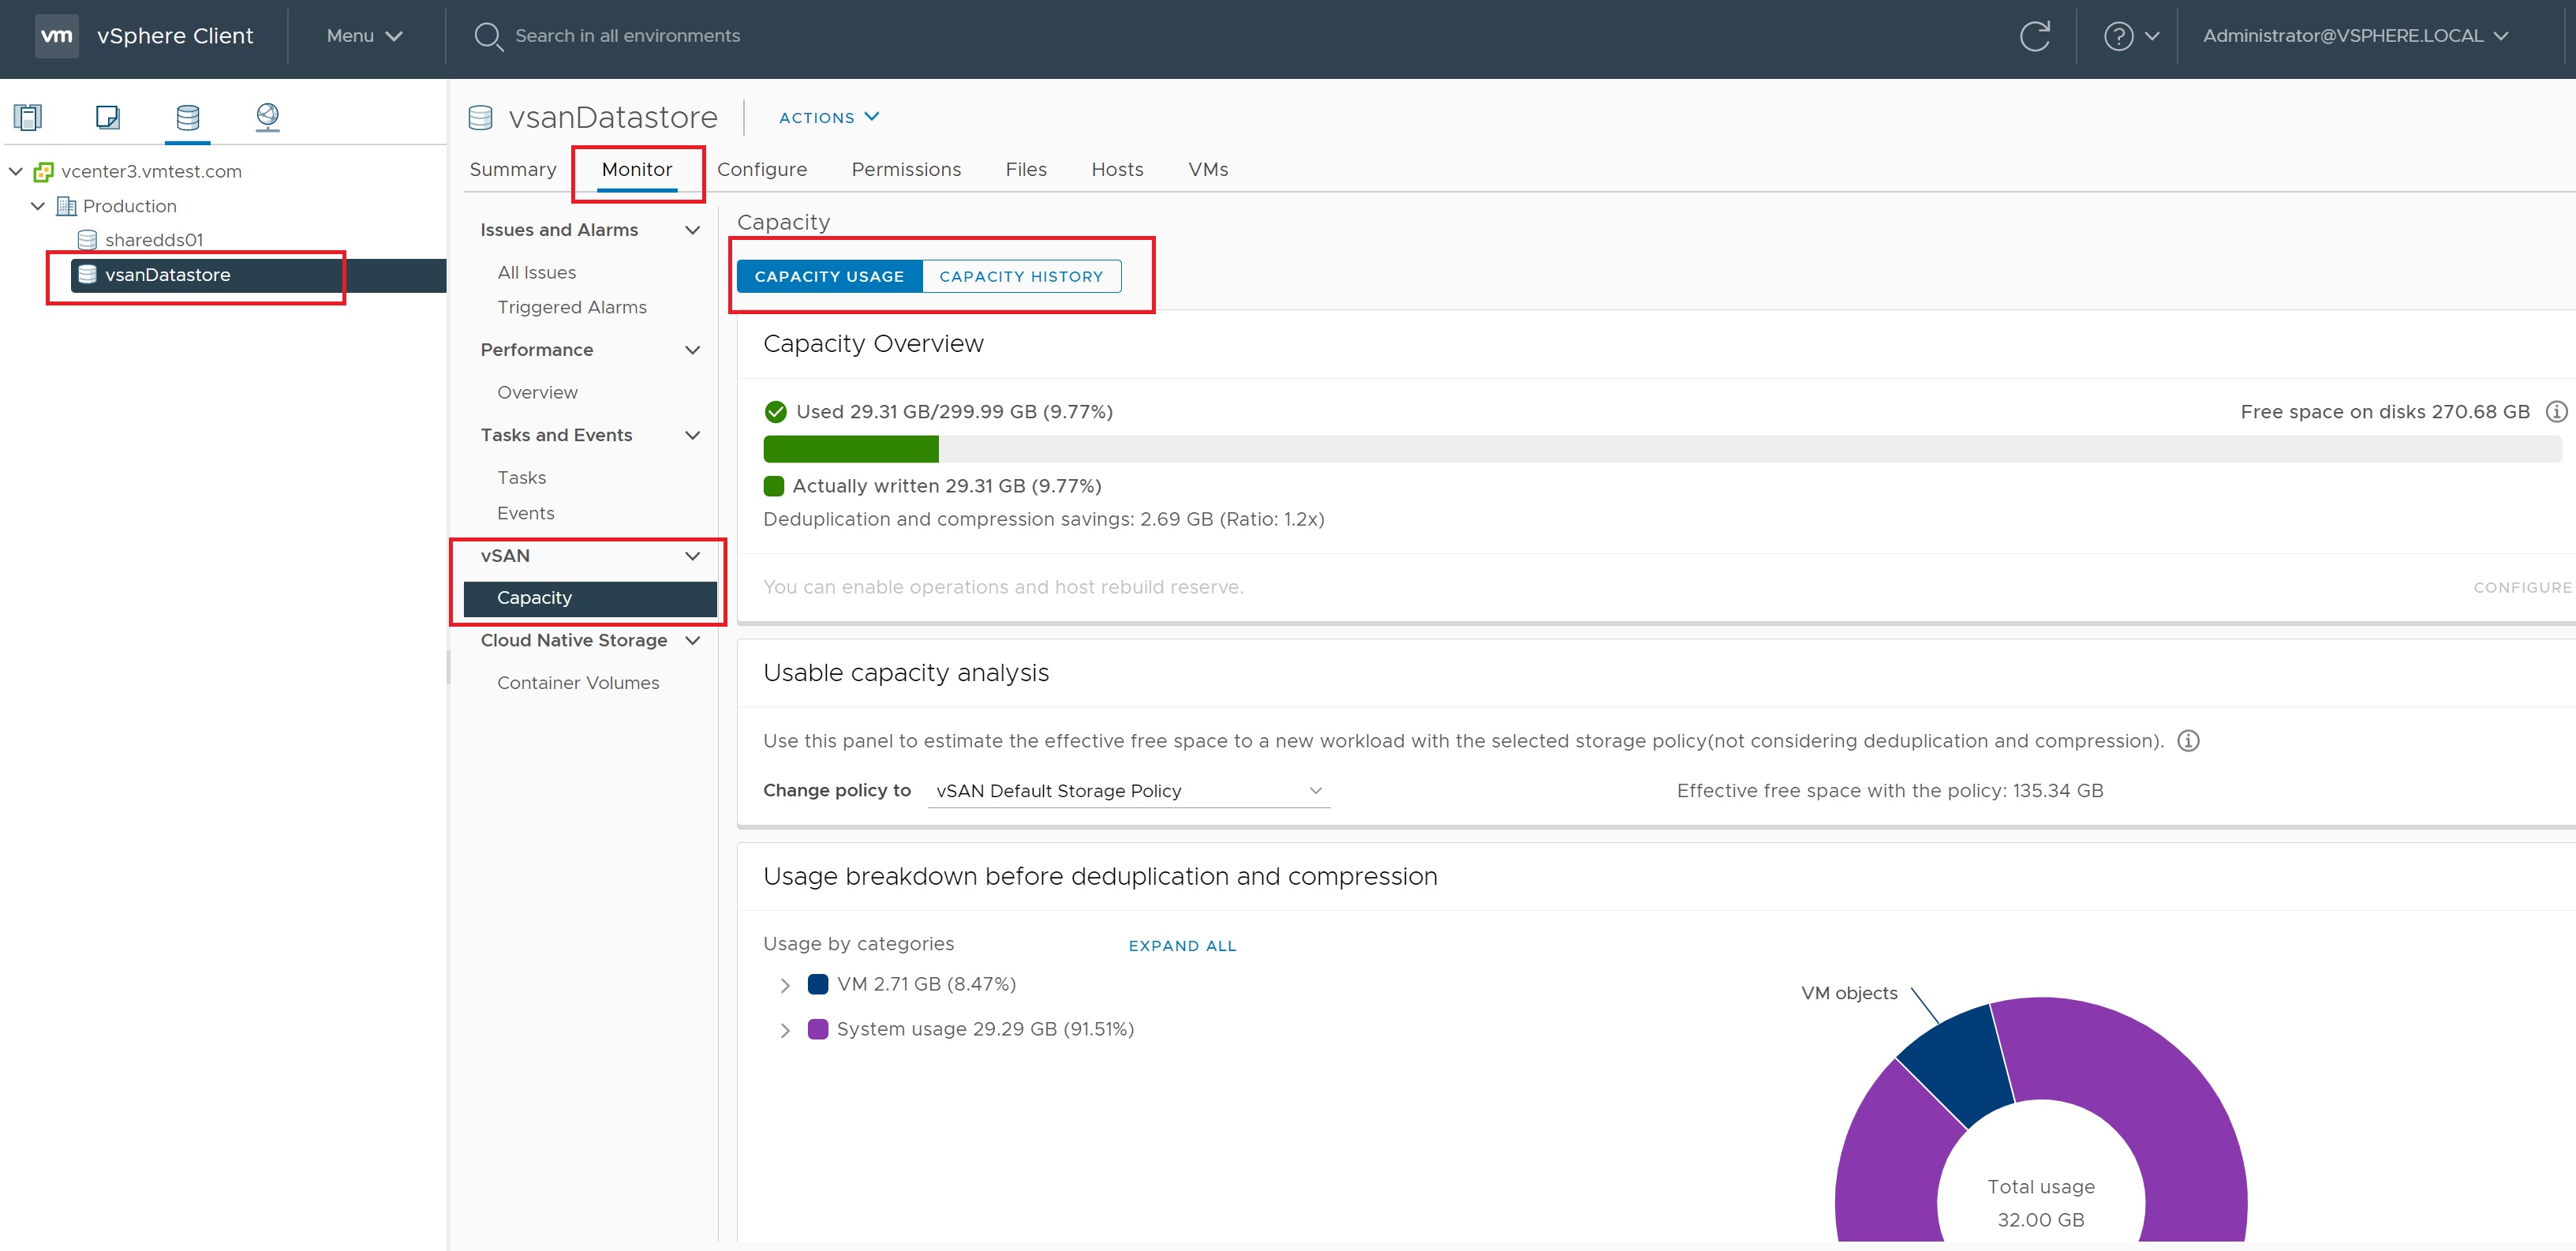
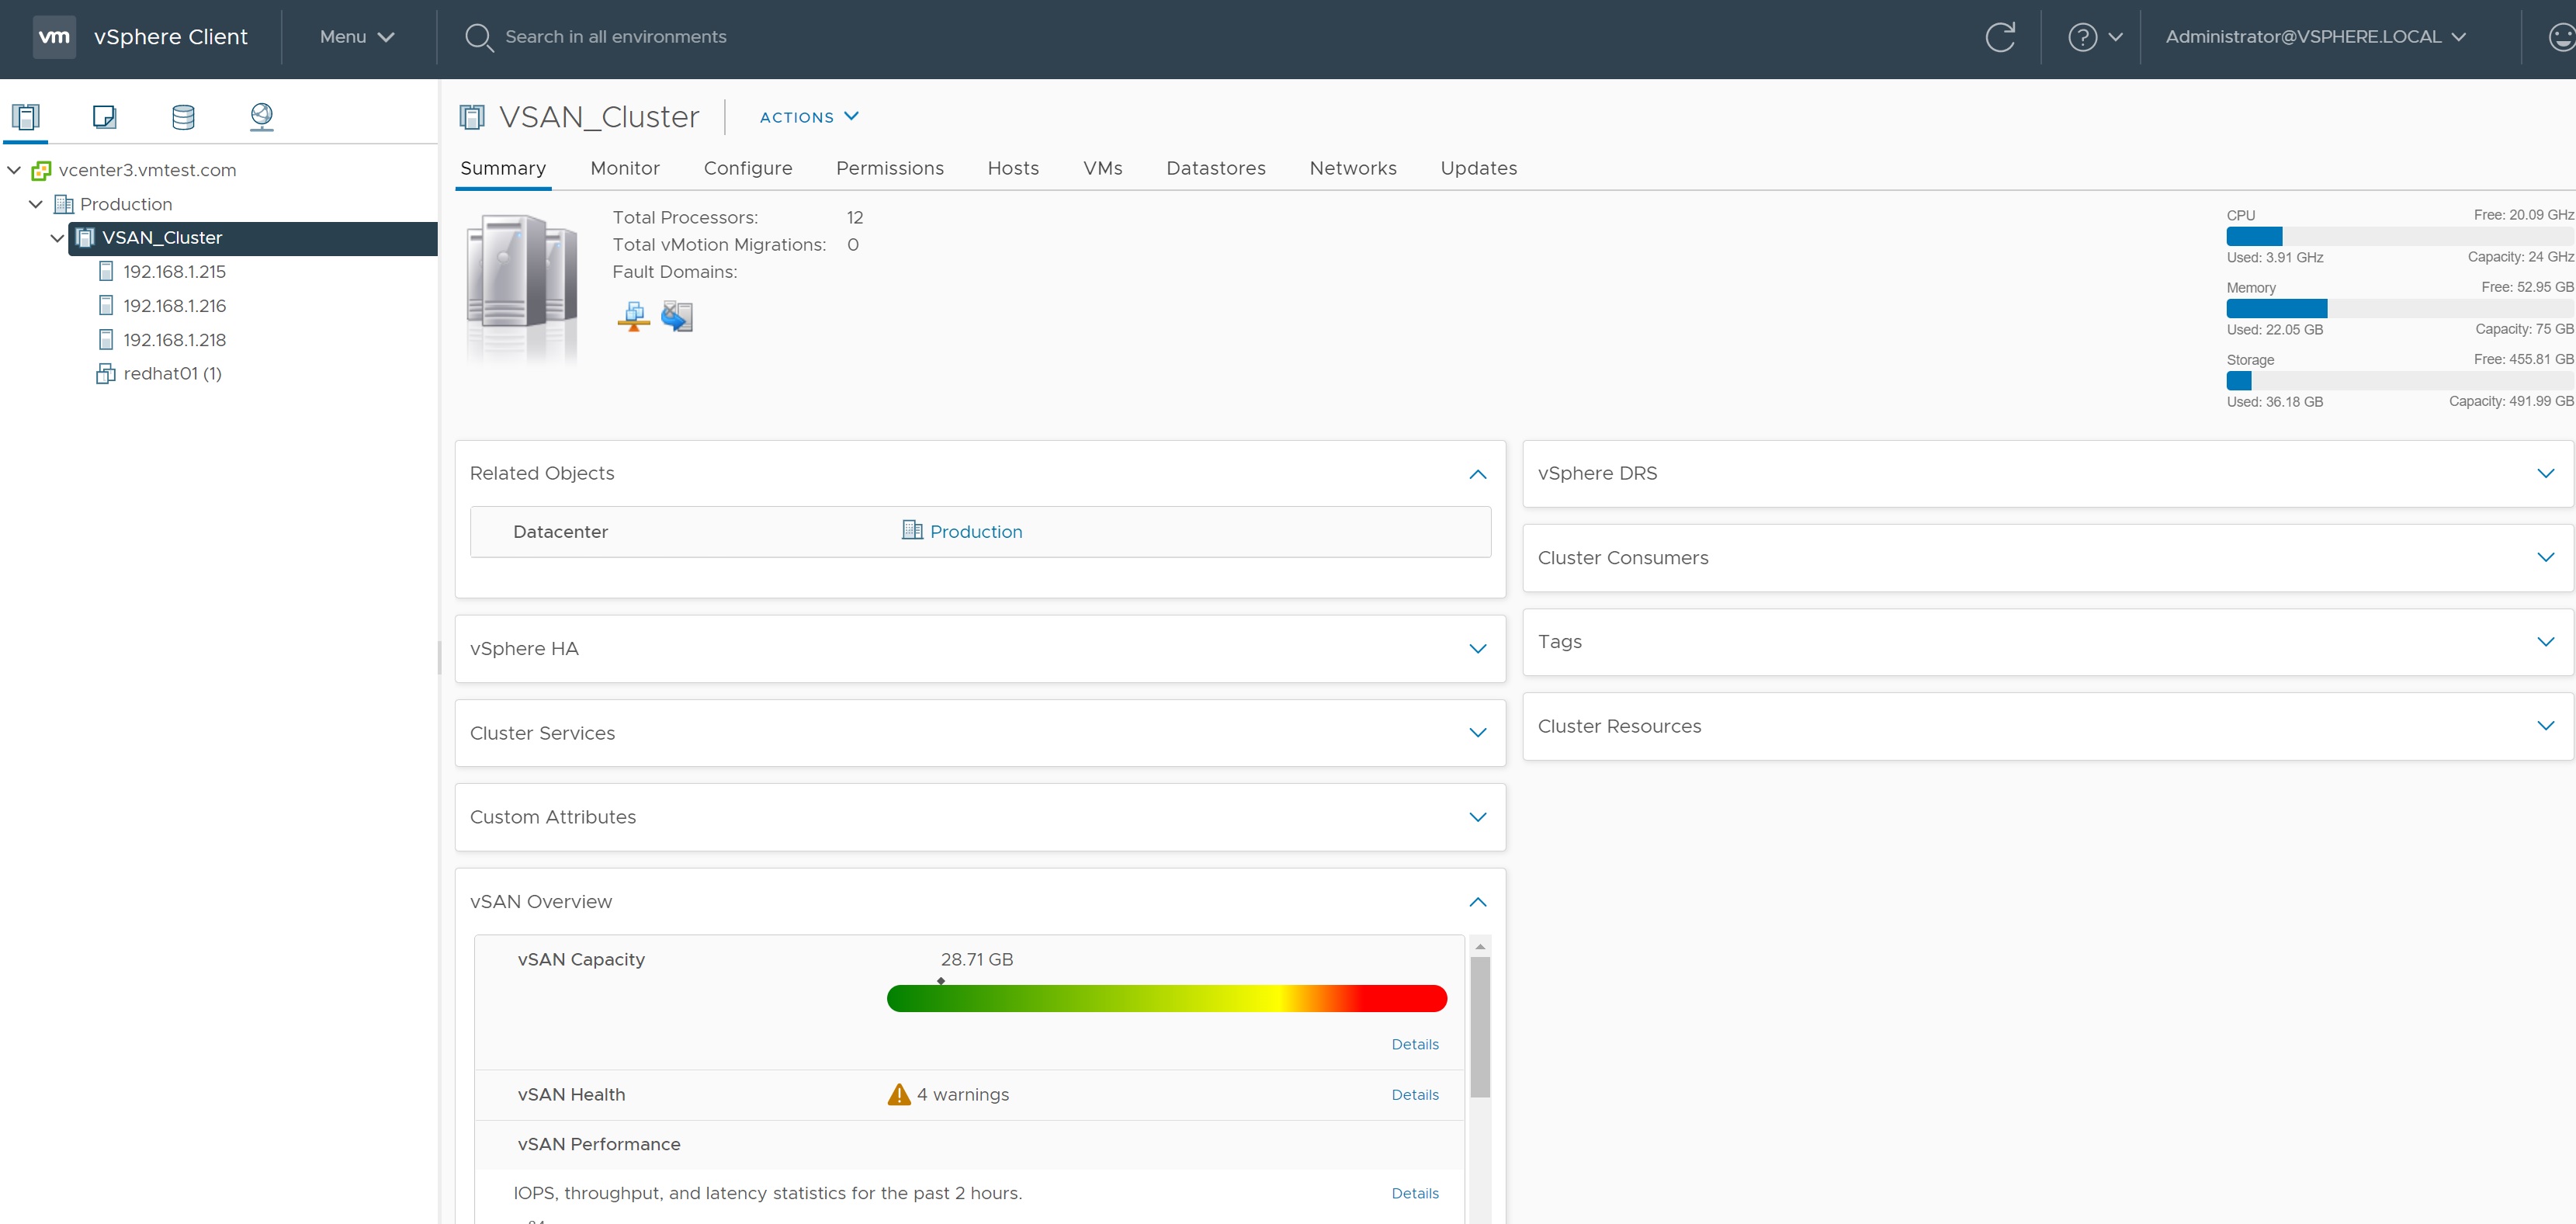
In the storage screen we can see that a vsanDatastore datastore has been created, the summary screen indicates that this is a vSAN datastore.

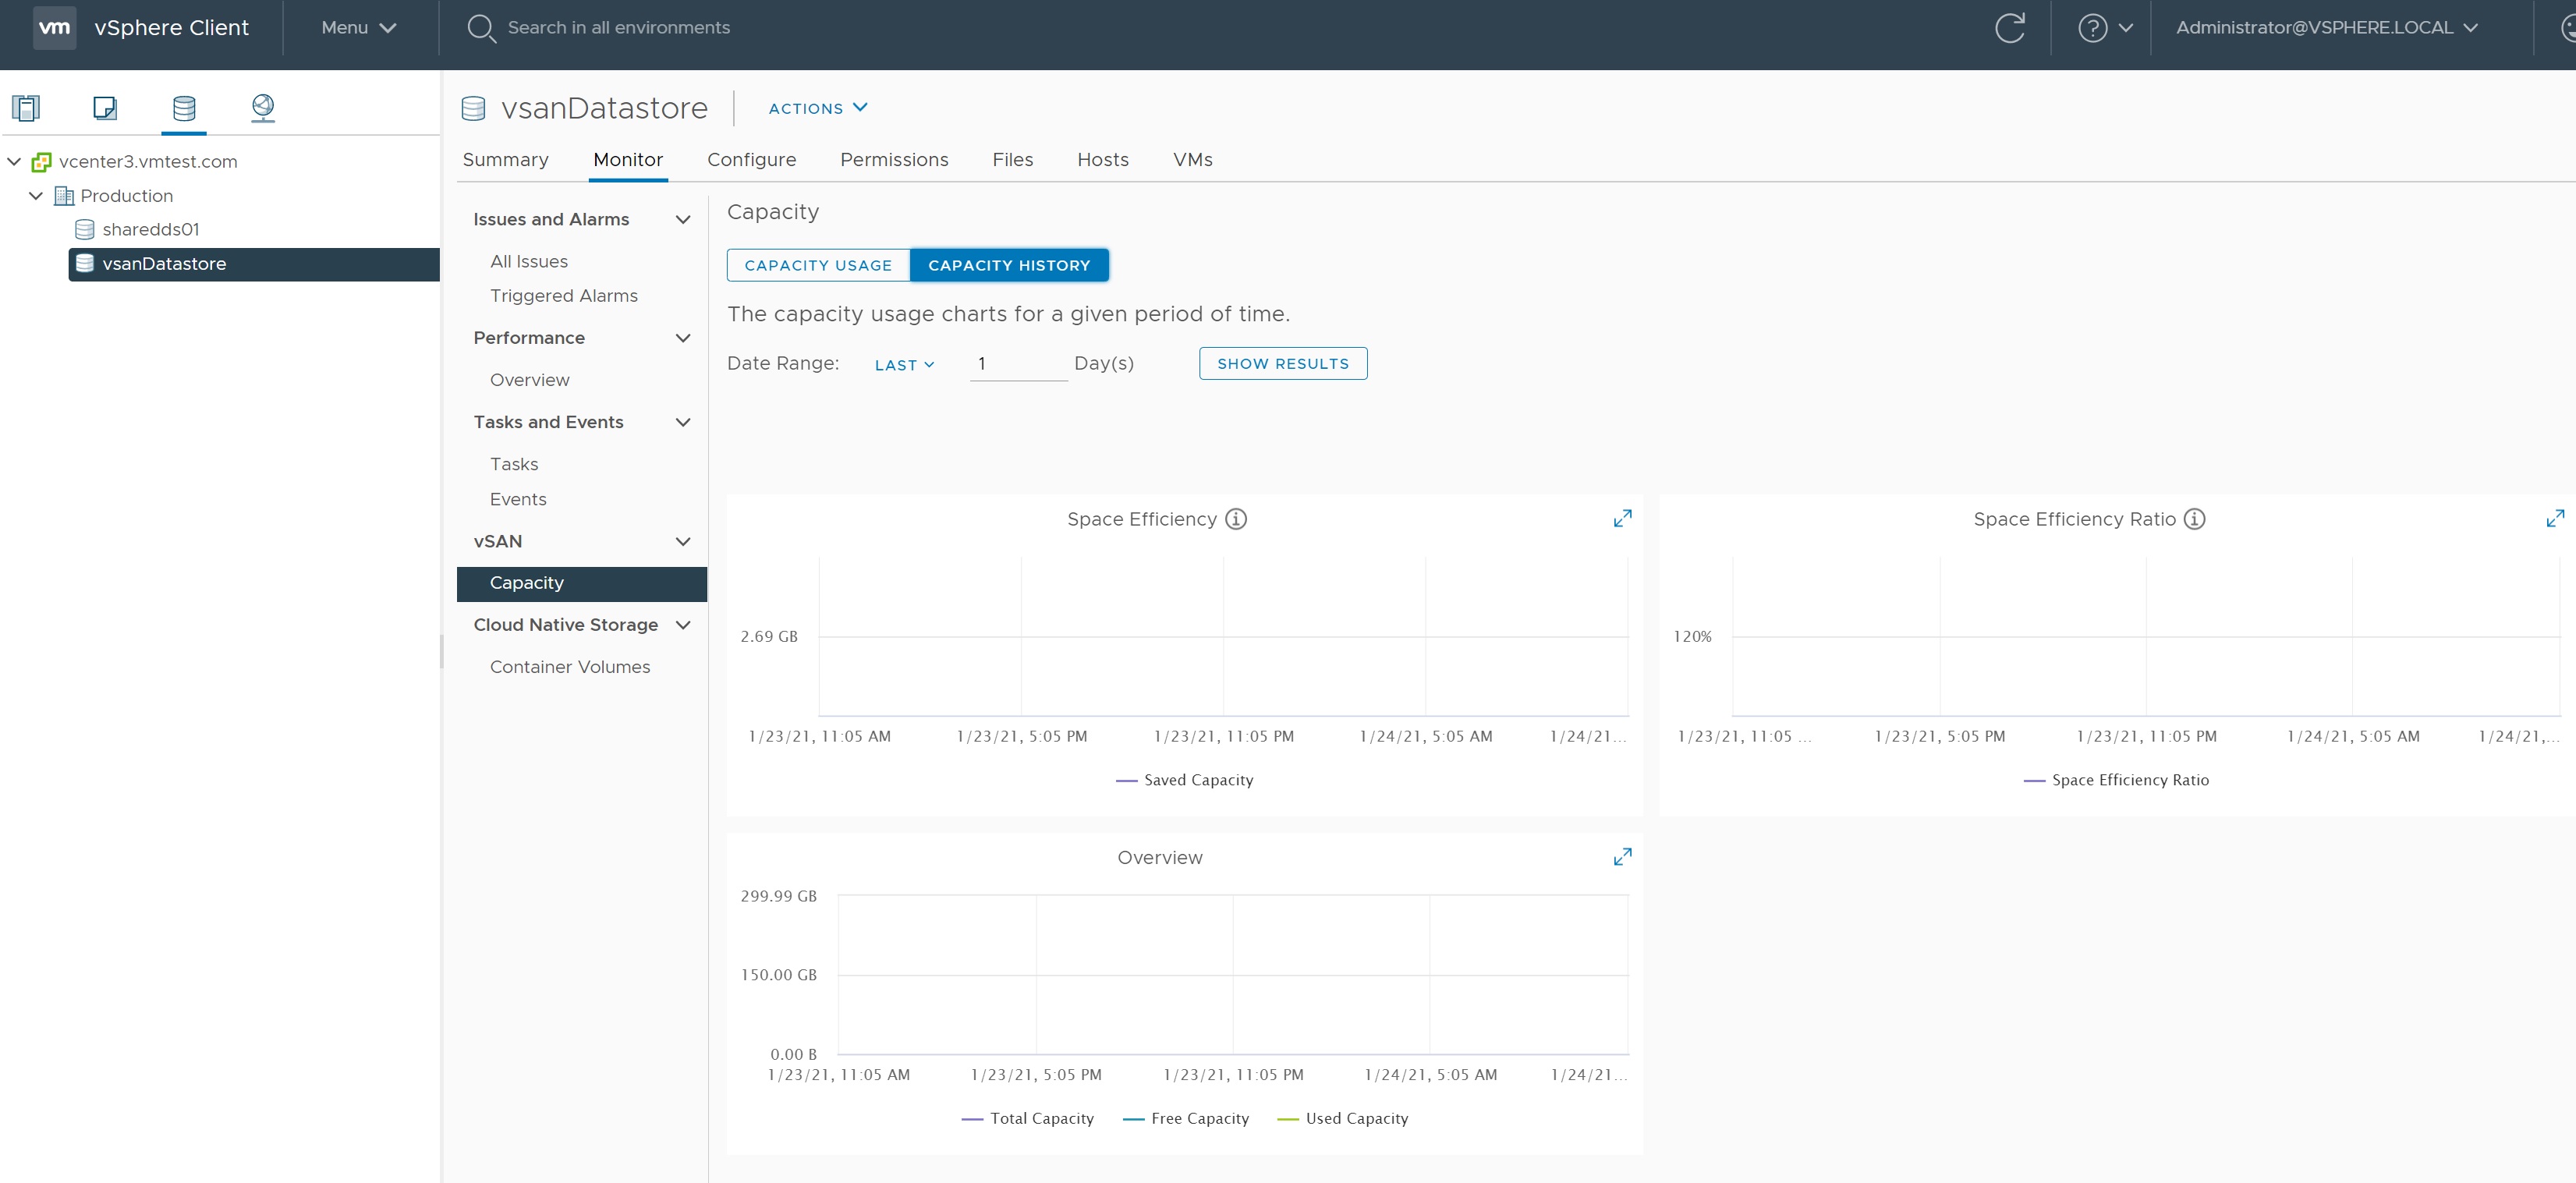
If we select the monitor -> capacity we can get further details on the capacity of the datastore
In the same screen we can select the capacity history screen to get details on how the datastore store is being used and it capacity history.
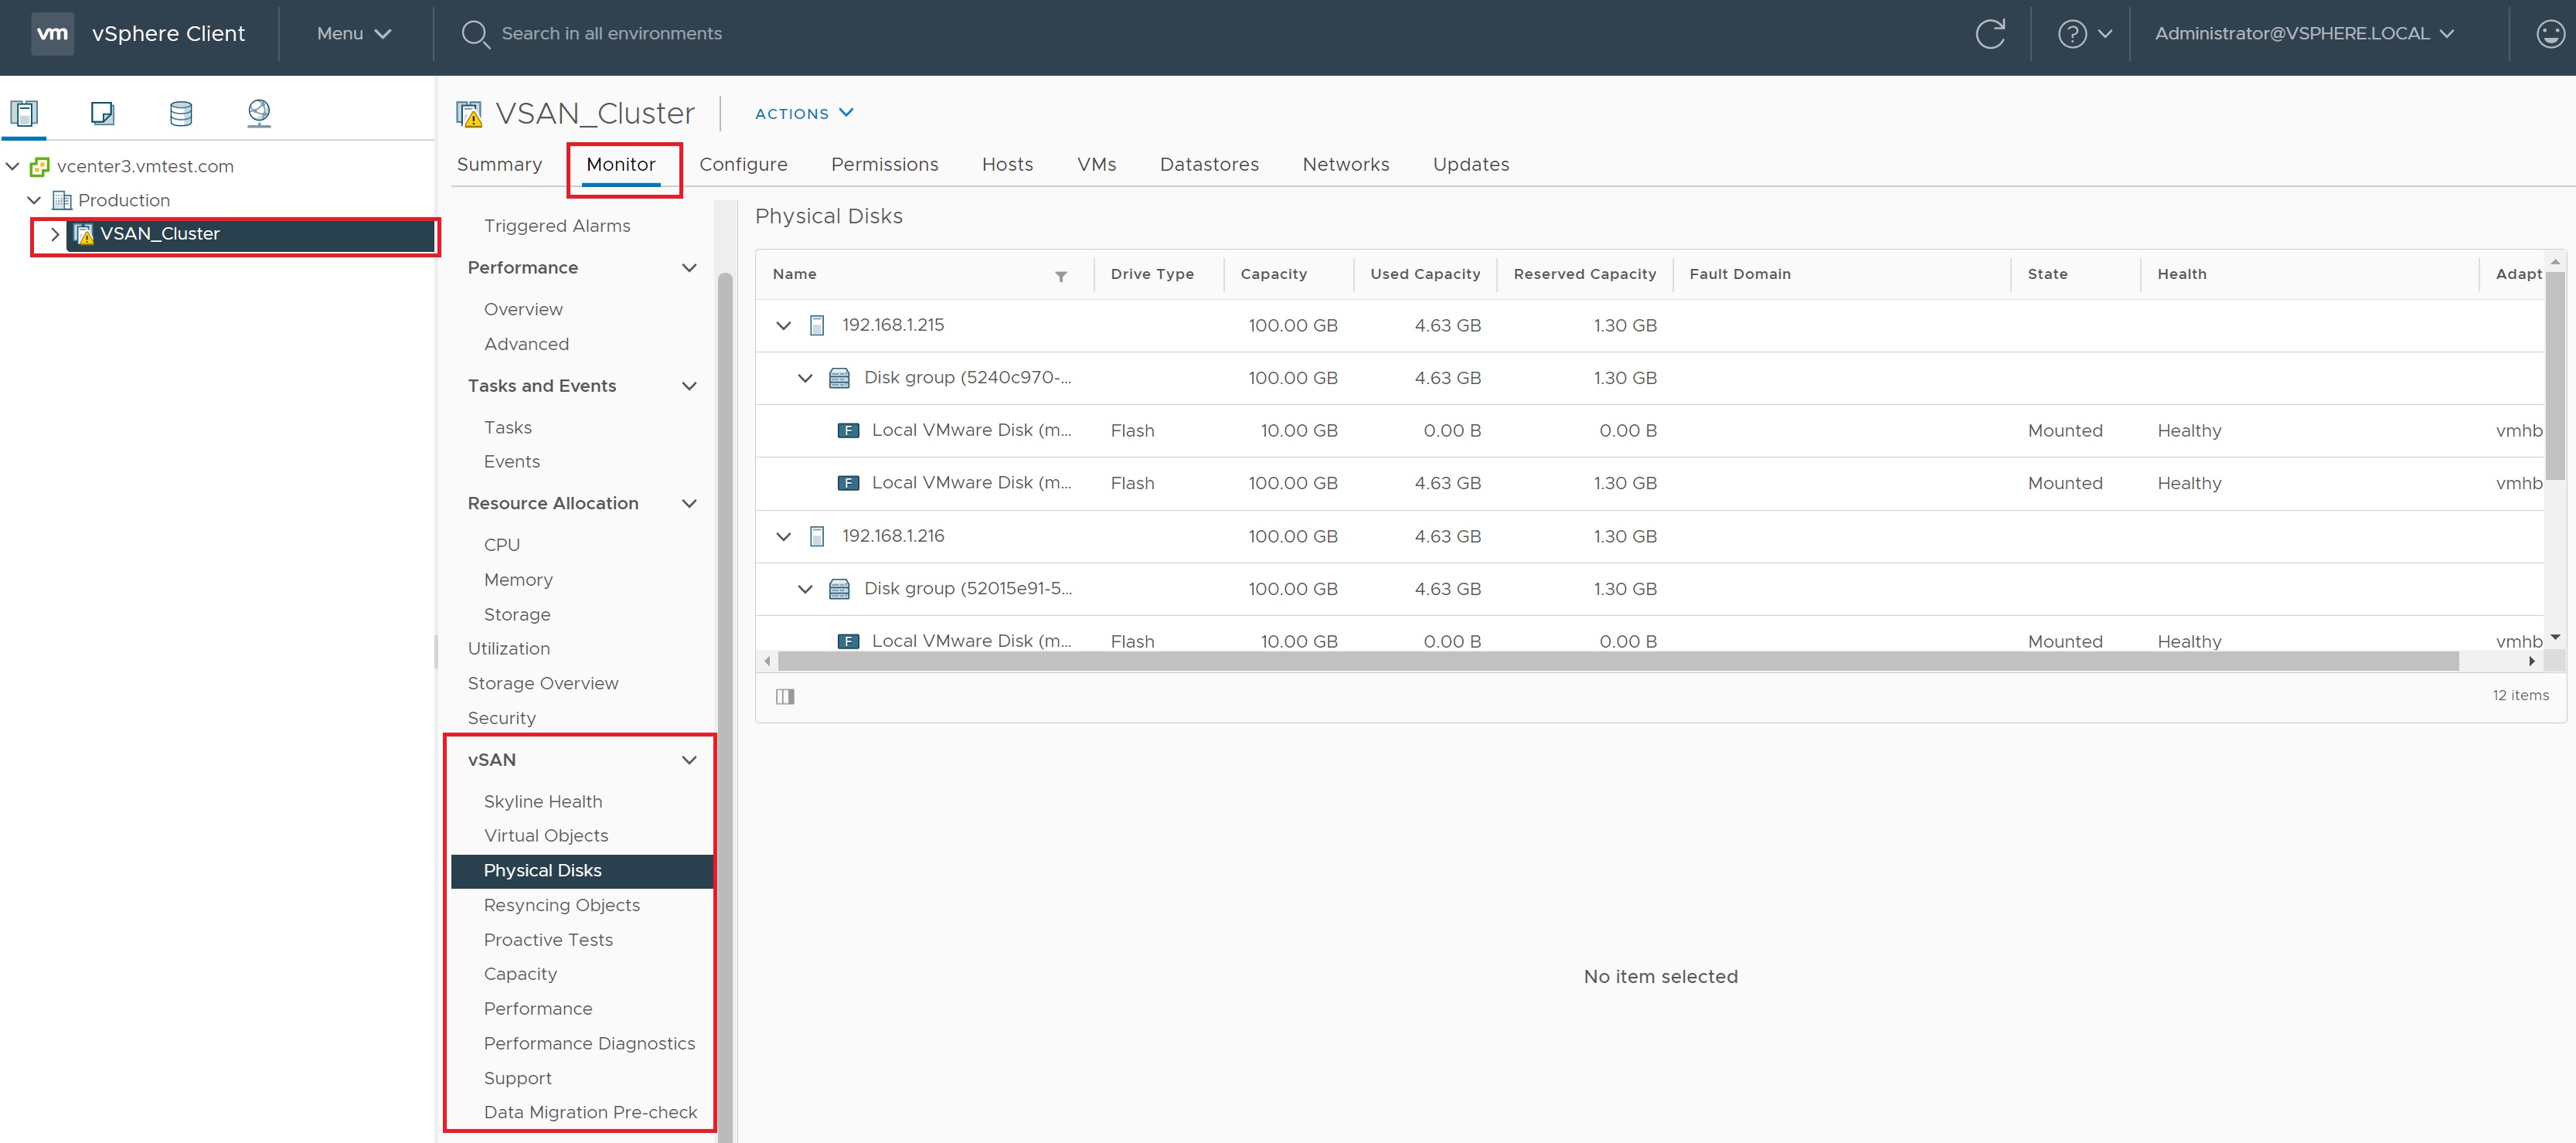
In the monitor section we have many links on datastore to see its performance, physical disks, etc. In this screen I am showing the physical disk layout on each ESXi server.
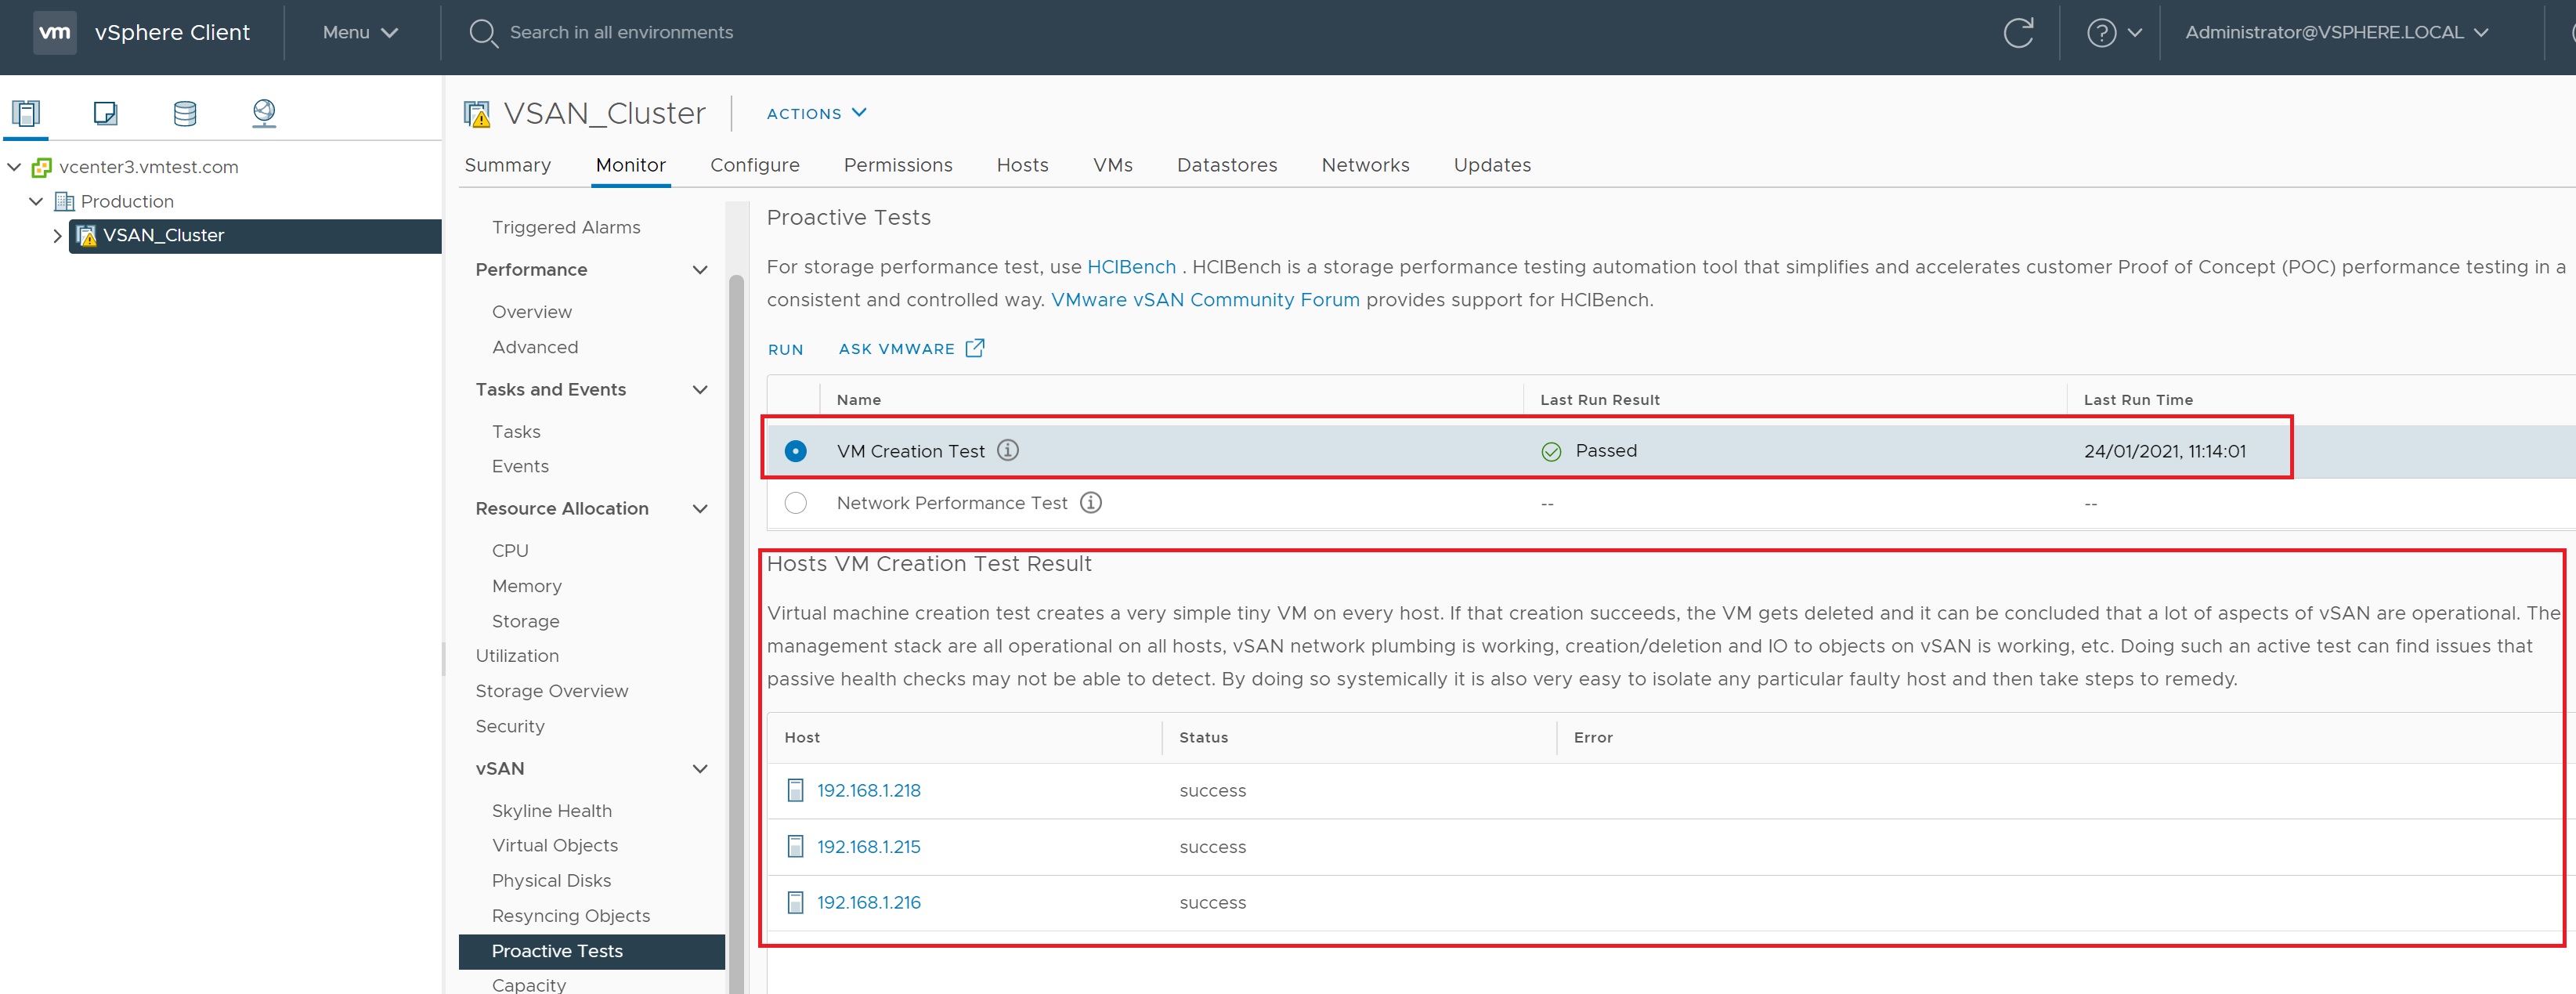
We have a link to test the performance of creating a VM and the network performance, lets test the VM creation performance of our cluster

on the popup we select RUN

After a period of time the results are returned, even with a nested ESXi setup the test passes, if you get any issues you need to address them before putting into production VM's on this cluster.
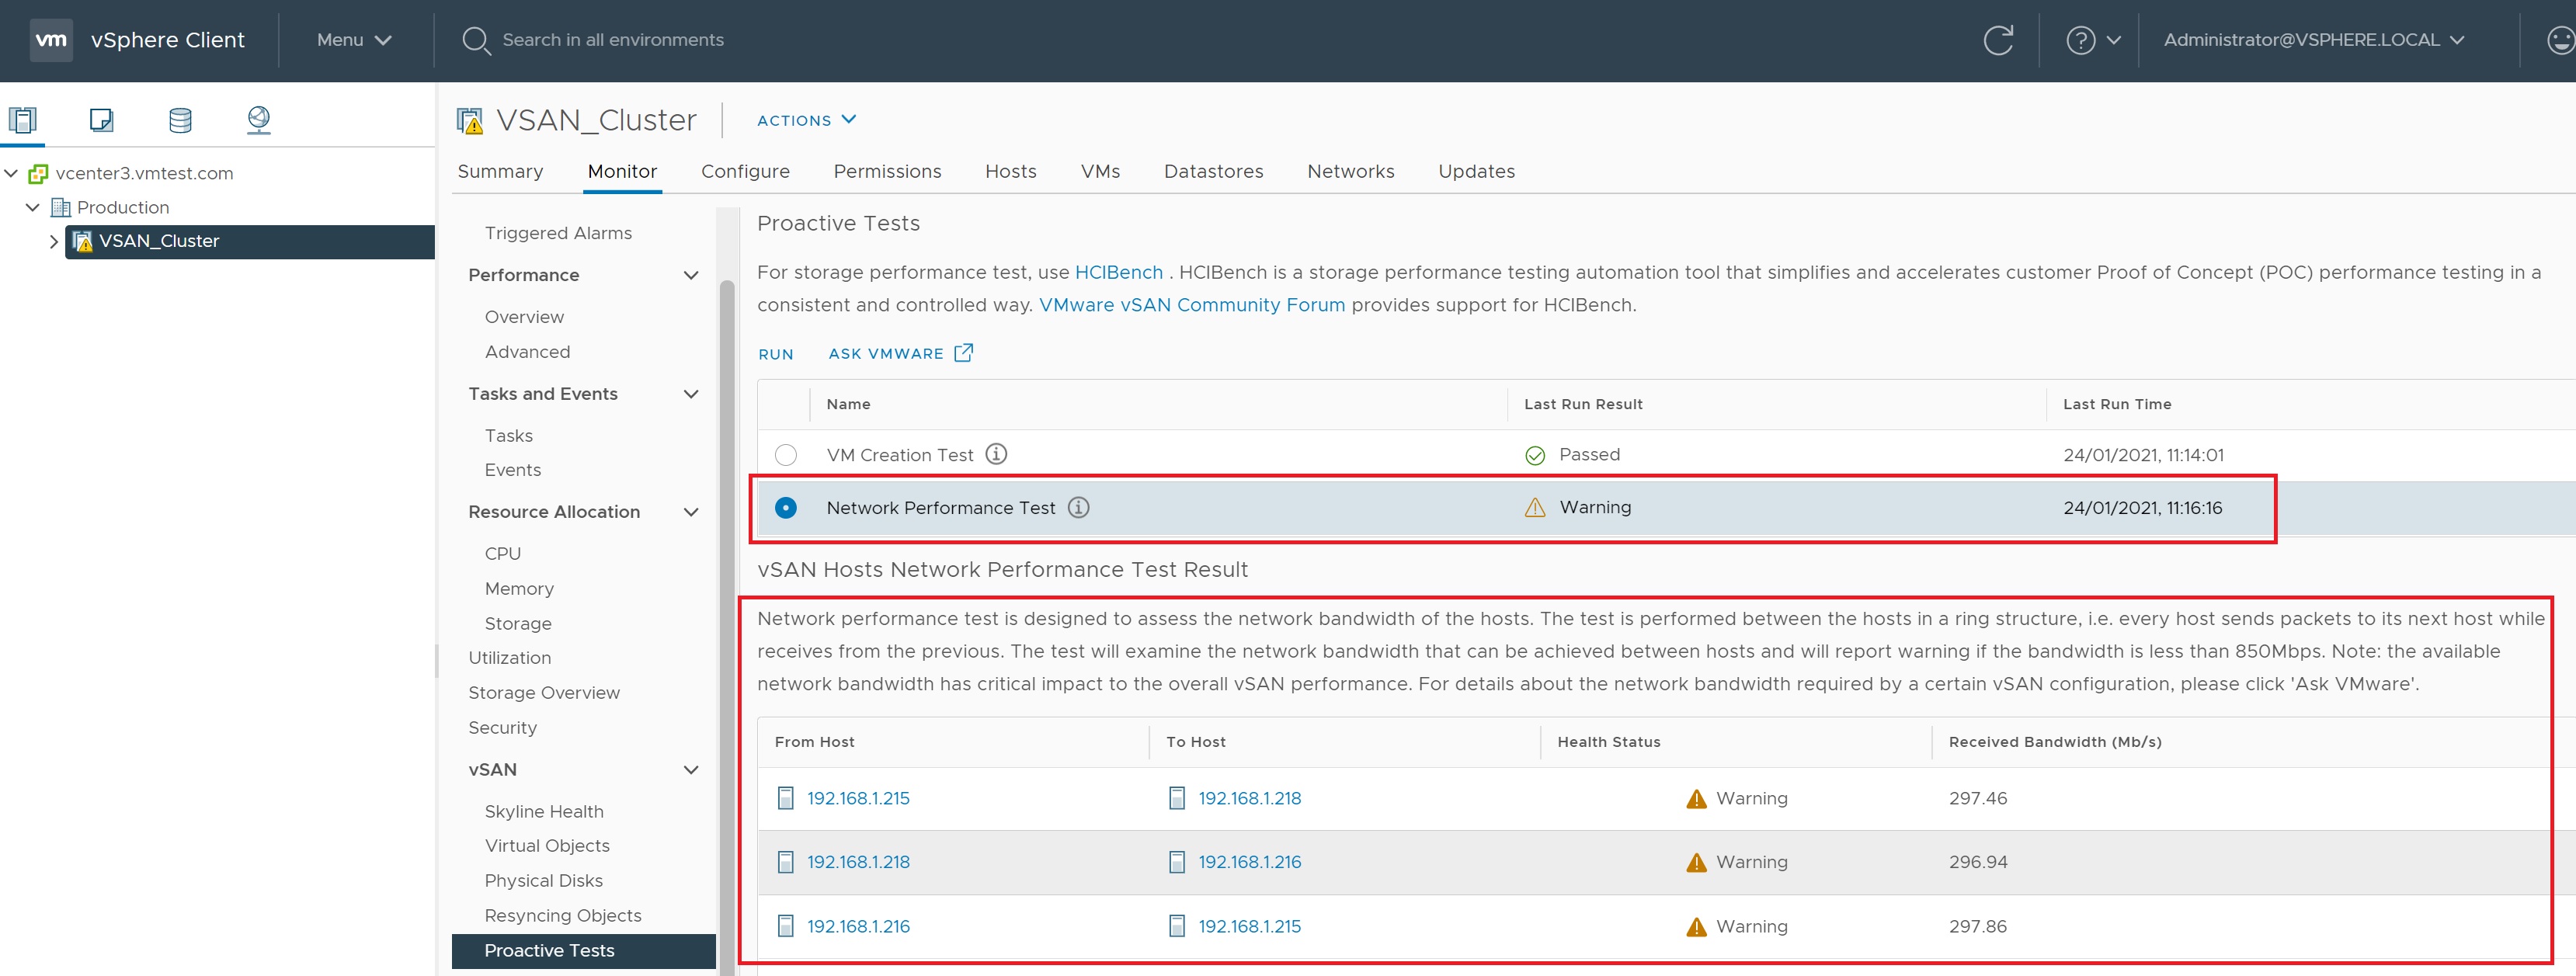
Next we select the network test, again we select RUN in the popup screen
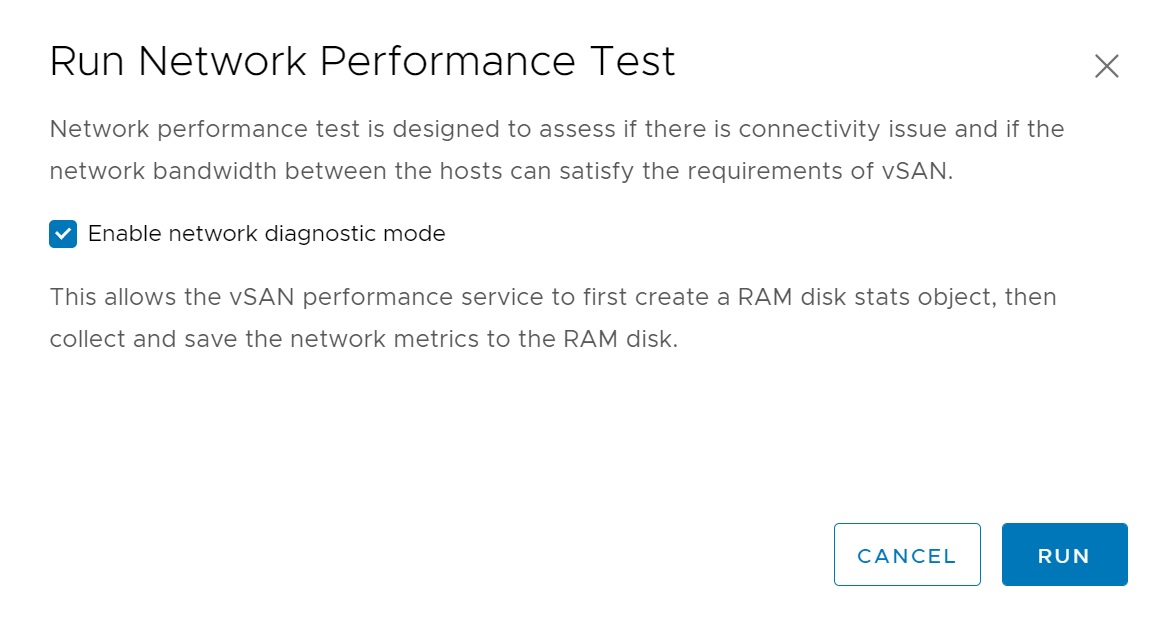
When the tests are returned we can see that we have some issues regarding the network, as Iam using only 1GB network the peformance will degraded the more VM's that I add, really we should be using 10GB or even 100GB networks.
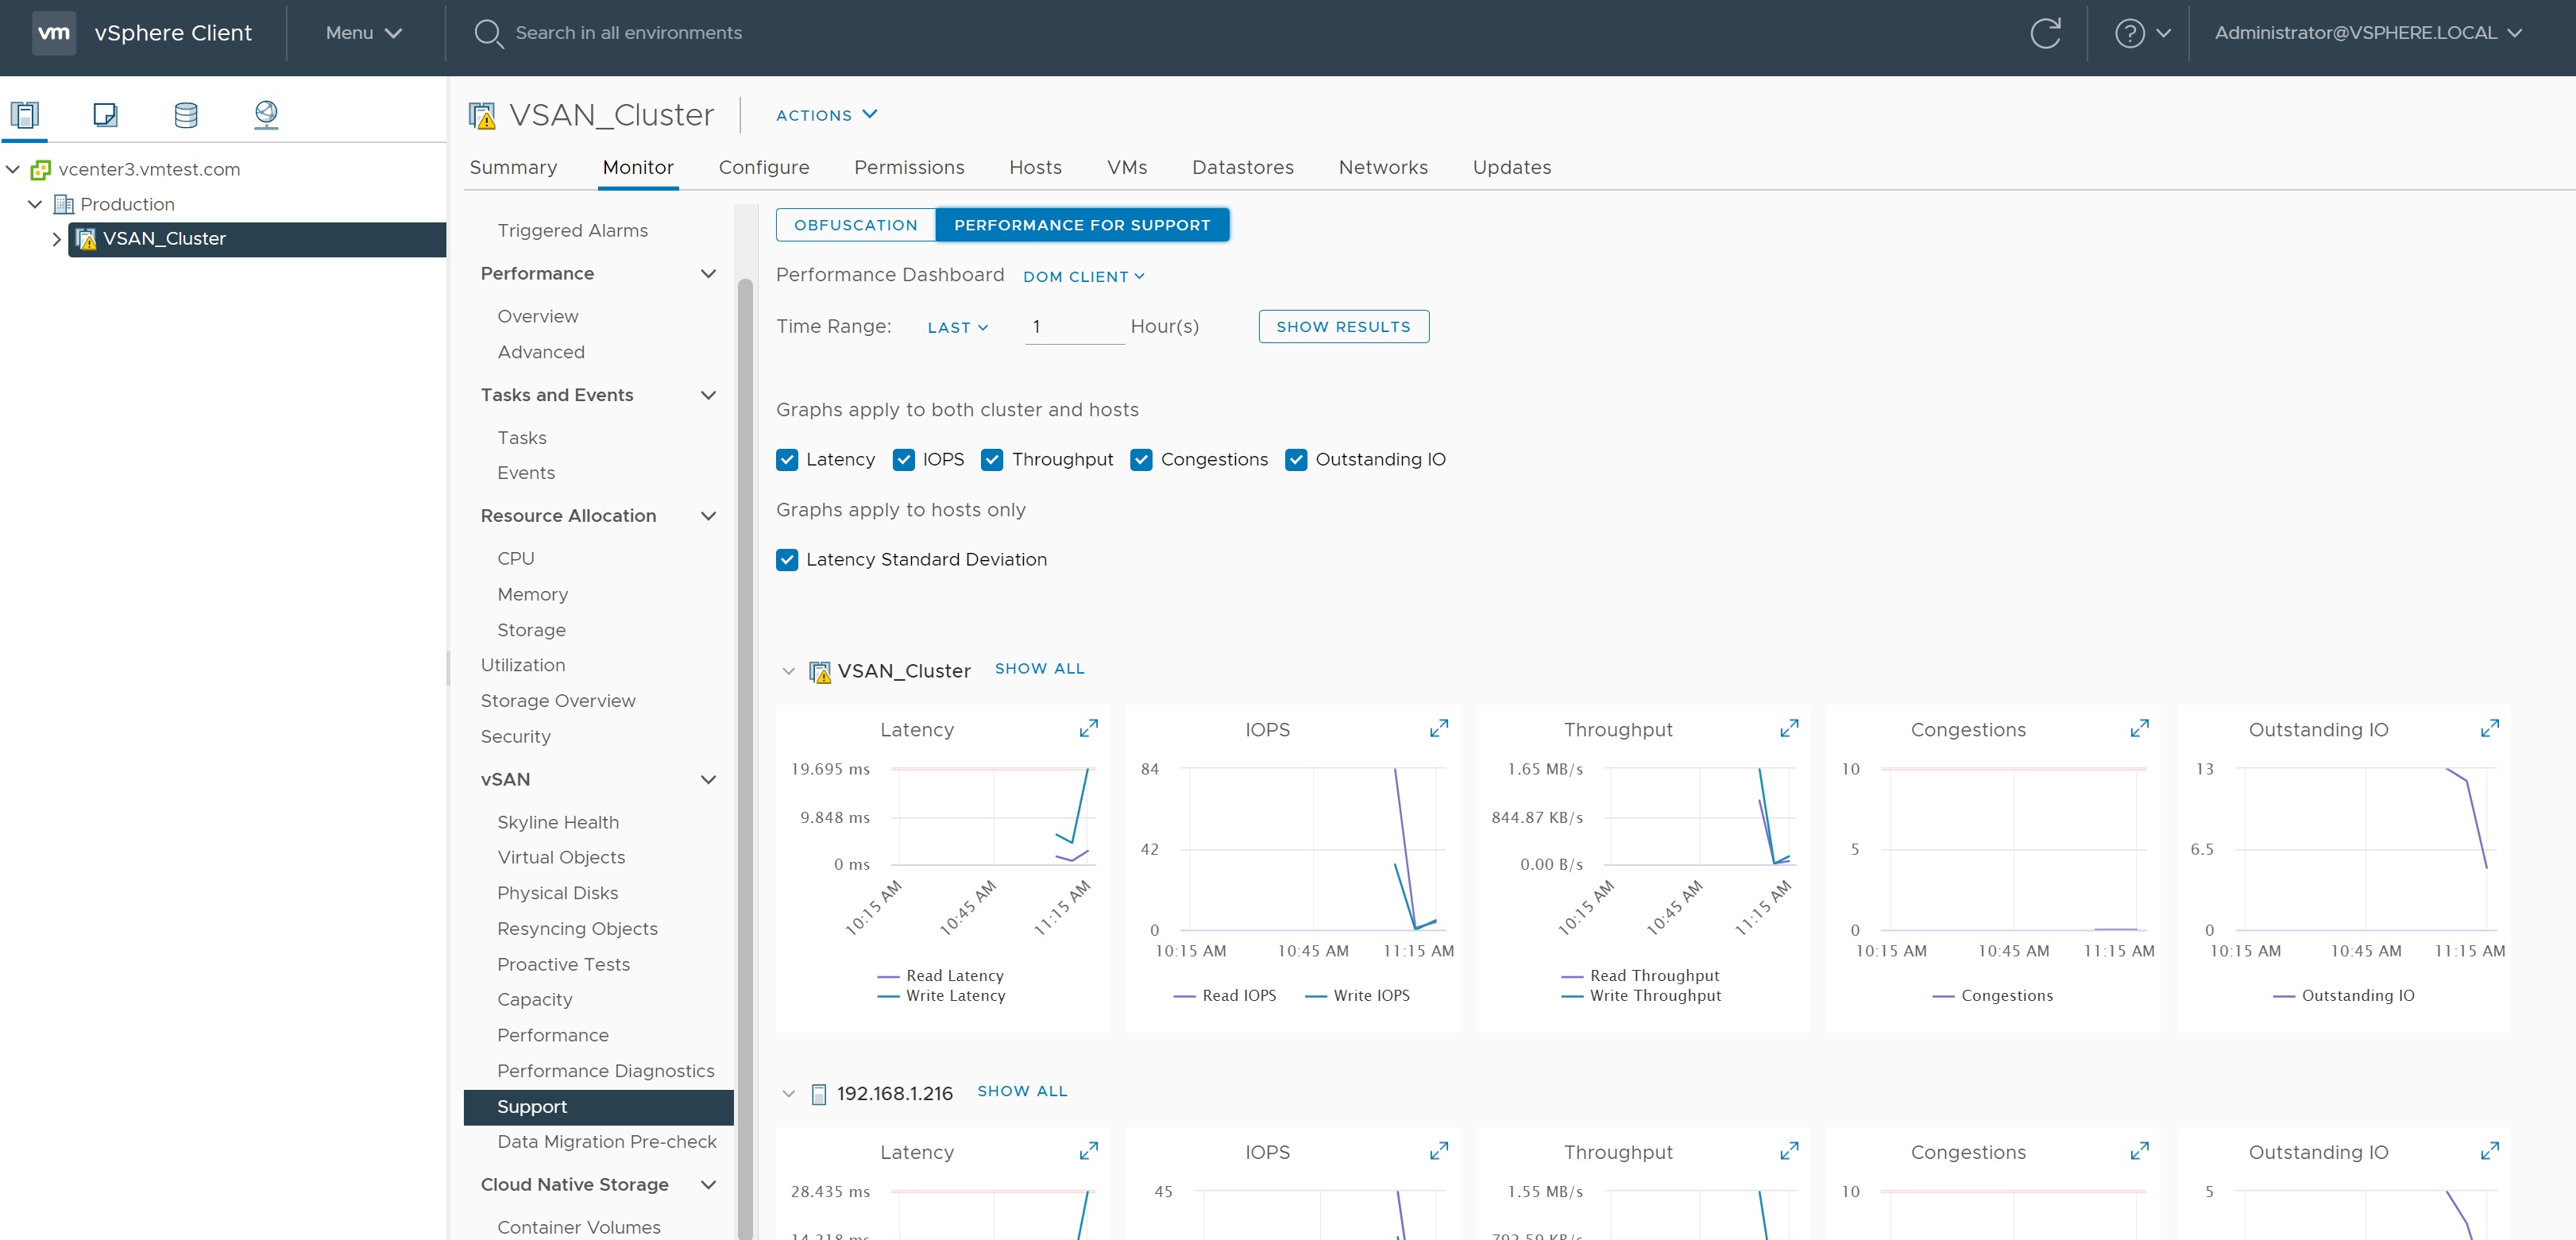
The performance screen details how well our vSAN cluster is doing in terms of performance, we can see IOPs, Throughtput, Latency, etc. This screen is important when you start to use stretched vSAN clusters and low bandwidth networks.

The support screen allows us to download the statistics of our platform and send them to VMWare for analysis to help with performance problems.
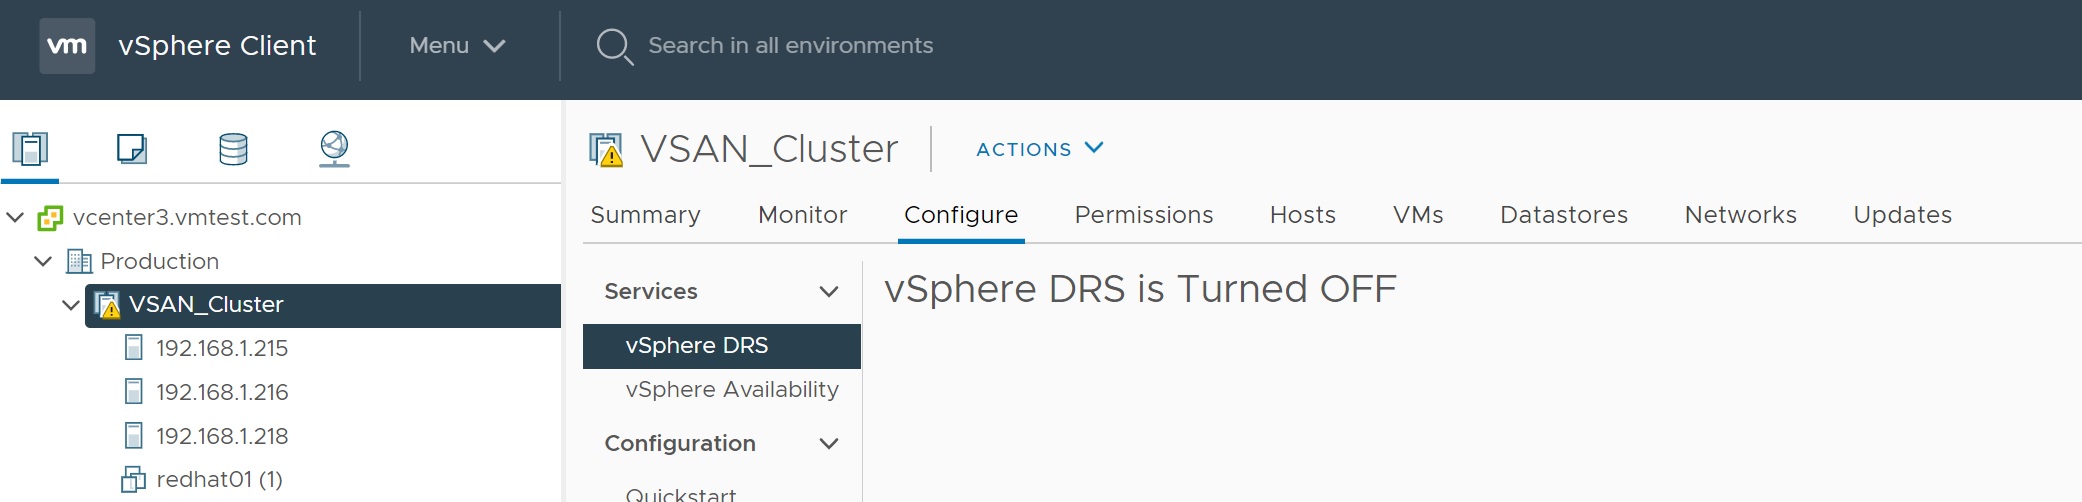
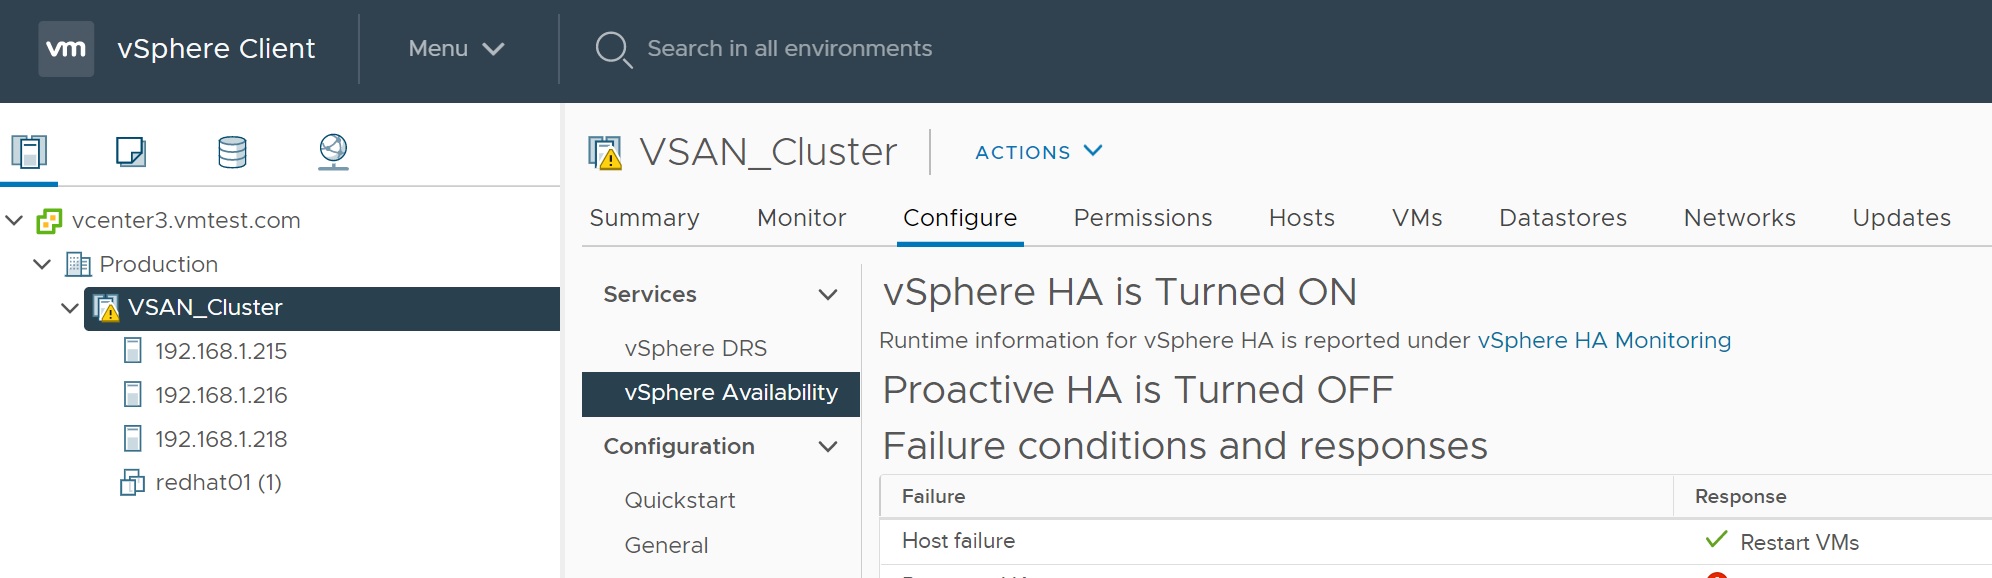
I have already covered HA and DRS, but here I am quickly going to cover turning on HA and DRS the remain parts of the cluster, below you can see that as we did not select these when we first created the cluster ther are turned off.
For the HA I select the edit button and slide to on, after a brief period HA will be configured, I do the same for the DRS.
We get numerous warnings, try and fix as many as you can, again I am using a nested ESXi setup and thus these warnings are expected.
Eventally I fix the warnings or Reset them to green and we have a healthy vSAN cluster
I create a RedHat 6 server on the vSAN datastore and login to it, I am going to power off one of the ESXi servers to test that the vSAN cluster can handle it as it stated above during the setting up. I confirm that the VM is residing on the vSAN datastore.

Also we check that the VM is not residing on the ESXi server we are going to power off as I dont want HA kicking in.

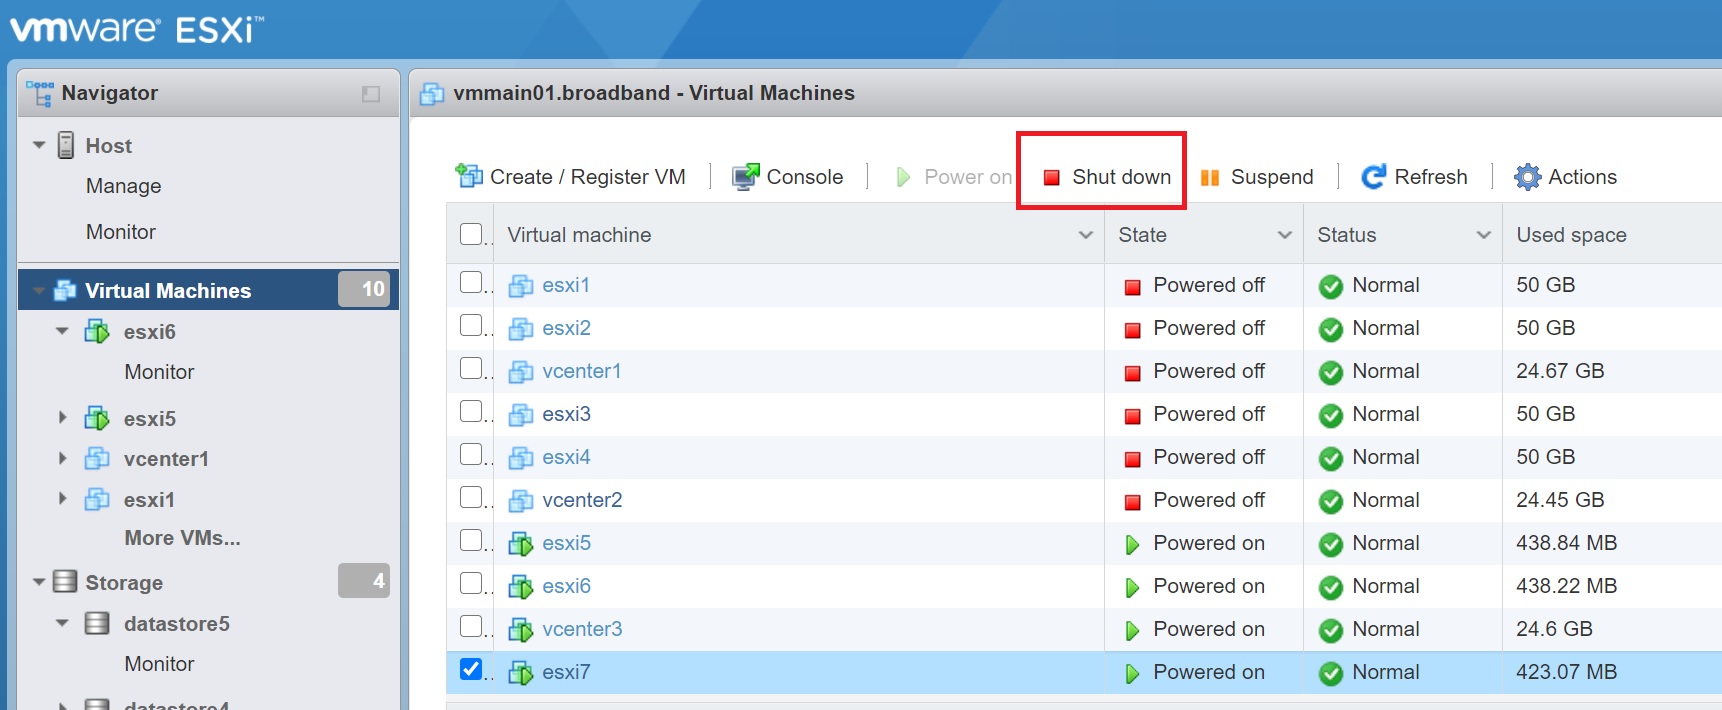
I login to my physical ESXi server and power off esxi7 ESXI server
Once the ESXi server is down we start to see many alerts within the cluster
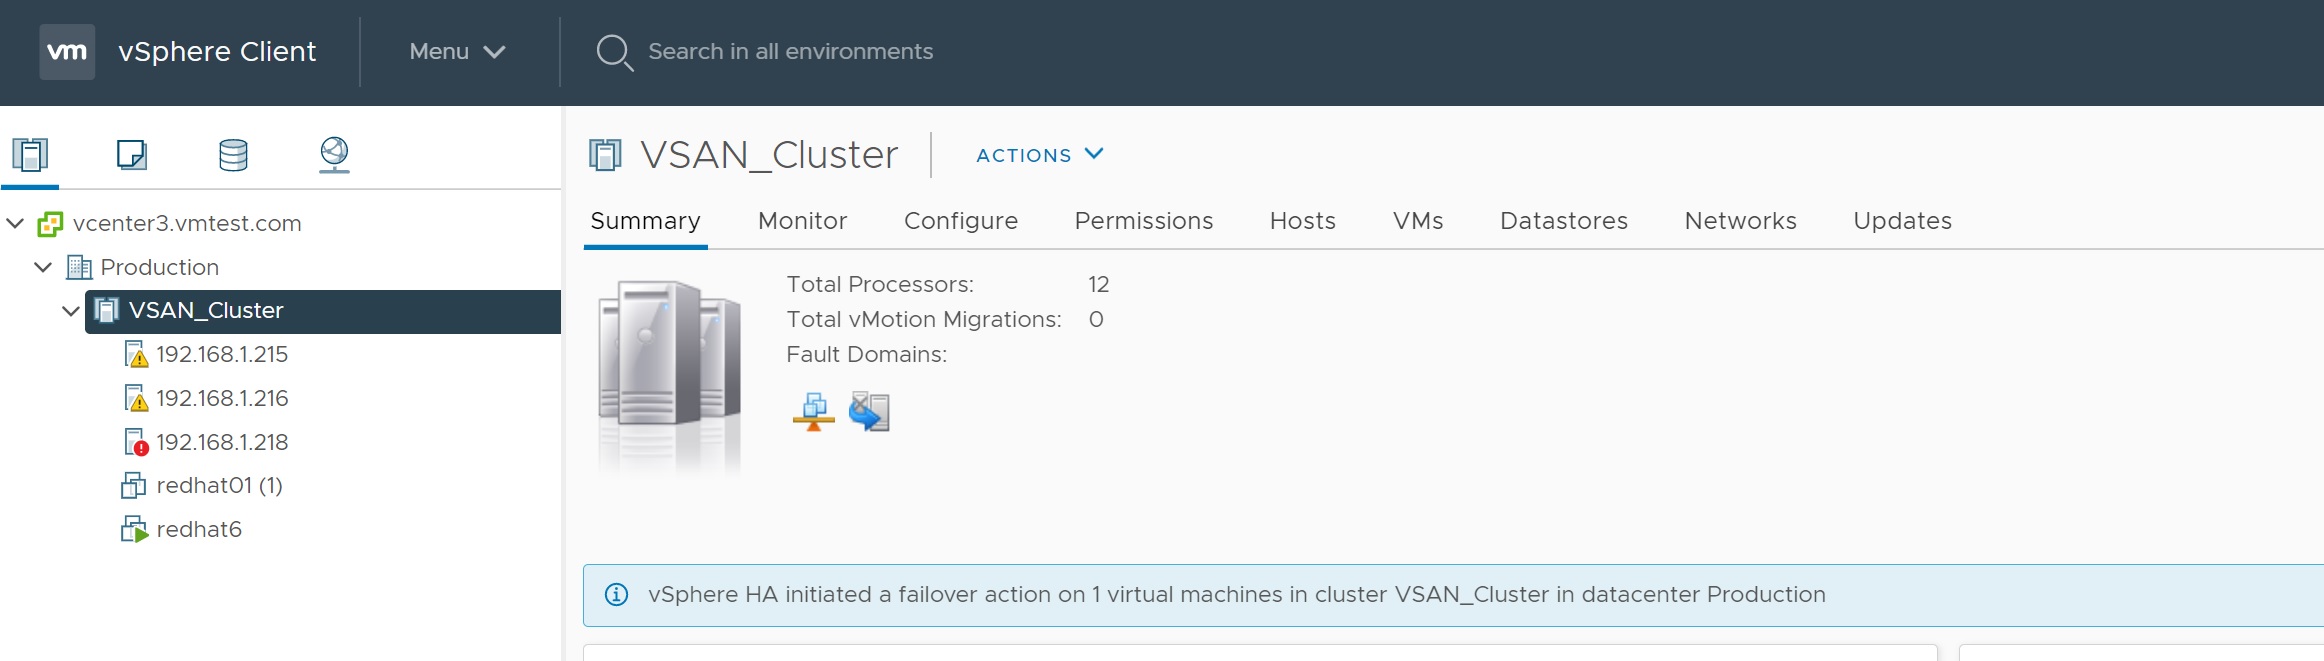
After a period of time the cluster beds down and we can see all alerts

But nothing happens to the RedHat 6 server we are logged in on, it remains up and running
A simple ESXi server going down might not be the only problem use the Skyline health to drill down highlighting any issues with your vSAN cluster.
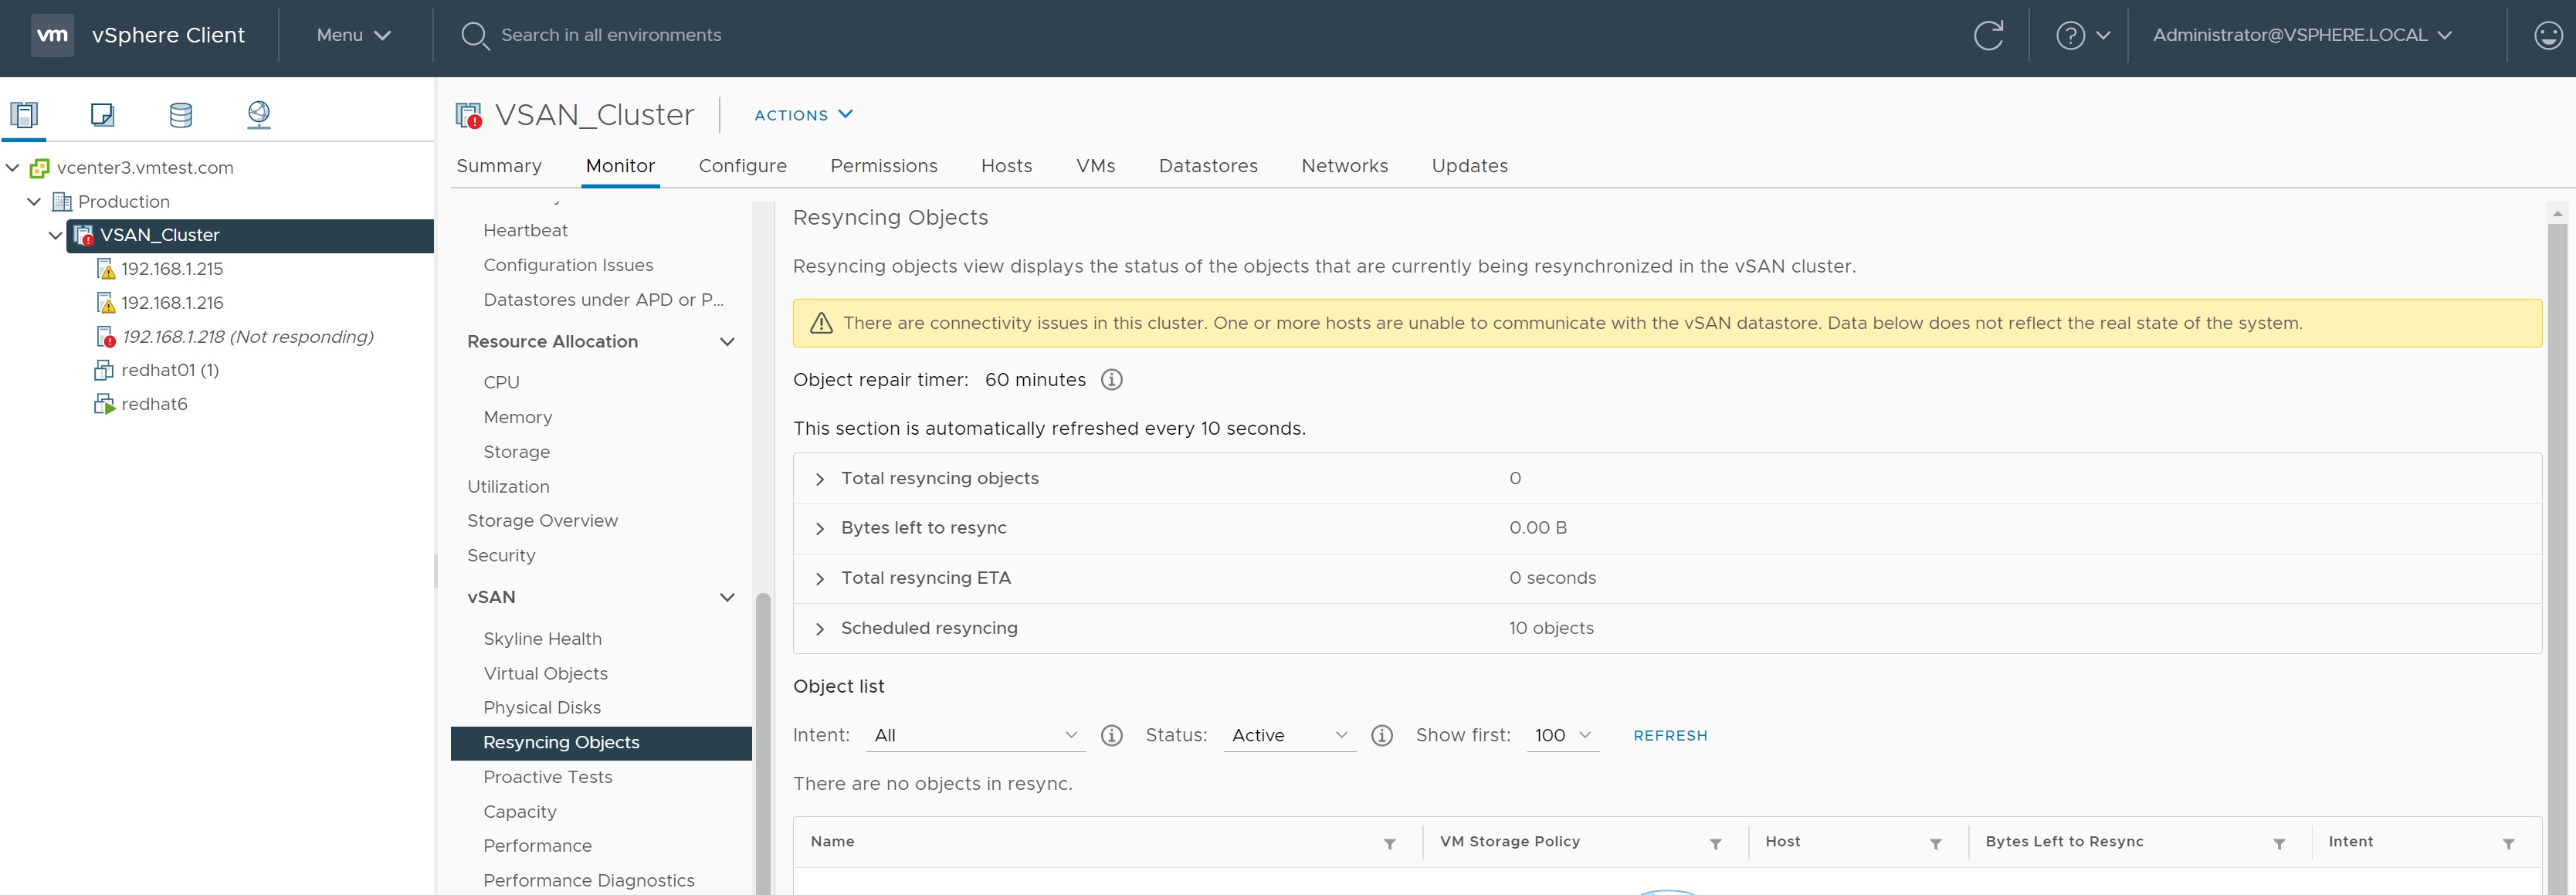
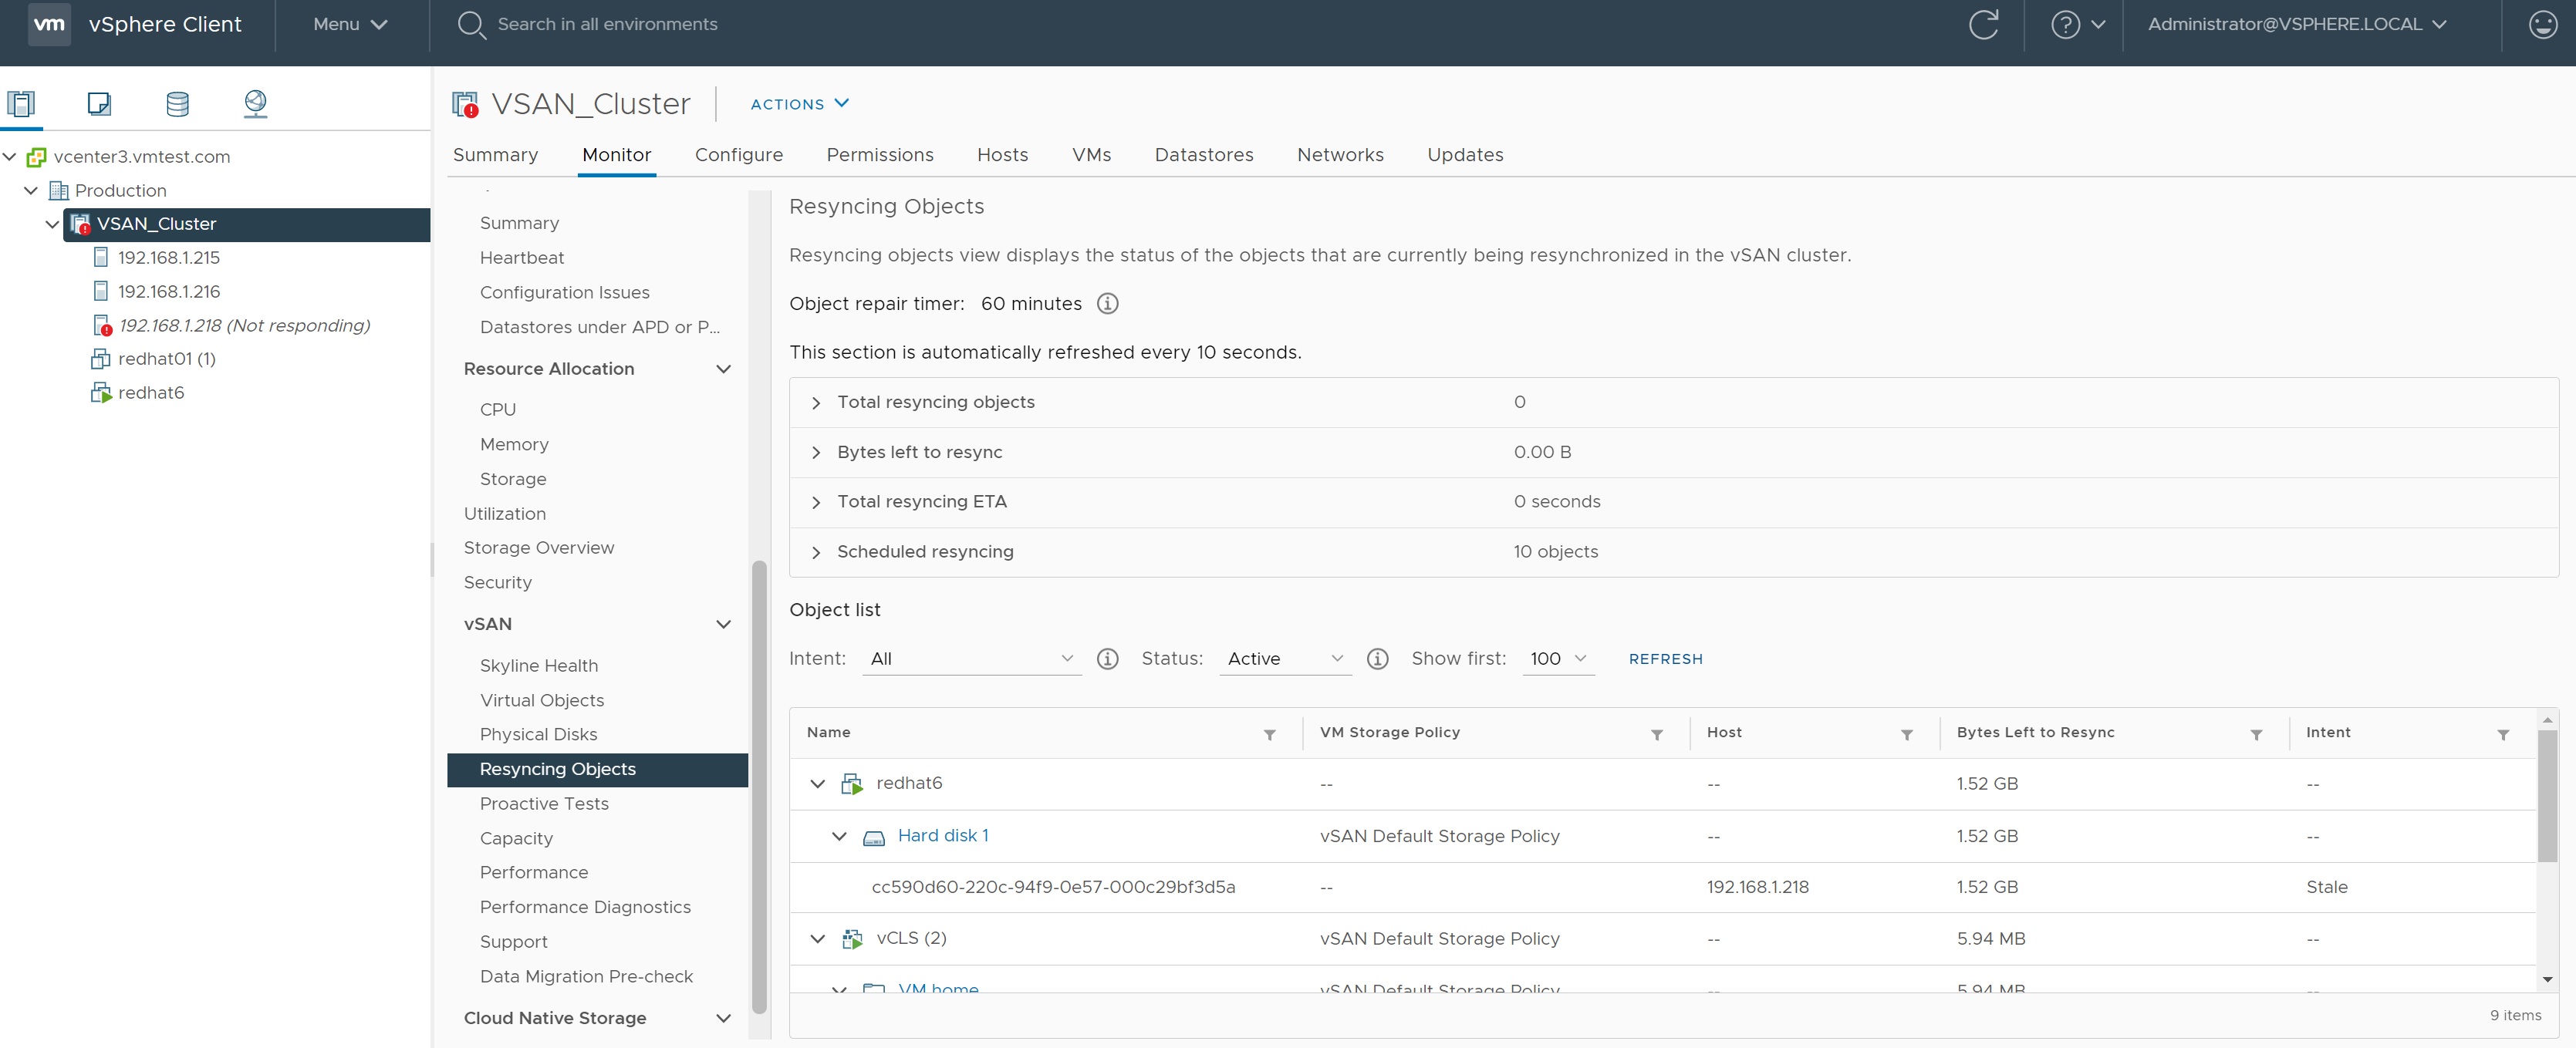
First I want to make a note of the Resyncing Objects screen as you can see nothing is resyncing at the moment, the more time a ESXi server is down the more it will need to resync when it returns to the cluster.
Now we power on the esxi7 server again via the physical ESXi server

As you can see the ESXi server has returned to the cluster and will take a bit of time to be fully back to normal
Many cluster vSAN tasks are happening in the background

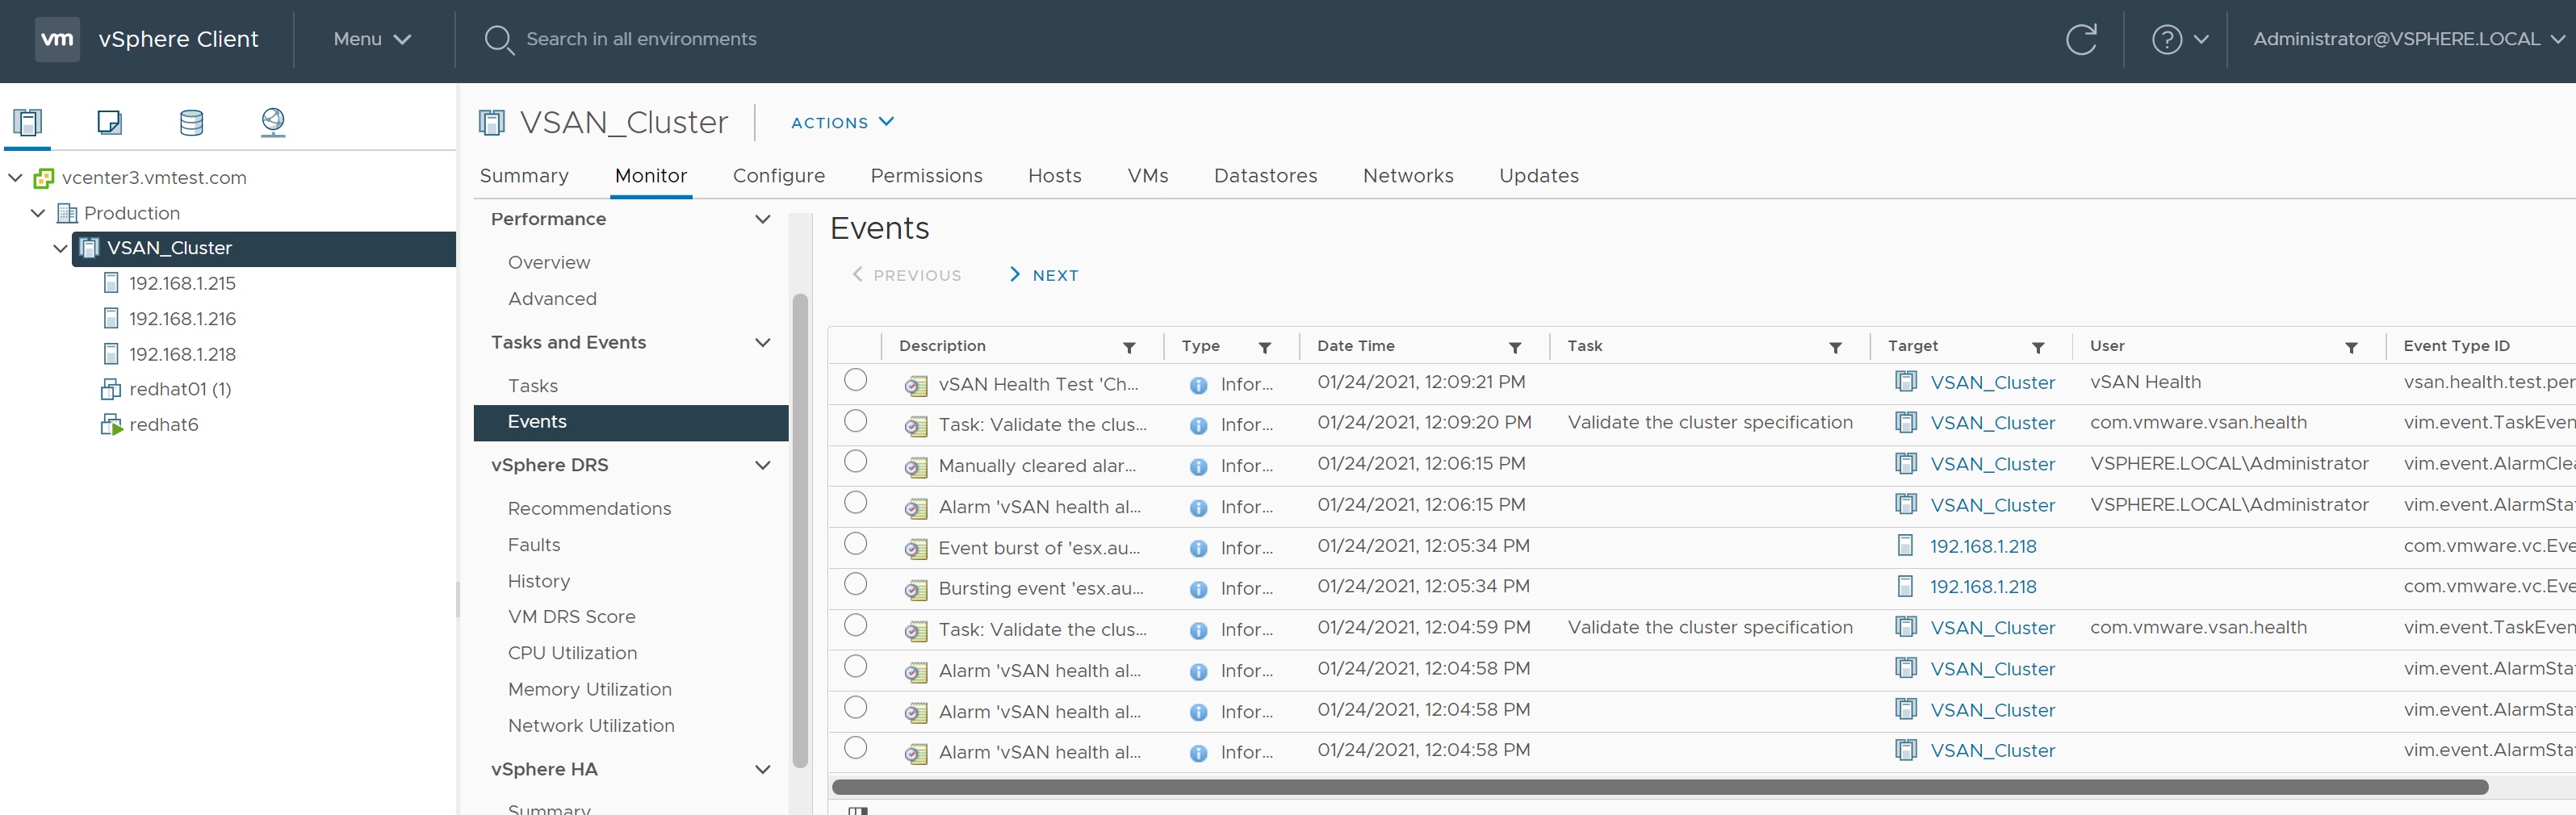
If you are not around you can see tasks that have happened (if the fault occurred overnight) in the cluuster -> monitor -> Events screen
If you are quick enough returning to the Resyncing Object screen you can see that the ESXi server that went down is now being Resync'ed with the remaining ESXi servers, this can take a bit of time depending on how many VM's you have and how long the ESXi server was down for. Eventually everything will return to normal.
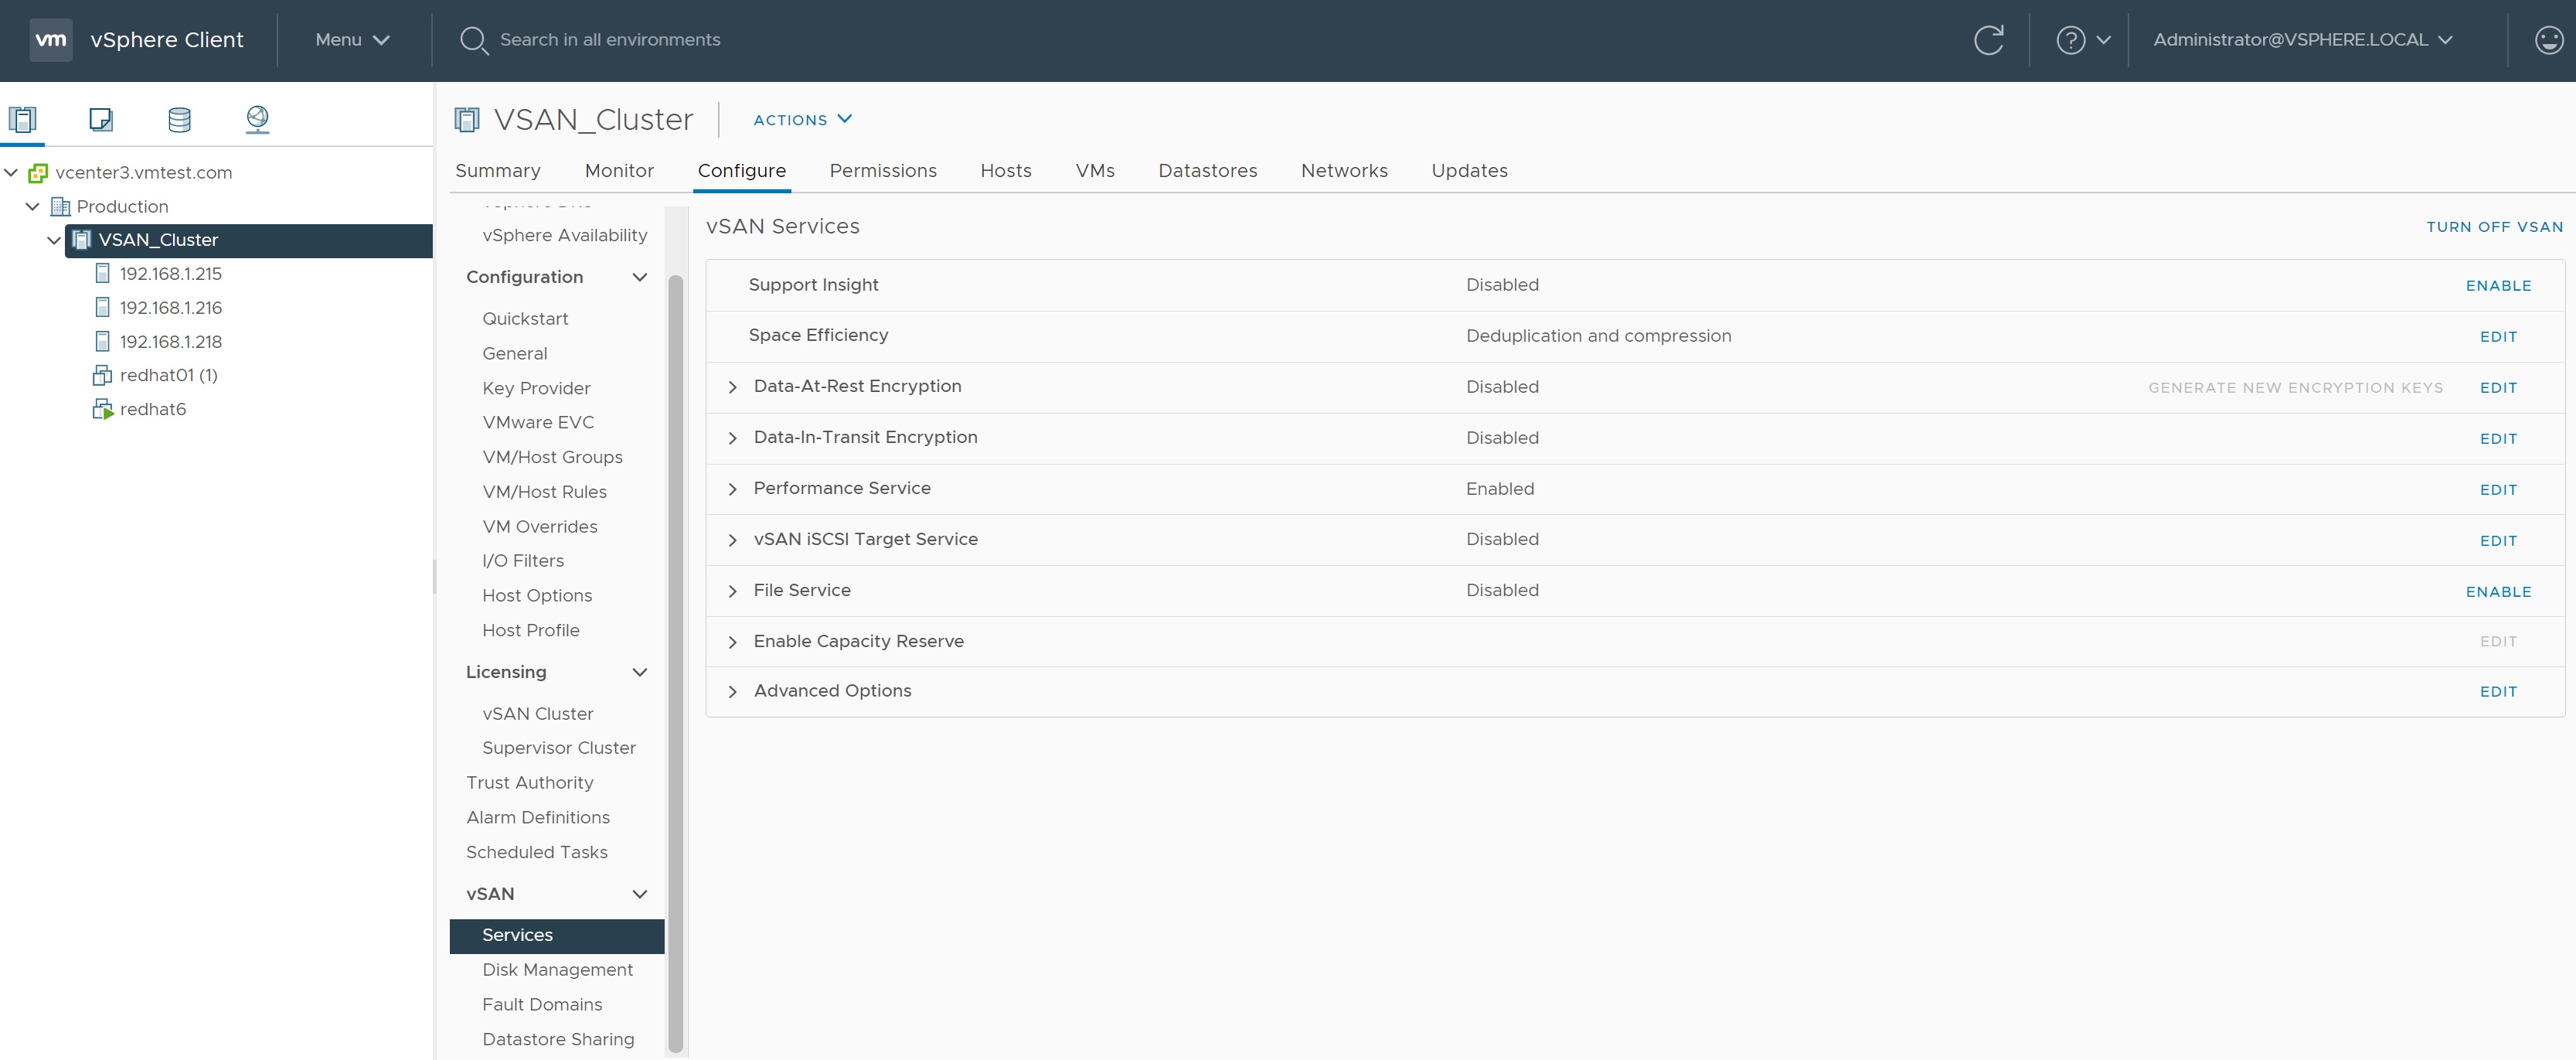
There are times that you might want to reconfigure the vSAN services, highlighting the vSAN cluster -> selecting configure -> vSAN, there are many options that you can configure which I will cover now, the first being the services, you have the options to enable or disable a service or even configure the services options
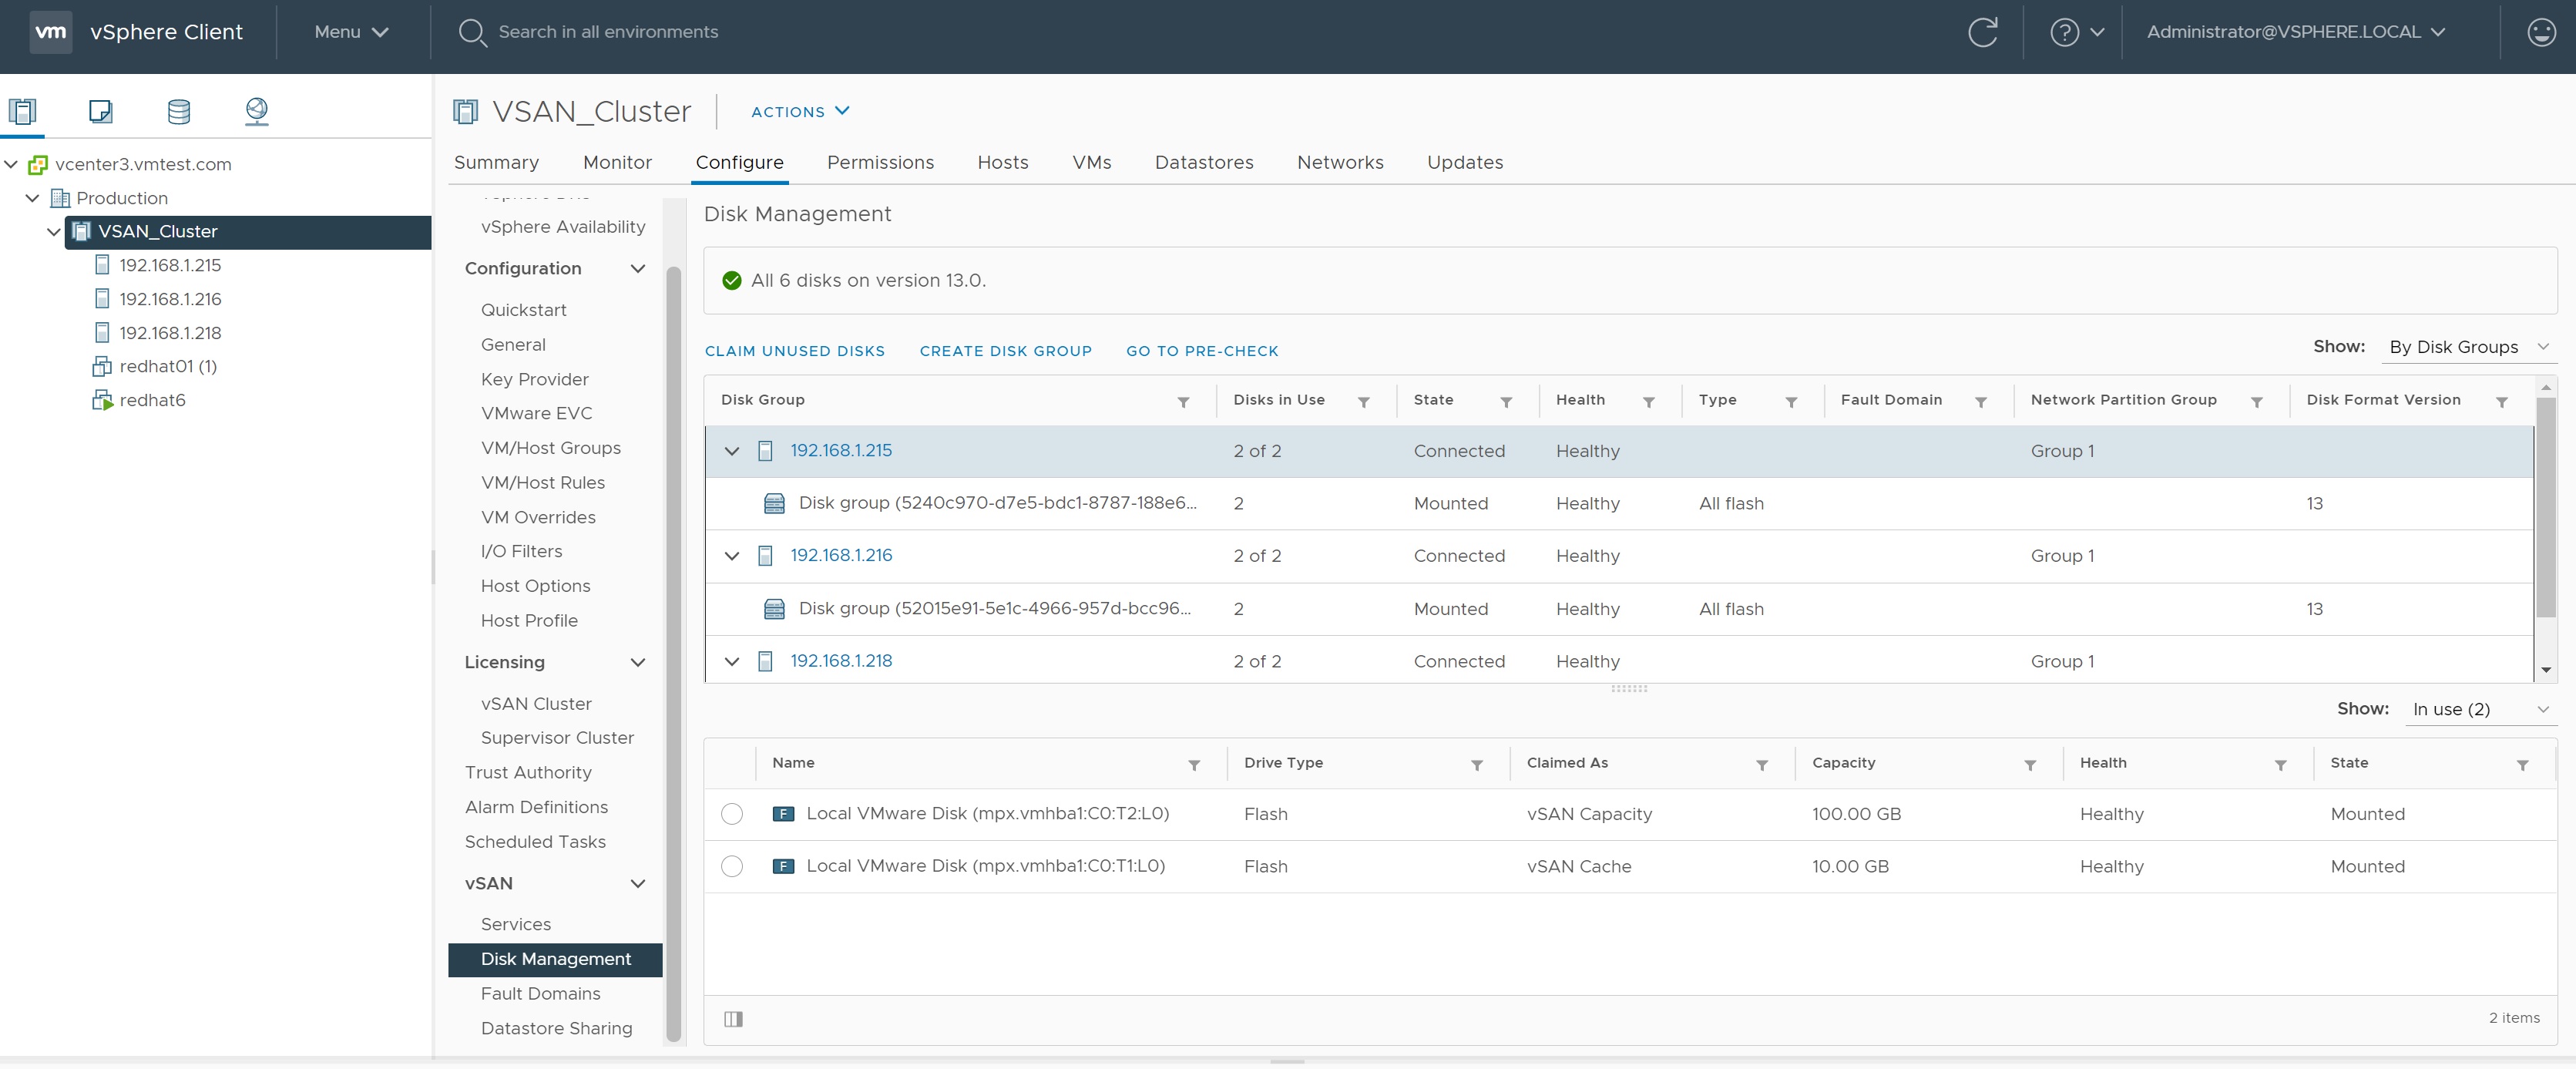
In the Disk Management screen you can change the cache and capacity claim disks, you can add disks to an existing disk group or even create a new disk group
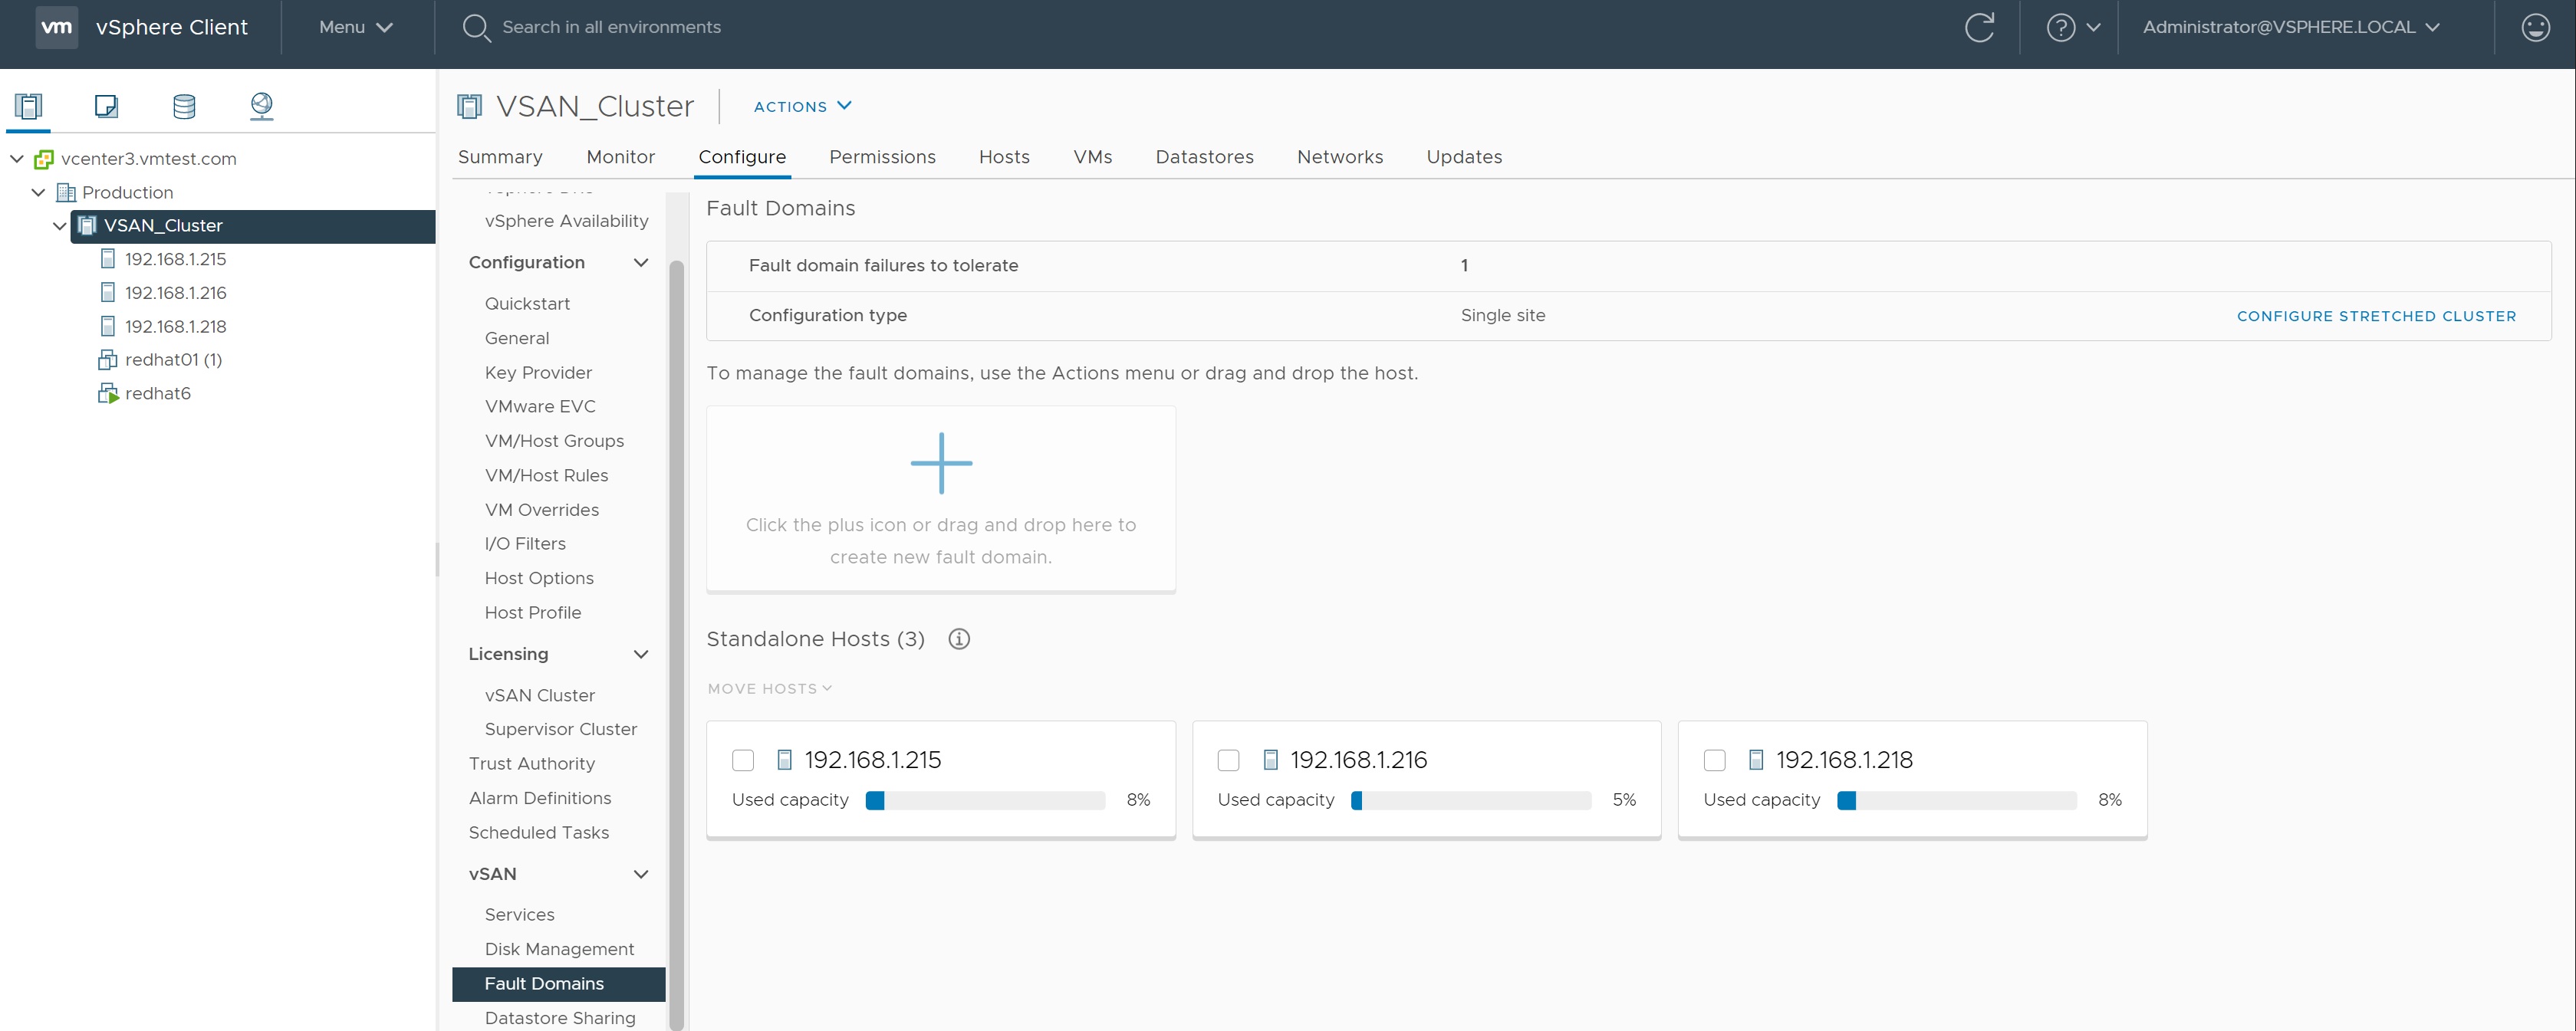
The fault domains screen details the hosts capacity and even to change the stretched cluster if one was setup. Here you can add fault domains to the existing configuration.
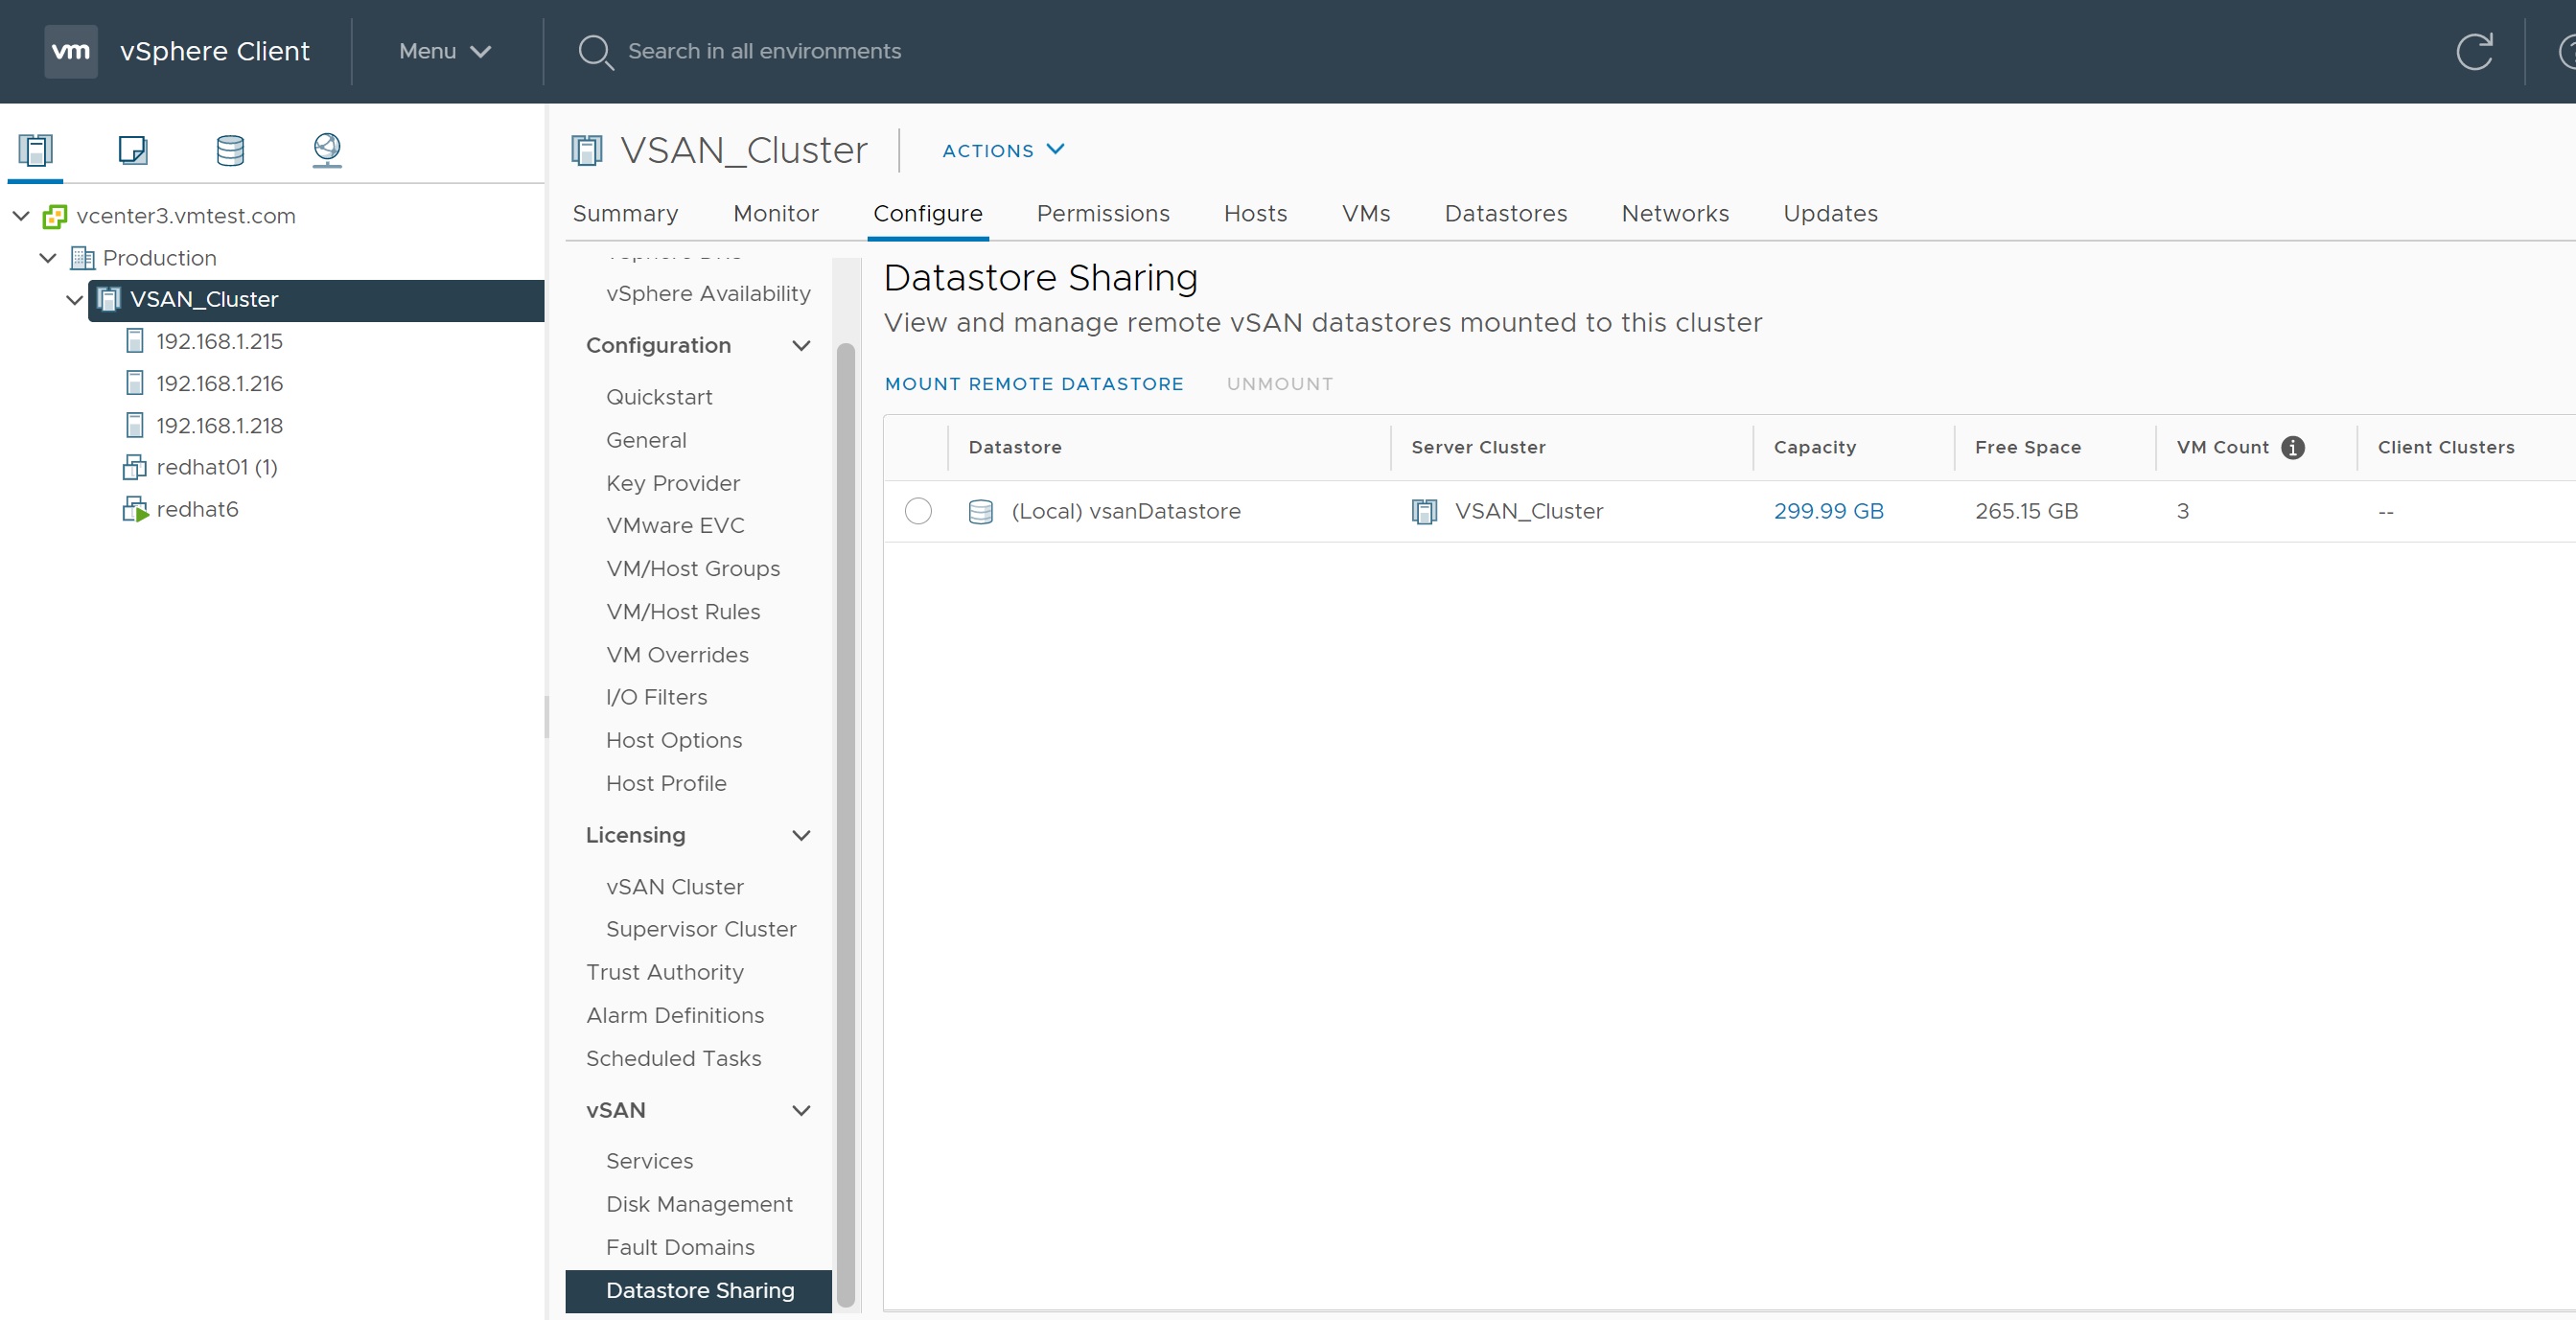
Lastly we look at the Datastore sharing, here we can view the existing datastores or even mount remote datastores.
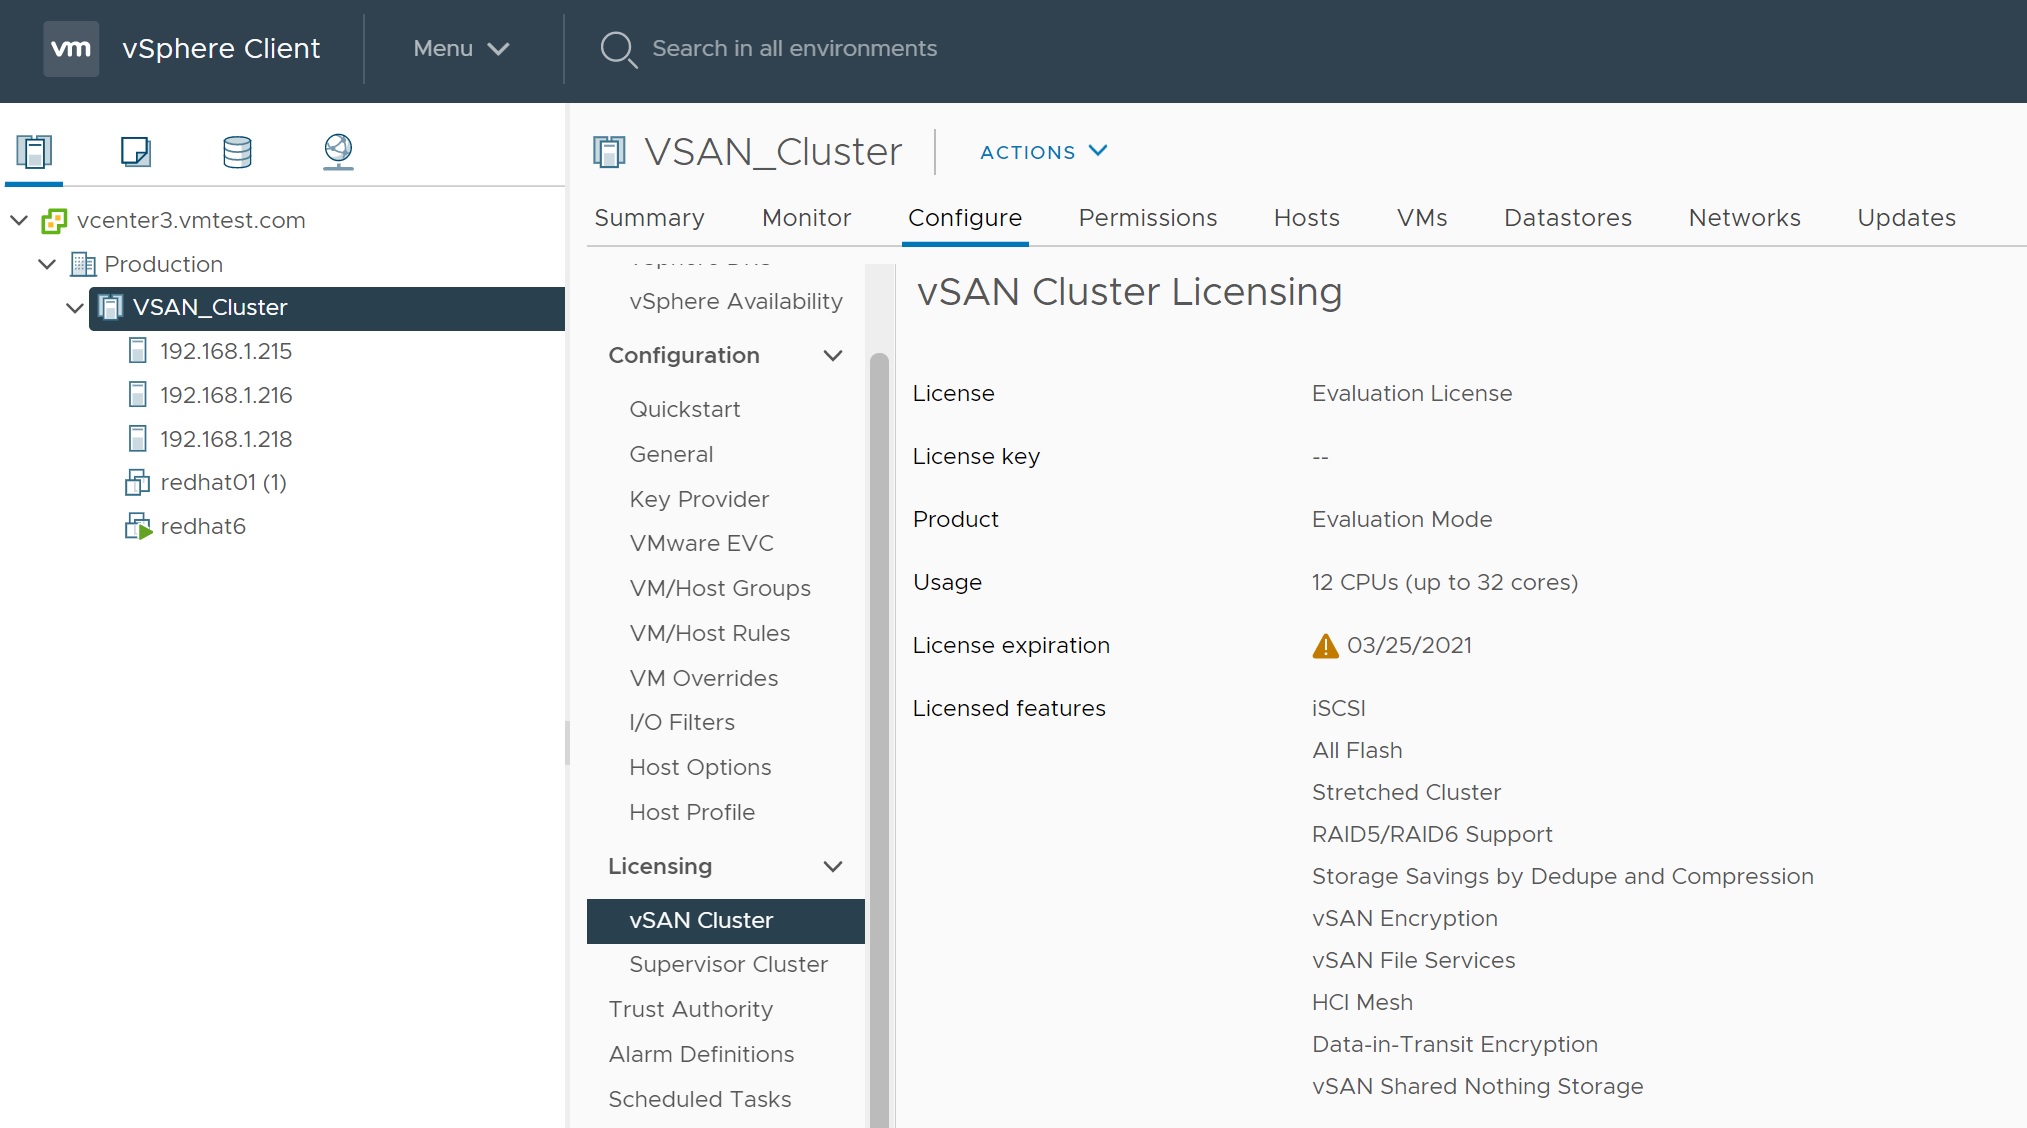
If you are not aware you need a license to use vSAN, the license allows you to manage different types of features and the number of vCPU's, for testing purposes you get 2 months and all features turned on.
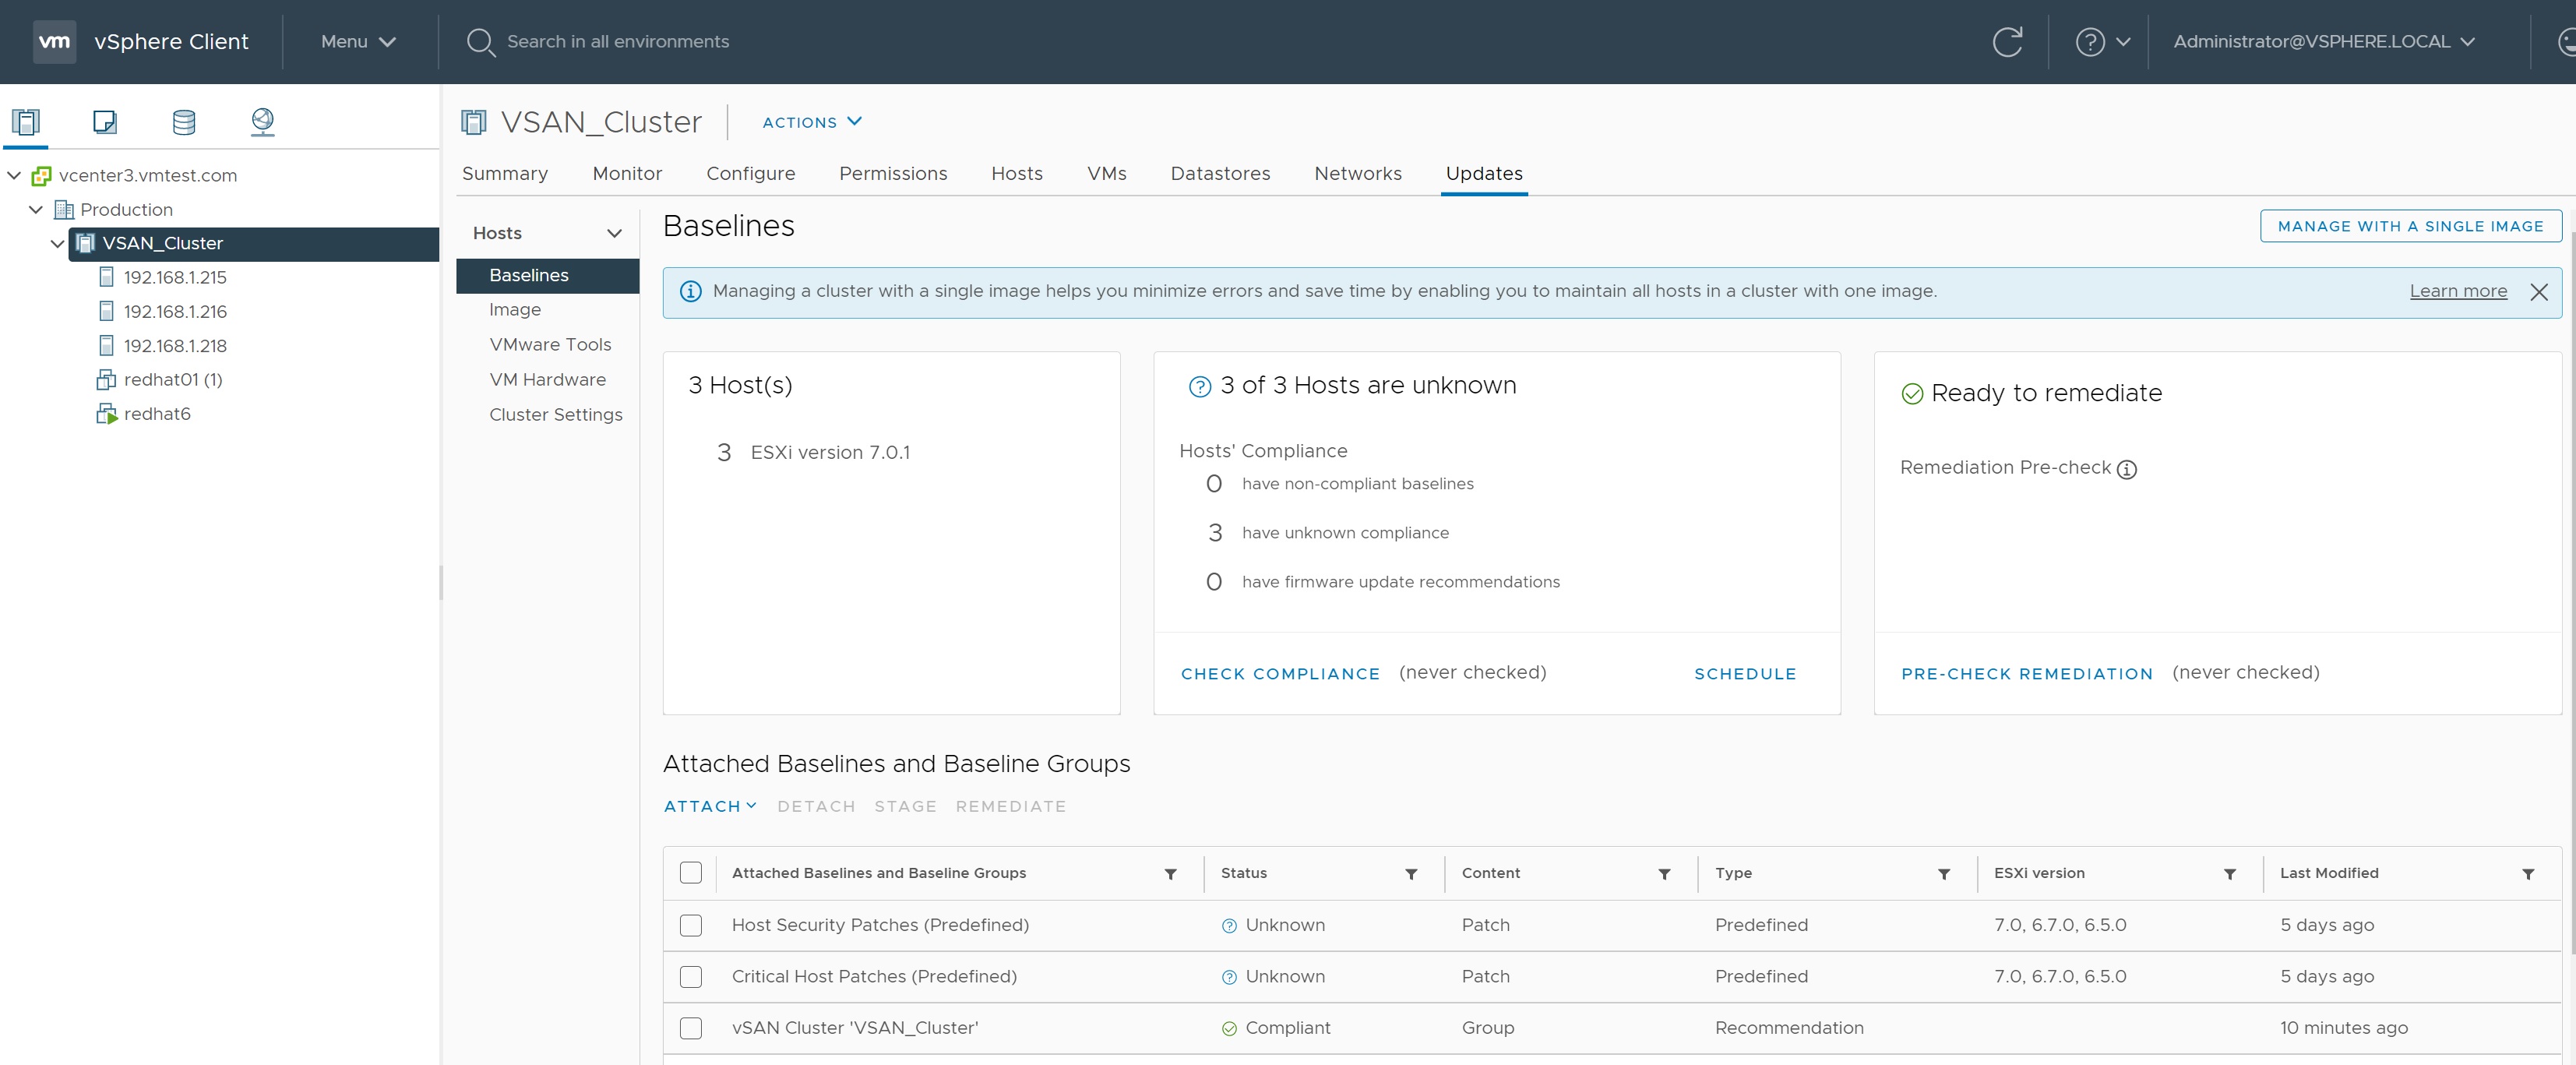
Lastly we come to updates which I have already mention in my vSphere LifeCycle Manager section, make sure that you patch your systems regularly, you can always use baseline images to keep a check on updates that come out.